
In part 1 of the Downright Sneaky Lectora® Tricks tutorial, you will learn how to create devMode, a special mode you can use that makes it easier on a developer when testing his or her course. In subsequent tutorials, you will learn how to give yourself superpowers in devMode and then hide the entrance.The secret passageway If you’re like me (and I know I sure am!), then you probably watched a fair amount of Scooby Doo as a kid. Most episodes featured a spooky building that was “haunted” by some sort of monster like a swamp ghost, rock-n-roll demon, or whatever. Upon investigating, the Scooby Doo gang would often find a secret passageway that the sinister villain exploited in order to sneak around stealthily and appear to have supernatural powers.

I was quite disappointed to discover that my own home didn’t have any secret passageways. But now I can build my OWN secret passageways and so can YOU using Lectora! We will use our secret passageway to access devMode.What is devMode?DevMode (which is shorthand for Developer Mode) enables you (the developer) to bestow the ability to bypass obstacles so that you can zip through your online courses quickly and SNEAKILY —like a ghost! This is especially useful when you are testing your course.Here are a few examples of special abilities you can give yourself in devMode.
You can do whatever you want in devMode to make it easy to test your course... just make sure you keep those “meddling kids” from finding your secret passageway.Defining the devMode variable Do variables give you the CREEPS? Variables might seem scary at first. (“Zoinks! It’s the DISC DEMON!”) But once you master them, you realize they’re nothing to be afraid of (“Why, it’s just Ace Decade, the studio owner's nephew.”) Don’t let them intimidate you.

One way to apply a variable is to use it like a light switch: you can turn a setting OFF or ON. In our case, we want to be able to turn devMode OFF and ON, so we’ll make it a variable.When you create a variable, you have to decide what values will represent OFF and ON. I like to use 0 and 1 to represent OFF and ON states.
If devMode = 0, then devMode is OFF
If devMode = 1, then devMode is ON
You can define variables in lots of ways: for example, you could use the words OFF and ON to represent those states. Using 0 and 1 is just a convention I follow.How to create the devMode variable
1. On the Tools ribbon, click Variables to display the Variable Manager dialog box.
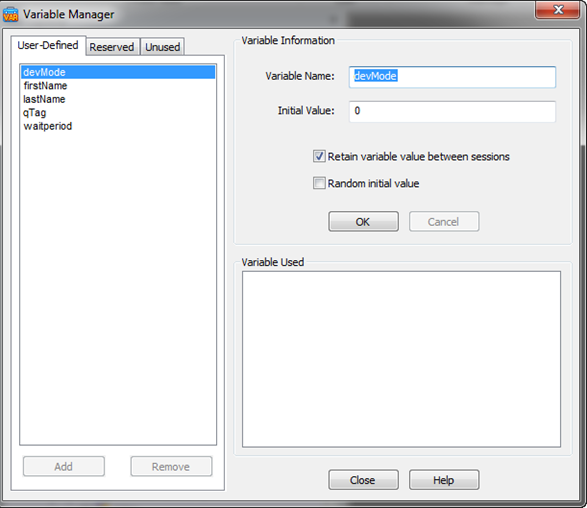
2. Add a new variable and name it devMode and enter the following settings:
In the Initial Value field, enter 0.
That means devMode is turned OFF (0) by default.
Ensure that Random Initial Value is not selected.
If we set this value to random, occasionally it might be 1. We don’t want that.
Select the Retain variable between sessions checkbox.
This option means if I turn devMode ON (1) and exit the course, when I reopen the course, devMode will still be ON because it “remembers” how I left it. It is optional to select this (but I like to).
3. Click OK and click Close to close the Variable Manager window.
OK, you’ve defined devMode as a variable. Good work!Next, we’ve got to think about how we are going to turn it on. Come back to the blog this Thursday for the next tutorial, where we’ll create a button that will turn devMode ON and OFF.Download the Lectora and Lectora Online files for this course in the Trivantis® Community.John Mortenson is the Online Learning Manager for The Fresh Market. He has been developing online courses for over 10 years and is a member of the Lectora Advisory Board. He is also an Adobe Creative Suite Guru and cartoonist. You can contact him onLinkedIn andTwitter.
.svg)
