


Some encouragement on using variables and conditional actions for newer users.
This is my attempt at encouraging you, if you are somewhat new to the whole designing with Captivate thing, to study and practice the use of variables and conditional actions. In my opinion, this is one of the hoops you’ll need to jump through to pass from a beginner to an intermediate to an advanced Captivate user.
Variables and conditional actions are an extremely powerful combination if you understand how they work and recognize that behaviors in your project can be made reliant on the values that one or more variables hold.
Understanding variables and conditional actions can truly unlock a new level for you and your projects. I honestly think the best thing for you is to dive in and play around with some ideas in a non-high-stakes sort of way.
Variables
Variables, by definition, are things that can change. So maybe think of variables as a basket that holds some value for you. Maybe it is the number ‘437’ or maybe it is the word ‘false’ or maybe it is the name ‘Peter’. As the learner interacts with your course, decisions they make will change the contents of your baskets. All you have to do is have a basket ready and make sure that Captivate knows when to place the different values into the baskets. To create a variable, select Project from the menu bar and then choose Variables…

Once you open the variable window, select Add New on the right.
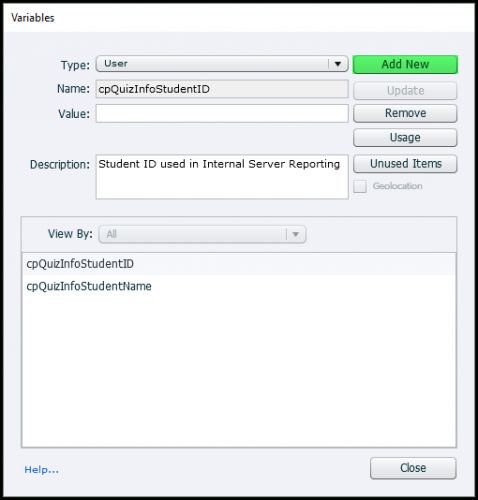
Then you will do one or more of the following…
- Give the variable a name
- Assign the variable default value
- Provide a description of what the variable is for
- Save
Really – only steps one and four are required.
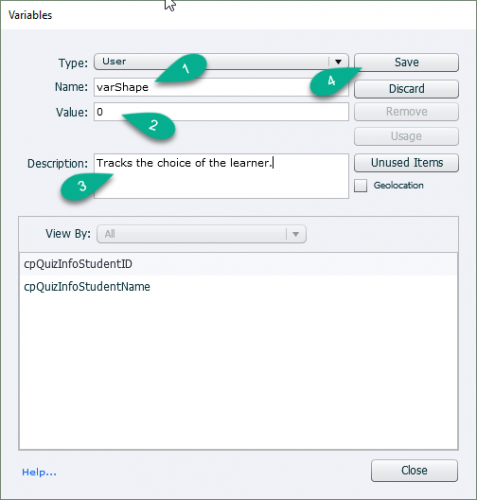
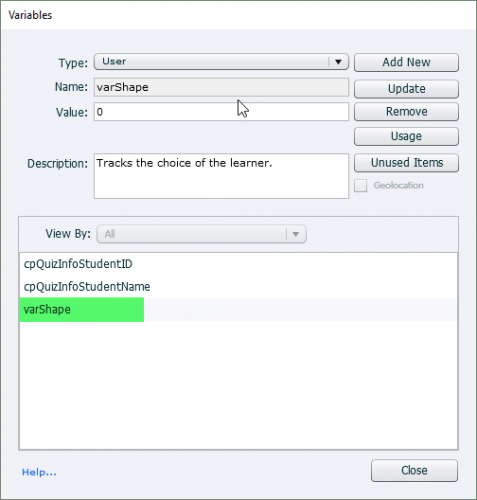
Once you have saved your variable – you should see it in the list below.
Now that you have a variable, you can find ways to put a value into it.
Conditional Actions
This is where we tell Captivate what to do with the values in our baskets. In other words, IF a certain condition exists, (or does not exist), THEN perform the following…
To get at the heart of conditional actions, you have to pretty much be thinking in terms of “If this, then that” – cause and effect style. We do this in our everyday lives without giving it much thought but sometimes it can be a challenge to use this sort of thinking when it comes to choice dependencies or branching scenarios in Captivate. You have to be thinking ahead – if the learner does this, then this will happen. Actions have consequences.
Here are some everyday examples…
“If I flip the switch, then the light comes on.”
“The problem is 5×7. If I put the answer to the problem as 23, then I am wrong.”
“If I am right, then the teacher will give me a sticker.”
“If I am wrong, then the teacher will give me more homework.”
“If I pull out the pan in the oven, then I will burn my hand.”
“If I put on the protective mitt before I pull out the pan, then I will not burn my hand.”
We are pretty much doing the same thing when we design our conditional actions. We create variables to keep track of all the “If choices” that the learner makes. Then we create the resulting consequences based on that choice.
“If the learner selects ‘A’ – add 5 points.”
“If the learner selects ‘B’ – add 10 points.”
Sometimes a result is the consequence of many variables that come together just right. In these cases, the “If this, then that” statement becomes much more complicated. Consider this example…
IF all of your homework is done AND IF the trash has been taken out AND IF it is not past 7 o’clock AND IF you eat all of your supper THEN we can go to the ice cream shop.
IF the learner selected difficulty level 1 AND IF the learner selects ‘A’ – add 5 points.
IF the learner selected difficulty level 5 AND IF the learner selects ‘A’ – add 1 point.
Perhaps the biggest challenge is role playing out all the possibilities. Maybe that is the easy part for you. In your case, maybe it is the setup in Captivate.
Mastery of variables and conditional actions can help you to achieve what you are looking for. To begin working on your actions, go to the Menu bar and select Project – followed by Advanced Actions…

Going through the actual setup is in-depth enough to warrant a post on its own.
Variable Checking
This is what can be the challenging part from a setup standpoint. When we want Captivate to make decisions between things based on our variables – I refer to this as a variable check. The more complicated the decision-making, the more important our sequence of operations becomes. You may have to have Captivate check multiple variables and the order in which they are checked becomes crucial to the success of the outcome you are looking for. If you are new to this, my advice is to start small and work your way up as you get more comfortable and feel more adventurous.
Working Sample
In my simple example, the participant will get to see a different shape on the right based on the selection that they make on the left. The result is determined all through the click of a single button to check the variable. The code on the button simply says “Hey! Take a look at the value of that variable over there and put up the shape that matches the value. If it is ‘1’, show an arrow. If it is ‘2’, show a circle. If it is ‘3’, show a triangle. If it is ‘4’, show a square. If it is ‘5’, show a pentagon. Thanks.”
It is sometimes very helpful to keep an eye on what your variables are doing. You will notice I have a box that displays the current value of the variable. You should see it change as you select one of the numbers on the left. I expanded the box so you could see the full text – $$varShape$$ – that is the format used to display a variable. This is great for troubleshooting and determining if variables are being assigned the way that you expect them to. It can also help to label them by variable and perhaps advanced action that they are used in so you know right where to go to look for errors. I will typically delete or simply hide them when I am finished with the project.

https://s3.us-east-2.amazonaws.com/captivateshare/variables/index.html
**I noticed after uploading the published files that I had copied the 5 button to use as my troubleshooting window and neglected to uncheck the ‘use as button’… so when you hover it will show the text and if you click it will change to 5 – I did not bother to re-upload all my files because I didn’t want to go over my upload limit. LOL but it still works for what I wanted you to see.**
Hopefully this was some useful thinking for you. I am happy to entertain any questions that you have about this.
Very good practical examples and uses of variables.
Nice work Greg. There is so much you can do when thinking this way. Thank you for sharing Greg.
Really enjoying these blog posts! Practical examples and thorough explanations; thanks Greg.
You must be logged in to post a comment.


