


Here’s something I see far too often. People that make videos for training, teaching, and communicating believe adding effects to their videos is beyond their skill set. Or, they think they’re unnecessary, frivolous decorations.
That’s not so. I’ve created hundreds of tutorial videos, and I can confidently say that I used video effects in nearly all of them. Simply put, they’re a critical part of creating great videos that deliver a clear, resounding message.
In this post, I’ll show you how to add effects to your videos in three easy steps. Then, I’ll share a few ways you can start using effects in your videos right now.
Easily add effects to your video with Camtasia!
Download a free trial of Camtasia for an easy way to add effects your videos.
Get started free!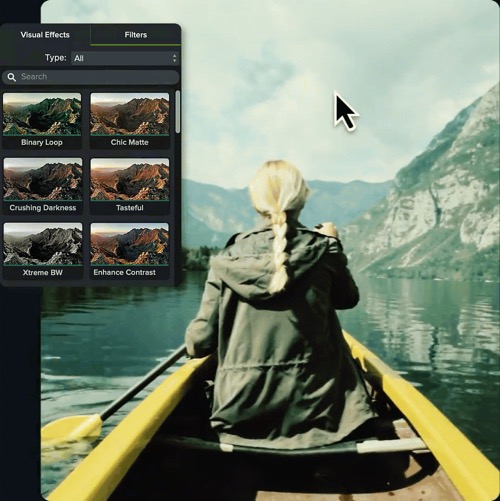
How to add effects to videos in three steps
Depending on the video editing software you use, adding effects to videos can be anywhere from very simple to wildly complex. Luckily, if you’re working with TechSmith Camtasia, it’s especially easy.
Here are three easy-to-follow steps to add effects to your videos.
Step 1: Find your effect
All of Camtasia’s effects are accessible in tabs along the left side of the editor. They’re broken up by categories to make it easy to find the one you want.
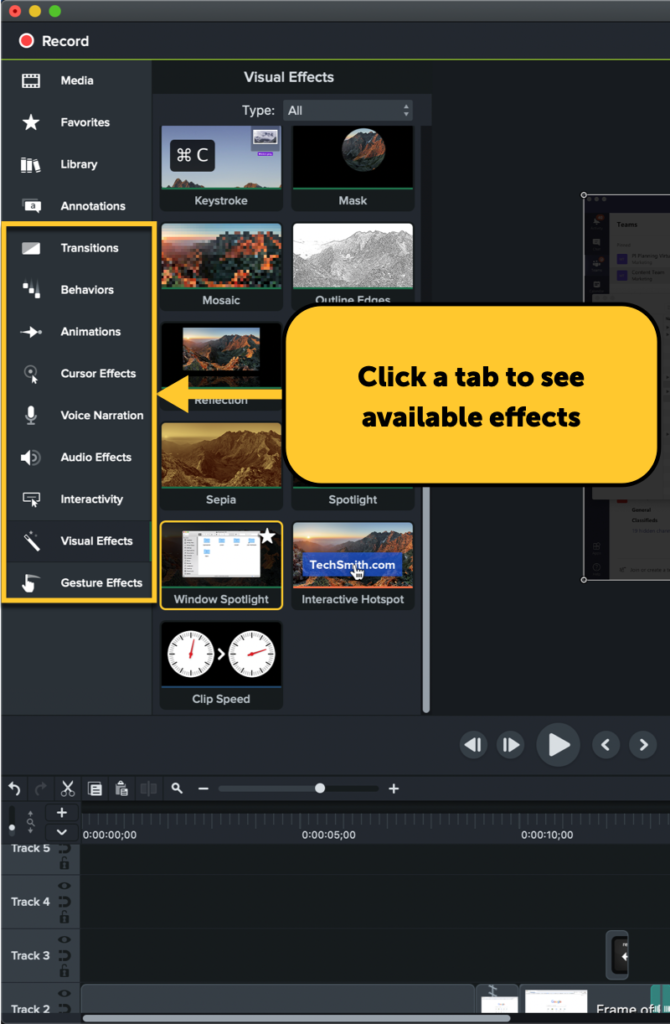
Click one of the tabs and then scroll through the options in the panel. Some effects, like Transitions and Behaviors, will display a simple preview when you hover your mouse over them and move it from left to right.
Step 2: Add the effect to an object on the timeline
To add an effect, simply click and drag it to the media, annotation, or content group on your timeline. Camtasia highlights the objects that the selected effect can be applied to in blue.
Step 3: Customize how the effect looks or behaves
After you add an effect, you can customize it using the settings in the properties panel.
With the clip selected, adjust the settings to achieve the look you want. For example, I’m using a spotlight effect in the clip below. By adjusting the properties and position, I can achieve a nice visual focus on the URL bar, which is exactly what I want my audience to notice.
Depending on the effect you’re using, there will be different adjustments you can make. The options you have depend on the type of effect and range from color changes to timing and positioning of the effect on your clip.
After adding an effect and editing it, you may want to make additional changes later on. No problem, simply select the clip that contains the effect and start editing the properties. In some cases, you can make an effect only appear on part of a clip.
All of this can be done from the effects drawer. Click the small arrow on media containing effects to open the effects drawer and see all that have been added. Then, to change the duration and when an effect appears, click and drag the handles at the edges to shorten it, or click and drag the entire effect to move it around on the clip.
You can get really creative when customizing your effects. You’re also not limited to one effect on media or annotations. Feel free to get super creative with the properties and combining effects, or keep it simple and stick with the defaults.
Effects you should start using right now
Now that you know how to add effects to your videos, you’re probably wondering when you should use them. Here are three types of effects you can start using right now.
Transitions
Transitions are probably the most important effect to know how to use. They let you seamlessly move from one video clip or image to another, but that’s not all. They’re also great for bringing annotations and other graphics on or off the screen.
Camtasia has tons of transition effects. There are, of course, the classics like fades and gradient wipes. But when you’re ready for more, you can try out whip spins, ripples, dissolves, and numerous other options.
They’re all found in the Transitions tab and applied just like I demonstrated above. The one unique aspect of transitions is that they’re only applied to the beginning or end of a clip.
Camtasia helps you see where the transition will be added. Then, once it’s on the clip, you can edit the duration by clicking and dragging.
Here’s an example of adding a transition and editing it.
Create stunning text animations with Behaviors
Cool text animations are one of the best ways to wow your audience. In some cases creating animated text can be tough, but Camtasia’s Behaviors make it easy to do.
Behaviors are easy to apply packages of animations that can be used with any media on your timeline. That said, they’re most often and impressively used with text. Add behavior effects to make text fly, slide, jump, bounce and appear in different ways.
You can get incredibly creative with behaviors using the customization settings in the properties panel and even layering behaviors on top of one another. If you want to learn more, we have a great tutorial on Camtasia Behaviors.
Use Cursor Effects to direct your audience’s attention
In videos that use screen recordings, like tutorials and other software demonstrations, the cursor is the star of the show. It literally drives the action with every movement and click.
Camtasia’s Cursor Effects make it easy for your viewers to follow the cursor and know exactly what’s happening on screen. Use them to make clicks easier to see, change the size of the cursor, and even smooth out its movements.
The Cursor Effects tab has three panels to choose from. The first, shown below, contains effects that change how the cursor looks or moves.

The second two panels contain effects that add visual or audio indications for left and right mouse clicks.
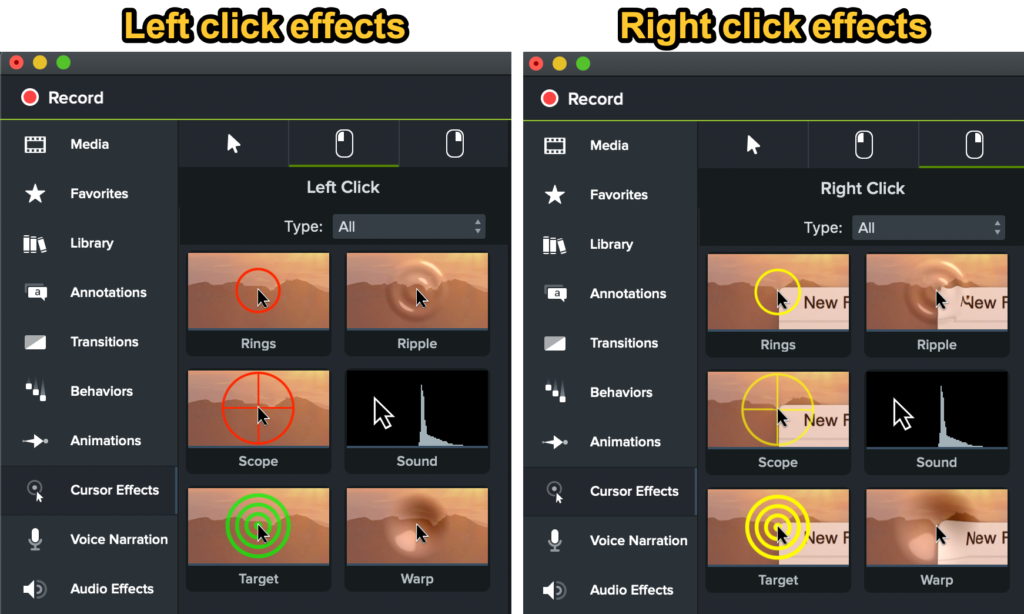
Apply these effects to screen recordings to make it dead simple for your viewers to follow along. Cursor effects can be especially useful if you’re demonstrating software or processes that make it hard to see when and where you are clicking.
That’s definitely not all, folks!
Camtasia has too many effects to cover in a single blog post, but that doesn’t mean every single one isn’t useful at the right time. For example, the Remove a Color effect is great if you’re looking to work with a green screen.
There are also Audio Effects that can be incredibly useful if you add music, include sound effects, or need to edit your narration.
No matter the kind of videos you’re creating, I am sure there is a place for adding video effects. If you haven’t yet, start experimenting with effects in your videos by downloading a free trial of Camtasia.
Camtasia helps you add effects fast!
Download a free trial of Camtasia for an easy way to add effects your videos.
Get started free!
