
Nothing turns off viewers faster than a video with bad voice over audio.
In fact, our research shows that viewers are far more likely to stop watching your video because of poor audio quality vs. poor video quality.
And, while you can record voice over audio with your device’s built-in microphone, it doesn’t mean you should. You’ll get far better results using a separate, higher-quality microphone.
That means you need to know how to import and sync audio files and video clips in your video editing process.
Sync your audio and video
Download a free trial of Camtasia to quickly and easily sync audio and video sources
Try it TodayWhy is audio so important in videos?
It may seem counterintuitive to think that audio can be more important in your video than the actual video footage, but it’s not. In today’s world of shaky TikTok videos, Instagram Stories, and YouTube videos, viewers have become far more forgiving of lower quality video.
But (especially in the case of informational or instructional videos), if your narration or voice over is hard to understand, people will have a hard time following along. And, if they can’t follow along, they can’t learn.
But here’s the good news.
With the right tools, recording great audio and syncing it with your video footage is incredibly easy.
A little bit of knowledge and a simple-to-use video editor like TechSmith Camtasia will go a long way.
What equipment will I need to record audio?
Depending on what type of video you need, there are a number of ways to record your audio voice over. First, you need to determine how you’re recording your video.
What do I need to capture audio for screen recordings or if I just want to record my webcam?
While you certainly can use an external audio recorder for recording voice overs, most of us just need a good microphone and a computer with the right software.
There are a lot of options for both microphones and recording software, and you may want to experiment a bit to see which is best for you.
You can record voice over audio directly into Camtasia and do basic editing from there. Other editors are also available, though they may have a higher learning curve, as well.
My new favorite way to record and edit voice over audio, though, is TechSmith Audiate.
Audiate allows you to record (or import) your voice over audio. It then transcribes it in real time, so you can literally edit your audio just like editing text.
Rather than trying to work with the wave form, you can actually see what’s been said. Audiate can even automatically remove hesitations, your “ums” and “uhs,” and more.
It’s a game changer.
What about audio equipment for a live camera video shoot?
For a professional-style video or if you plan on turning your video into a podcast, you’ll want a good microphone and an external audio recorder to capture the sound.
Your microphone will connect to the audio recorder and, when you’ve finished recording your audio, you’ll need to transfer the audio to your computer for syncing with your video source.
More expensive audio recorders use XLR cables while more affordable brands will use ⅛” jacks (the same as a standard headphone jack), so make sure you have the right cords for your device.
That said, unless you’re a professional videographer, most of us probably don’t have a need for a separate audio recorder.
How to sync audio and video sources
So, let’s say you recorded your audio first with an external microphone, and you want to line up your video or screen recording to match
Or you started recording, but while you were editing, the audio and video became unsynced and you want to line them back up.
There is an easy way to get your video and audio back in sync.
Let’s get started!
Step 1: Record and edit your audio
Whichever method you use to record your audio, do it now. We have a great post on how to record great audio in any environment.
You can then edit your audio in the editor of your choice. Remove any mistakes, hesitations, etc.
Step 2: Import Audio
Now that you have your edited audio recording, you’ll need to import your audio file, and your video file into your video editing software and start syncing clips.
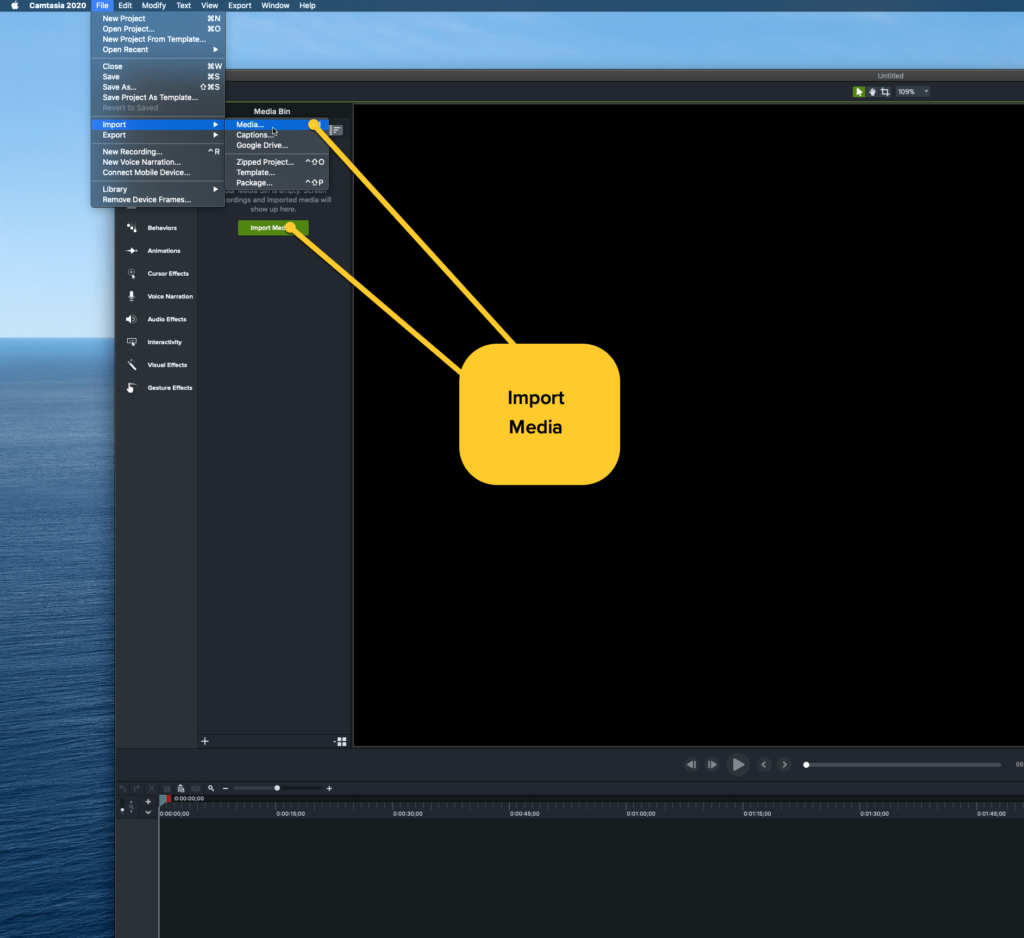
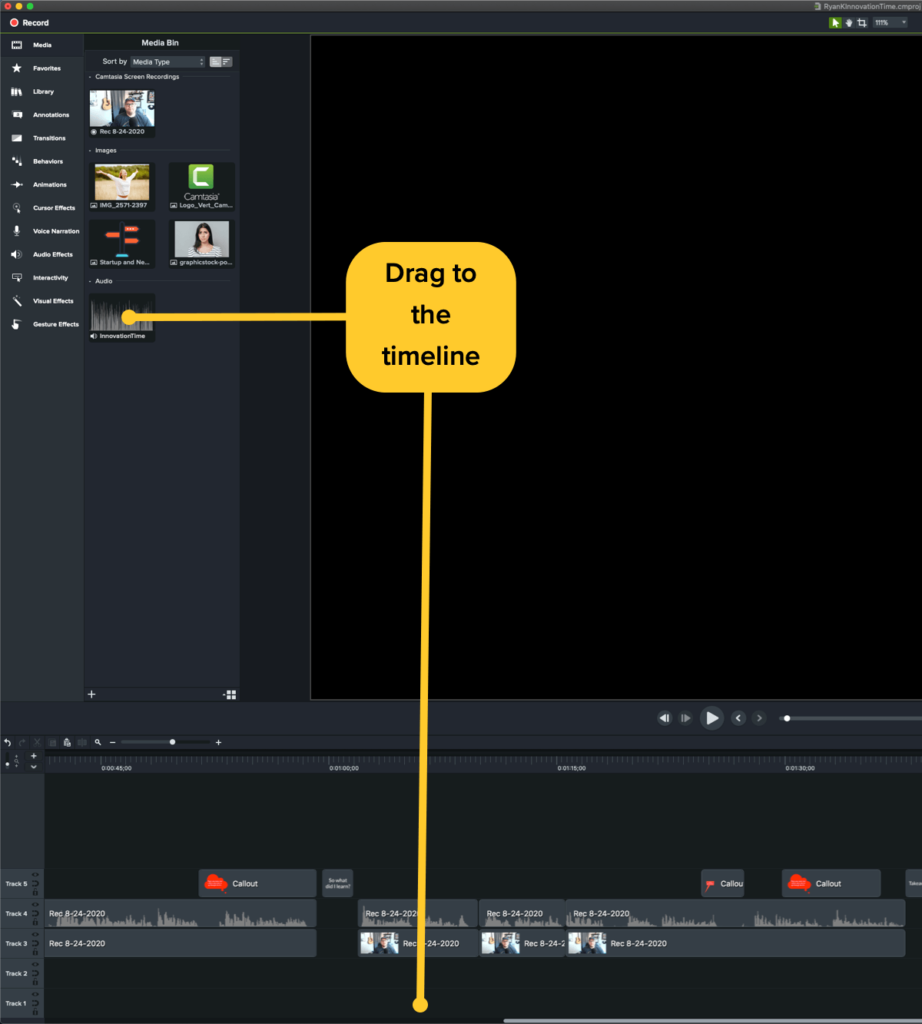
In Camtatsia, you can import your audio and video tracks independently. Then, simply drag each clip onto your timeline.
Step 3: Sync audio with video
The most difficult part of syncing audio with video is actually lining up your audio and video tracks in the timeline. We will show you how to do this in Camtasia, which has a zoom function to help you line up your audio and video tracks.
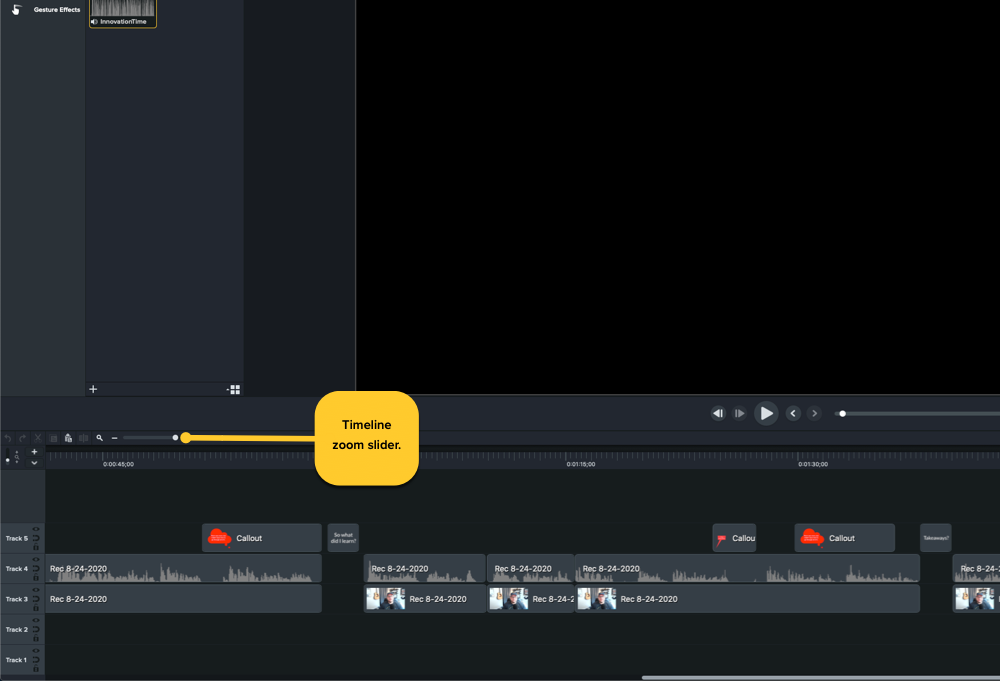
You’ll want to make sure that you can scrub through the timeline at frame by frame basis. To do this, zoom all the way in!
Remember when we told you to clap at the beginning of your recording?
This is where that comes in handy (no pun intended)! This is an old trick that will create a spike in your audio file so that when you later import your audio file into your video editing software, you will be able to see where you started recording.
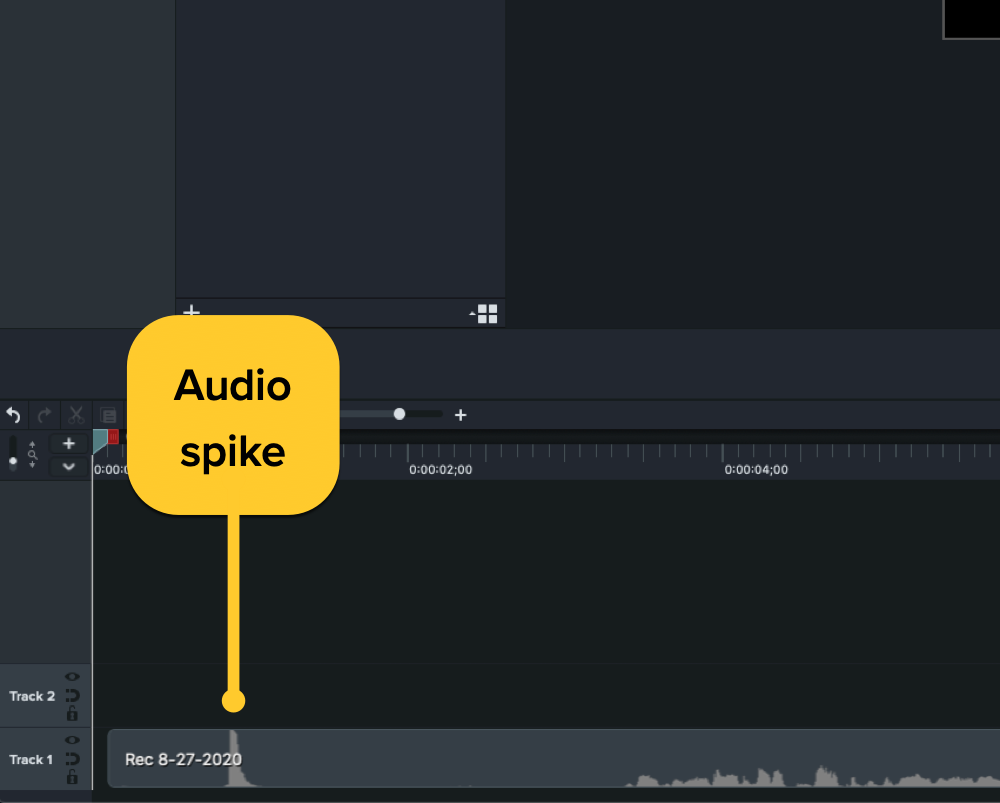
You may have even seen this method used in big Hollywood productions when they use a clapboard. The clapboard is used to give editors the visual marker, while the sound produced by the clap (the spike) provides the audio marker.
On your timeline, you will see an audio spike in the audio file, and in the video you should see your hands clapping. This will allow you to sync the video with the audio!
If you forgot to include a clap or cue, you can manually find the starting points, note down the times, and drag them into alignment with each other.
What’s next?
You did it! You recorded, imported, and synced your audio and video clips on the timeline. Sometimes it’s just a matter of trimming the ends and exporting, other times you have a lot more editing still to do.
Now you’re ready for what’s next, which could be transitions, adding captions, adding b-roll, merging clips – the editing options are endless for you to make your video as polished as you’d like!
Sync your video and audio
Download a free trial of Camtasia to quickly and easily sync audio and video sources
Try it TodayEditor’s Note: This post was originally published in September 2017 and was updated in August 2020 for accuracy and comprehensiveness.
Share