
Even before the COVID-19 pandemic forced most K12 and higher education institutions to switch to fully online learning, the virtual education space was growing and thriving.
But for some instructors, there are still questions about how to best record lectures and other instructions to ensure student access and success.
For example, is it better to pre-record lectures or will students better learn in a Zoom or other online meeting environment?
What tools are available for recording lectures? Will they be difficult to learn?
How can I be sure I’m providing the best solution for my students?
Don’t worry! Whether you’re new to the online learning space or a verified virtual veteran, this guide to recording lectures will answer those questions and a lot more.
Here’s what you’ll learn:
Why Zoom and other live meeting apps may not be the best way to engage and instruct.
Why on-demand learning can help students learn more effectively.
Three methods for recording class lectures (no matter how much time you have to do it).
Tips for ensuring your recorded lectures are engaging and effective.
To Zoom or not to Zoom
After schools and universities suddenly went to remote-only instruction, many instructors who had never taught online classes were forced to reimagine how to deliver quality education to their students.
Naturally, many tried to recreate the live classroom environment using online meeting tools, such as Zoom, Microsoft Teams, or other similar applications.
You might hear this type of learning referred to as “synchronous” learning. Really, that’s just a fancy word for live, real-time teaching.
In this scenario, students and teachers have to be in the same (virtual) space at the same time. Everyone sits on the same video call and listens as the instructor lectures. The instructor can share their screen and share additional files or links in the chat, but that’s typically the extent of the interaction.
This type of learning tries to mimic or recreate the face-to-face learning experience in online spaces.
But here’s the problem: trying to recreate the traditional learning experience online doesn’t always work. In fact, it can actually do more harm than good.
Live online courses limit important aspects of learning, forcing all students to learn at the same pace, without the flexibility to consume course content when and how they can. Students and faculty can experience mental fatigue from the pressure of trying to process highly compressed live video.
And, because everyone is expected to be available at the same time, students in different time zones, those who may not always have access to high-speed internet, or those who must share technology resources with others in their households are at an immediate disadvantage.
Luckily, there’s a better way.
How to record your lectures
When you record your lectures and upload them for your students to view, students can watch the videos in their own time, consuming as much of the content at a time as they can. And, they can go back and rewatch or review content as needed.
You might hear of this referred to as “asynchronous” learning, but that’s really just a fancy way to say “on-demand.”
Lecture recordings also allow students to better interact with course content through conversations with their peers, quizzes embedded directly in the course videos, and more. Instead of just listening, they can participate.
Meanwhile, instructors can measure student engagement with the content through quiz results and video analytics (such as who watched and for how long, etc.) Plus, by assigning points to watching videos, instructors can give more incentive to watch and pay attention.
And, because the course is more interactive, personable, and connected, students are better motivated. The flexibility to review content on their own schedule and at their own pace reduces stress and better accommodates different learning needs.
Plus, no matter the size of your audience, the content scales to meet your and your students’ needs. And, because learners consume the content when and how it’s right for them, there are no restrictions on time zones or geographic locations.
That doesn’t mean that live sessions aren’t appropriate at times, but leveraging the advantages of on-demand learning complements live interactions to extend the value of course content.
Three methods to record lectures
If you’ve never recorded and shared a lecture, or if you’re still new to online learning, it can be intimidating. You want to deliver quality instruction, and you want your students to succeed. But, how do you know you’re giving them what they need?
First, know that there’s no one right way to record your lecture. But, there are a number of best practices and tips we can share to make your (and your students’) experience great.
For the purposes of this article, recording and sharing your lectures will center around TechSmith Knowmia Pro.
Knowmia Pro allows educators to engage students no matter where they are by allowing them to:
- Easily create and share media.
- Discuss lessons and content.
- Make learning videos accessible.
- Humanize online learning.
Method 1: The quick and dirty
Many people think a recorded lecture has to be super-professional, polished, and rehearsed to be effective.
Honestly, that couldn’t be further from the truth. In fact, research shows that students actually engage better with lecture recordings that are less formal.
The quick and dirty method is as easy as it sounds. Open your slide deck if you have one, turn on your webcam, grab your mic, and record on the fly.
It helps to have a script (or at least an outline of what you want to say), but your slides can help guide you if necessary.
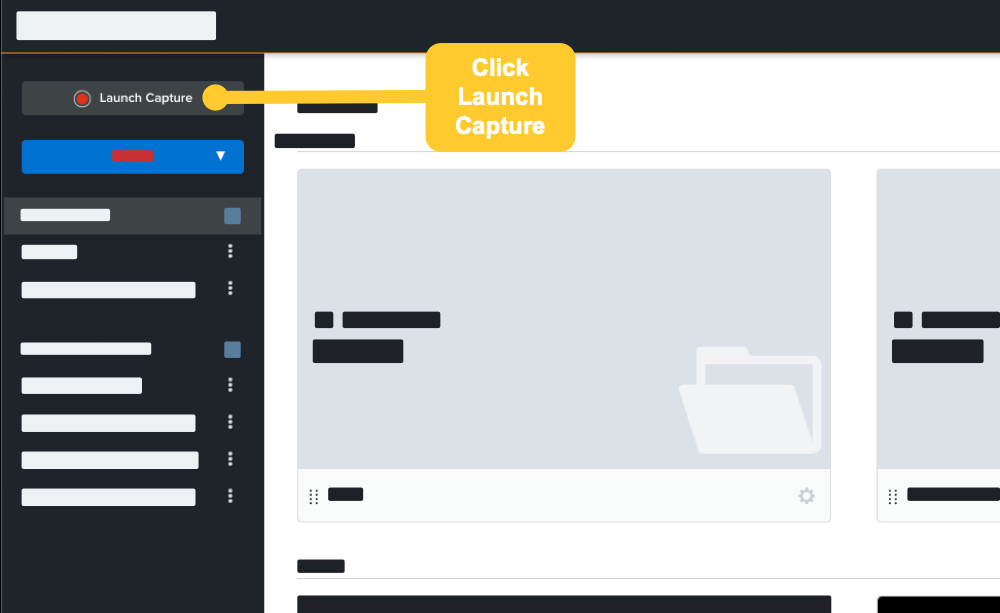
Just open Knowmia Pro and choose Launch Capture.
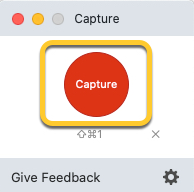
Click “Capture” in the dialogue box that opens.
Use the crosshairs to select whether you want to record your entire screen or just a region.
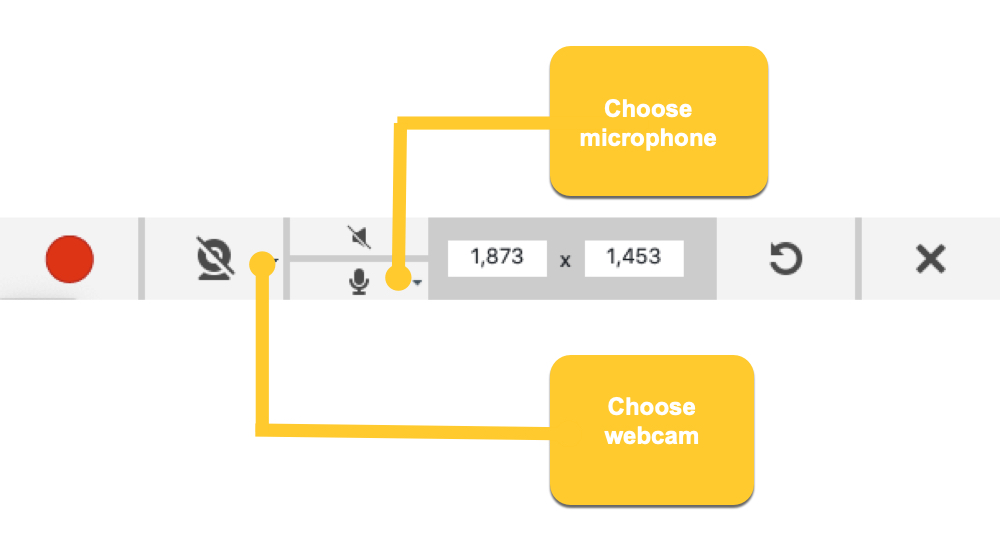
Choose your webcam and microphone.
Start recording!
It’s that simple!
When you’re done, you can trim out sections of the video you want to remove (such as time at the beginning and end where you may be making preparations to start your lecture or finishing up recording tasks).
Pros:
- Leverages content you’ve already created.
- Fastest and easiest way to record and share your lectures.
- Doesn’t require any video or audio editing.
- Best way to start if you’re new to online learning.
Cons:
- Doesn’t necessarily showcase the inherent benefits of on-demand learning.
- What you record is what you get, warts and all.
- No extras, such as quizzes or other ways to increase engagement.
- Not the best method for longer videos.
The easiest and fastest way to record and share lectures with anyone
Camtasia and Audiate make it easy to record and caption professional-quality videos
Try Camtasia TodayMethod 2: The middle ground
In this method, your ultimate destination is still Knowmia Pro, but you’ll actually first assemble your video in TechSmith Camtasia and record and edit your narration using TechSmith Audiate.
I won’t go into depth on both of those parts, but here you can find a great article about adding audio to your PowerPoint presentation.
You can also pull in other content, such as screenshots taken with TechSmith Snagit, or other images and video.
Once you’ve created and edited your video in Camtasia, you can share it directly to Knowmia Pro. Here, you can add quizzes if you want and share it with your students.
Pros:
- Again, uses content you’ve already created.
- You can enhance your existing content with new images and video.
- Easier to edit pieces of the video later, rather than having to redo the whole thing.
- Still a fast and easy way to create online learning content.
Cons:
- Takes longer.
- Requires using other software apps to get the job done.
- Minor learning curve for video editing. (Trust me, Camtasia makes it SUPER easy.)
Method 3: The Full Monty
The third method goes all the way. Rather than importing your slides and walking through your PowerPoint presentation as if you were giving it to your audience, you’ll create new video content with custom images and/or video clips. Your slides become a guide for creating that content rather than the content itself.
Use live camera video, clips from other videos, screenshots and other images, and much more. Really, you can be as creative as you want to be.
Enhance the video with audio, images, or video from TechSmith Assets for Camtasia, or from other sources. Add callouts, behaviors, transitions, and more to improve the professional feel of your video.
Again, you’ll assemble and edit your video with Camtasia and share the final product to Knowmia Pro when it’s finished.
Any clips where you’ll be speaking on camera will require you to record your voiceover in Camtasia, but any voiceover that doesn’t show your face can be recorded and edited in Audiate.
Though Camtasia is the creation tool, it’s Knowmia Pro that really lets your recorded lecture reach its full potential. Once again, you can add quizzes to the video after it’s uploaded to gauge students’ engagement and understanding of the content.
Use Knowmia’s discussion features to let students ask questions of you or their peers, and facilitate useful discussions around the course content.
Pros:
- Fully leverages the unique advantages of the online learning space.
- Easy to replace or edit pieces of the video as needed.
- Most polished and professional-looking option.
- May help students stay more engaged.
Cons:
- Takes the most time to get started.
- Requires familiarity with Camtasia features.
Tips for ensuring great recorded lectures
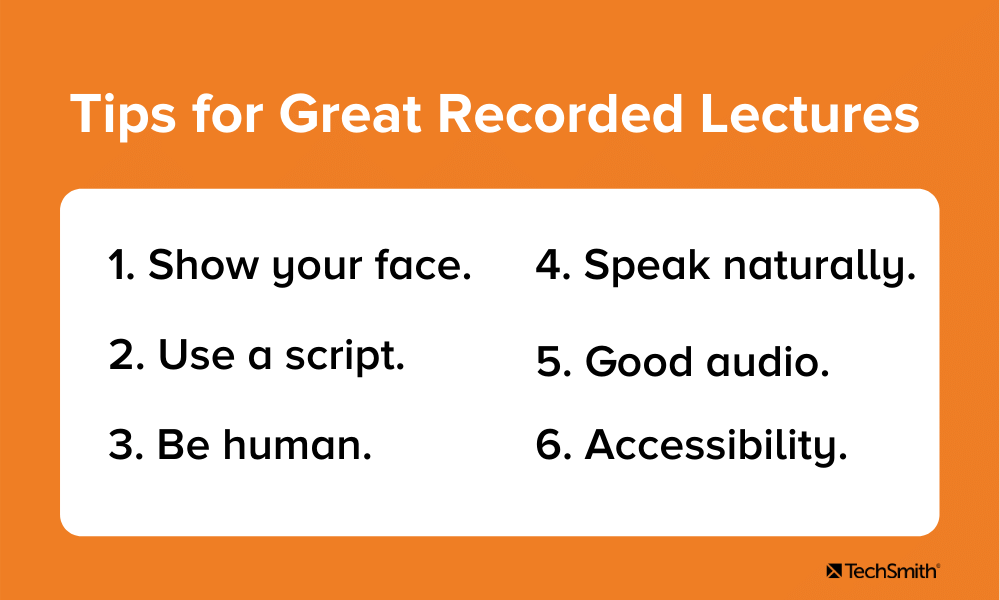
Regardless of which method you settle on, there are a number of things you can do to help ensure your videos are useful and interesting for your students.
Show your face
Students want to see their instructors’ faces. An image works in a pinch, but showing video of you speaking will go much further in helping your students connect with you and the course content. And, it may make them feel more comfortable approaching you with questions or concerns.
Use a script
Creating a script for your video is one of the single most effective ways to ensure video success. Whether you’re recording your webcam on the fly or going all-in with a totally custom video, a script ensures you cover everything you intend to and keeps you on-topic. If you don’t create a full script, I highly recommend at least putting together a list of detailed bullet points.
Be human
Don’t worry about being a perfect presenter or processional voice over artist. Your students will engage better with you if they know there’s a real human — flaws and all — on the other side of the screen.
Speak naturally
Don’t worry about being overly formal with your speech. Talk to your students like you’d talk to them in the classroom. Again, it helps show your humanity, which helps with engagement and trust.
Good audio
A TechSmith study shows that good voice over audio is even more important than image quality when it comes to engagement and enjoyment of your video. Use a decent microphone (not your laptop mic).
Speak slowly and clearly.
Edit your verbal mistakes as appropriate.
Accessibility
This is Knowmia’s not-so-secret power. Knowmia offers best-in-class automatic captioning for your videos so that students who are deaf or hard of hearing will still be able to consume your video’s content. And, it helps those who may need to consume your video with the sound off.
If you used TechSmith Audiate to record your audio, you can export it as a text file to use as a video transcript as well. If you started with a script, your script can be the basis for your transcript.
Record your lectures. Your students will thank you!
No matter how you decide to do it, recording your lectures provides a more engaging, effective, and efficient way to deliver course content. And, you don’t have to be a video expert to do it.
With tools like Camtasia, Snagit, Audiate, and Knowmia Pro, TechSmith allows anyone to create professional-quality images and video — no pro skills required.
The easiest and fastest way to record and share lectures with anyone
Camtasia and Audiate make it easy to record, edit, and caption your videos
Try Audiate for FreeNo! Recording your lectures can be very simple! Use a screen recording tool like TechSmith Knowmia Pro and you’ll be recording in just a few clicks!
There are a number of tools available, but TechSmith Knowmia Pro works nearly seamlessly with TechSmith tools like Camtasia and Snagit for a complete online learning software suite.
No. In fact, many students will benefit from the added benefits of recorded lectures. Live sessions are useful for online learning, but trying to recreate the face-to-face experience in the online environment can sometimes do more harm than good.
Share