


Taking a little time with a pencil and paper can save you many hours of reworking content to ensure that all the elements and assets are consistent. It easy to keep adding assets to your project, but time-consuming when you have to modify them individually.
Planning for a Successful Captivate Project
One of the common mistakes that I come across with Instructional Designers is that they always jump right into the development phase of the project. They think that they are in the design phase and continue to build the project and as they progress they realise that this project is taking many more hours than originally planned.
By jumping into the development phase, rather than doing a design audit first, they put pressure on themselves, annoy clients or employers and lose valuable income due to the extra hours required to complete the project.
So how do we get around this? It is simple, you need to design first and the best way to design is with pencil and paper before you even open Captivate. This may seem counterproductive, but it is a proven method of making your time count, eliminate mistakes and reduce costs.
So let’s have a look at what you can do to make it super easy for yourself, and for your clients or your employer and get your projects finished on time?
The first thing you need to do is to decide on a theme that will suit your project, or modify a theme to suit or create a theme from scratch. There are many themes available free from the assets panel in Captivate and you can get more by searching the web, however, the best way is to design your theme from scratch (I’ll cover this in another post). Whatever way you go this is only the beginning of the process and what we really want to look at is how we save time with all the extra assets we put in to our project such as fonts and font styles, buttons, smart shapes, colours, advanced actions, shared actions, images and audio and video.
As you can see there are lots of things to consider in the project design stage and we can have a look at each one now.
Using old-fashioned pencil and paper:
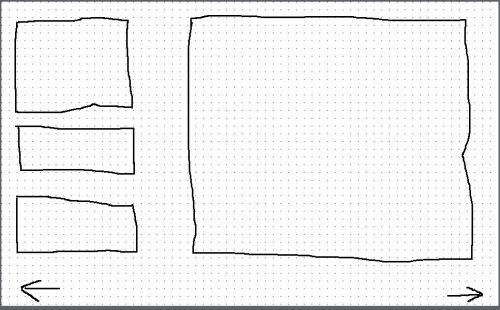
Pencil and paper still have a place in the world of technology, it cheap, quick to do and easy to see where everything goes on your page. Consider using a grid layout to make it super easy to align your assets as in the image below, I use a grid set at 10px apart (see image below). Using pencil and paper is fun and allows you to be creative and it never runs out of battery or internet free so you never have to worry about getting cut off halfway through a journey.
This is a great way to come up with new designs and concepts or to muddle around with logos or fonts.
Using A5 or A4 sheets of paper is a great way to layout your project as it makes it easy to switch slides around and identify the order of all slides. Paper is also great for saving to look back on as you can make all the notes you want on both sides of the paper.
Another great way to design is to use an A4 or A5 acetate sheet (see-through plastic sheet) with this you can layout your theme and then overlay all of your assets to see how they will look. Acetates are also great for drawing on with whiteboard wipe off marker and you can also add coloured sheets of paper behind the acetates to see how the bacg=kground would look on the slides.
Let’s have a look at “Buttons” or “Smart Shapes” :
Many instructional designers normally design every singles button on the stage, that fine to see how it will look, but the then keep all of the buttons and modify them one-by-one. This is time-consuming and costly for you and the client. So what should we do? We need to sketch what we need to have on our stage and then see where buttons or smart shapes will be used frequently, then consider the following:
- What colours will you use for these items?
- What states will be required?
- What size should they be?
- Will they require a single action, advanced action or shared action?
With this information, we can complete a single button or smart shape and then replicate it as many times as we need it to complete our slide. In the image below you can see ten smart shapes all based off of one smart shape. Remember that you are still able to go back and change each shape individually or as a group. In this, I have used ten smart shapes and one shared action to complete all of the actions I need. When the learner clicks on a button they update the eleventh smart shape which has eleven states applies to it.

Let’s have a look at “Images”:
Images play a crucial part in our captivate projects, however, images can cause trouble if we do not understand how to use them correctly. Many images that first-timers use are either too large or too small to add value to the project. When dealing with images its important to know that they do not have to be a super high resolution,
Problem 1:
The image is too small and when shown on a larger screen it pixelates as in the image below: This makes for a bad learning experience and will take away from your overall learning experience for the learner.

Problem 2:
The image is too big and blots out your project file size. With only a couple of images that are too big and your project may be slow to load and may even lag when loading for the first time user.
The best solution is to use images that are the correct size for your project stage ie: 1024 x 627. This way you images will be easier to manage and load. Again image resolution does not have to be high, I normally set mine at 90px per inch. As this is for viewing on computer or mobile device a lower resolution will be fine and will keep your total image size very low.
Actions and Shared Actions:
Two of the most powerful features in Captivate are the “Execute Advanced Actions” and “Execute Shared Actions”. The two items allow you to really make your project interactive and fully engage the learner.
So, if you have a slide that requires an advanced action and this only applies to one or two slides then it is best to keep it as an advanced action and modify for each page. However if you have an action that must happen on many assets or slides then it is best to create a shared action as this can be created once and then easily modified for all of the other assets that require this action to happen, remember that shared actions cannot be modified after you save them, the parameter, however, can be modified when using the shared action.
When using actions it is best to write down what it is that you need to happen and to try this in the action builder, you will soon see that creating actions in not only fun, but also super simple, and you can always reach out to the community if you have any issues that you are unable to resolve.
Font & Font Styles:
It is good practice to identify what fonts and styles you will use and then to create font styles in Captivate for these. I usually start with four styles and sizes (Title, Subtitle, Content Text and Captions) This will save you lots of time and you will always have these available for use in your project. It’s a simple process that delivers big time savings for you and your client. Never use more than three fonts as this will make your project look weird.
Colours:
Again its good practice to select your colours before developing your project, staff with the primary colours and then the colours that will complement your primary colours. Keep it in line with your corporate colours as most companies will have a standard design process that must be followed to maintain the company image and branding.
Working out your designs on paper is the most practical way to design before you start working in Captivate and you get a real feel for how your project is going to come together. Pencil and paper are easy to store and you can look back on it for other projects. I use an A4 drawing pad for all of my early design sketches.
Also, when you are with the client it is much easier to sketch out a rough design on a pad than on a computer and never worry that your drawings or sketches are not perfect, they’re not meant to be there sketches to show a simple wireframe design to the client and to guide you in your work.
I hope you find this guide helpful and that it saves you some time in your design and development process. Have fun and let me know if I can be of help to you in this community.
I’m taking in as many beginner tips as I can find and this one helps a lot – thanks!
I’m taking in any beginner tips I can find and this one was very helpful – thank you so much!
Need more information about advanced and shared actions, or a reference link. Images/examples would also help.
Thanks for the beginners guide!
You must be logged in to post a comment.


