


Create an interactive Selector Bar.
Overview
My last blog tutorial showed how to add a slider bar: https://elearning.adobe.com/2018/06/add-slide-bar-projects/
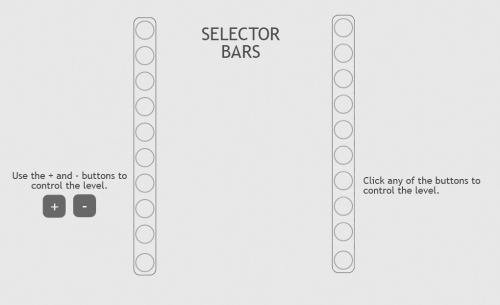
This tutorial covers two ways you can create a ‘selector bar’. With a selector bar, the learner uses button clicks to control the input level.
This tutorial uses much less javascript than the slider bars tutorial – however it does use some. As always the sample file can be downloaded here:
Step 1: Create the Selector Object
- Create a rectangle shape on your slide. Give the rectangle the id ‘obj’.
- Select the rectangle and click ‘State View’. In the ‘Normal Default’ slide add as many circles as you want. In my example, I use ten.
- Duplicate the ‘Normal Default’ slide for as many circles as you have. In the sample I have ten circles, so I added ten more ‘state’ slides – 11 in total. You can keep the default names ‘NewState1’ etc.
- For the first state slide ‘NewState1’ add a fill to the first circle. For the next state slide ‘NewState2’ fill the first and second circle. Complete the sequence until all circles are filled.
- By the end you should have a rectangle with the id ‘obj’ and 10 additional state views – each view filling more circles
+ / – BUTTONS VARIATION
Step 2a: Add Variables
Under Project, click variables. Add a new variable named ‘click’ and give it a value of 0
Step 3a: Create your + Button
Create a shape. Add a ‘+’ on it. Click use as button. On click execute javascript and add the following script:
var stateMax = cp.model.data.obj.stl.length – 1
var lastState = cp.model.data.obj.stl[stateMax].stnif(cp.getCurrentStateNameForSlideItem(‘obj’) ==lastState){
}
else {
click = click + 1
var newState = cp.model.data.obj.stl[click].stn
cp.changeState(“obj”, newState);}
I will explain – for those interest what the javascript means at the end of this tutorial.
Step 4a: Create your – Button
Create a shape. Add a ‘-‘ on it. Click use as button. On click execute javascript and add the following script:
if(click ==0){
}
else {
click = click – 1
var newState = cp.model.data.obj.stl[click].stn
cp.changeState(“obj”, newState);
}
Again, I will explain the javascript at the end of the tutorial.
CLICK ON SELECTOR VARIATION
Step 2b: Create ‘invisible’ buttons
For each circle on your selector, create an invisible button (a shape with 0 alpha fill and outline). Click ‘use as a button’ and delete the rollover and down state views. On click execute javascript and add the following script:
cp.changeState(“obj”,NewState1);
You will then have to add the correct stateName for each button (i.e. NewState2, NewState3, etc.)
Explanation of Javascript
The only complicated javascript I believe is using the first method with the + / – buttons. So I will cover a bit of the scripting here.
I use the cp.model.data to retrieve information of the Captivate objects.
For example, the script “cp.model.data.obj.stl” returns the array for the different ‘states’ of ‘obj’. The “.stn” returns the state name as a string. Therefore “cp.model.data.obj.stl[0].stn” would return the “Normal”. This means you can use a variable integer to change the state of an object.
The script uses the variable ‘click’ as that integer. Here are some comments for the script.
var stateMax = cp.model.data.obj.stl.length – 1 //Sets ‘stateMax’ to the total length of the stl array
var lastState = cp.model.data.obj.stl[stateMax].stn // sets lastState as the string of the last item in the stl arrayif(cp.getCurrentStateNameForSlideItem(‘obj’) ==lastState){
} // If the current state is equal to the ‘laststate’, it will do nothing
else { // If the current state is not equal to the ‘laststate’ it will do the following
click = click + 1 // add 1 to click
var newState = cp.model.data.obj.stl[click].stn //set newState to equal the string name in the stl array (identified from the click integer)
cp.changeState(“obj”, newState); //Changes ‘obj’ to the new string}
Additional Notes
I know there are probably other and possibly easier ways to achieve this, however I find this would save time if you had an object with many different states. ‘If statements’ in advanced actions can get a bit out of hand if you have many.
The script essentially provides the ability to control a state based on an integer, rather than relying on the state’s name. I think there could be other possible applications for this. For example, you could have final score on a quiz that would could then determine which state is visible.
Please feel free to write any comments or ask any questions.
Enjoy.
I like to see the different approach.
Not really, there is also Go to Next State, and Go to Previous State. Have also another approach to create multistate object: First state: fill circle, duplicate, fill next circle etc…. I always try to find the easiest solution. Definitely use JS but only when it is necessary. And Shared actions have replaced advanced actions for a big part as well. Easier to manage.
You will not like my comment but I am indeed using shared actions to do exactly the same, never had problems since this is a pretty simple use case. Totally different from the slide bar, which really need JS.
No I like your comment 🙂 and yes I agree that you can definitely do this through advanced actions as well. However I found it became more challenging when I started having objects with more than 10 states. I was a lot of ‘if statements.’
Or, we can approach this topic from the standpoint of choice. Both methods work, It’s a matter of preference.
You must be logged in to post a comment.


