Preamble
This blog is in response to a few comments and questions I’ve seen about successive failure attempts such as “if a learner gets a question wrong on the third time I want the program to…”. Now Captivate already has a built in quiz function that allows you to show up to three successive ‘failure messages’. This is great if all you need it to show a message, but what if you want something more. For example, maybe on the second failed attempt you want it to play a video, or jump to another slide.
This is a method that I use to accomplish this. I find it easier than Advanced Actions because you don’t need to create so many ‘if statements’, and as an added bonus, this blog will also show you how easy it is to activate the alert() window which is only accessible through javascript.
Step 1: Set up your quiz
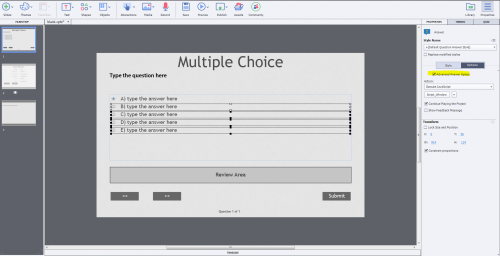
1. Create a multiple choice quiz slide with 5 possible answers. Under the quiz tab change ‘failure messages’ to 0.
2. Click on the four incorrect answers (holding down shift to select them all). Under the ‘Properties’ tab click ‘Advanced Answer Option’ and then click execute javascript

3. In the javascript window put in the following code:
att();
By having them all selected, it will apply the same execute javascript code. A quick note here that if you want to have a unique function for a particular incorrect answer you can put in your own function for that answer. I’d also suggest you watch Paul Wilson’s video on setting up unique error message comments.
https://www.youtube.com/watch?v=MBGJJ-SLOwc
4. Under Project -> Variables create a new variable called ‘attempt’ and give it a value of 0
5. Create two hidden ‘clue’ images with the IDs ‘clue’ and ‘clue2’
Step 2: The Coding 
Every time a learner gets the answer wrong it calls the function att() We obviously need to create this function so that it will do stuff. I’m going to post the code for this example and if anyone is interested, I’ll explain it line by line at the end of this post.
On the slide’s ‘on enter’ have it execute javascript with the following:
function att(){
attempt = attempt + 1
switch (attempt) {
case 1:
alert(“Good idea but try again”, “YOUR COMPANY NAME”);
break;
case 2:
cp.show(‘clue’);
break;
case 3:
cp.hide(‘clue’);
cp.show(‘clue2’);
break;
case 4:
cpCmndGotoSlide = 2;
break;
}
}
__________________
What will happen here is that the first incorrect response will have a window pop up and tell them “Good idea but try again”. The second attempt will reveal the image ‘clue’. The third attempt will hide ‘clue’ and show ‘clue2’. The fourth failed attempt will take them to information slide 2.
For my example I made the javascript ‘actions’ fairly simplistic just to illustrate the concept of ‘switch’ statements. But of course this can all be modifiable. Audio could be played, points could be awarded or deducted, videos shown, animations executed, etc.
I hope that some of you who are interested in learning more about how to use javascript within Captivate will find this useful.
Thanks,
Jeremy
Code Explanation
function att(){
This creates a function and names it att
attempt = attempt + 1
This increments the value of the variable attempt by 1. Therefore if ‘attempt’ was equal to 3, after a run of this script ‘attempt’ would be 4.
switch (attempt) {
‘switch’ is a javascript statement similar to an ‘if statement’. It looks at a value (in this instance the value of ‘attempt’) and then allows you to specify what to do in different ‘cases’ or situations.
case 1:
This is specifying what to do if ‘case == 1’. But unlike if statements, it’s super easy because you don’t have to keep writing annoying if statements for all possibilities
alert(“Good idea but try again”, “YOUR COMPANY NAME”);
break;
This is saying that if attempt is equal to 1, it will trigger an alert message. Alert windows are great to use. You can change the default ‘Adobe Window’ title to whatever title you want. And you can modify the colour and font in the Object Style Manager.
case 2:
cp.show(‘clue’);
break;
case 3:
cp.hide(‘clue’);
cp.show(‘clue2’);
break;
case 4:
cpCmndGotoSlide = 2;
break;
}
}
The rest of the script runs through all the other cases. For example when ‘attempt’ is equal to 3, case 3 will be triggered and cp.hide(‘clue’) will hide the object with the id clue and cp.show(‘clue2’) will reveal clue2. Any questions or comments please don’t hesitate to ask. Thanks again.