HIGHLIGHT
HIGHLIGHTED
+1


6
2
by Kevin Siegel, COTP, CTT
One of Adobe Captivate’s most often overlooked features is its ability to generate support documentation for your eLearning content. By simply choosing File > Print and opening the Print dialog box, you gain the ability to create Word documents that can be printed, emailed to your learners, or uploaded to a Learning Management System as course materials.
In the image below, notice that there is a Type drop-down menu in the Print dialog box that offers four kinds of documents including Handouts and Storyboards.
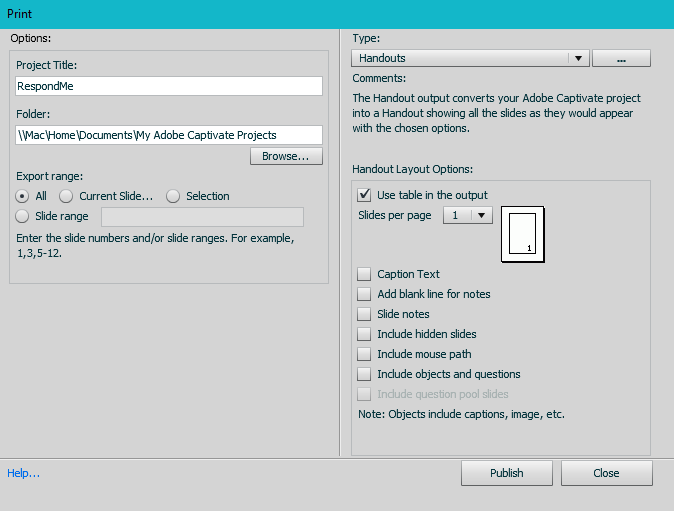
After clicking the Publish button, assuming you have Microsoft Word on your computer (Mac or PC), all of the Filmstrip slides are included in a new Word document. You can control which Captivate project assets appear in the Word document by selecting or deselecting items from among the check boxes at the right of the dialog box (Caption text, Slide Notes, etc.).
Creating Print documents is so quick and easy, I think you’ll be impressed given that the process works wonderfully. However, as impressed with the resulting content as you’re going to be, you’ll likely be unimpressed with the default appearance of the Word document.
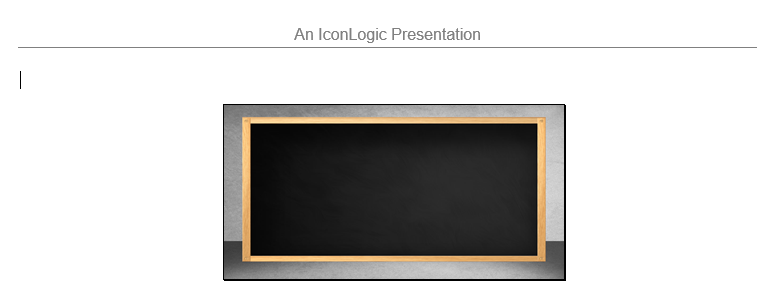
For instance, notice the name of my project was automatically inserted into the document Header. I’d like my company name to appear in the Header instead. No problem! It’s simple to edit the Header in Word (just double-click the Header and edit away).

The image below is the default footer. It’s not horrible, but I want the page numbers centered please.

Beyond having to edit the Headers and Footers, you will likely need to spend time formatting the styles to meet corporate standards. And having invested the time and energy getting things in Word just perfect, you’re going to be pretty bummed when you create Print output from Captivate later because all of your customization work gets wiped out. The excellent work you did before needs to be done again… and again. Yikes!
Before you bang your head on your desk in complete frustration, there is a solution that’s painless. You can edit the Word template found in Captivate’s PrintOutput folder prior to creating the output from Captivate. Once you’ve edited the Word template, you’ll never have to manually format the Word output documents on-the-fly again.
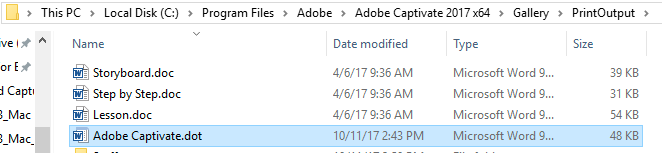
Note: Prior to moving forward, create a copy of the Adobe Captivate.dot file mentioned below and keep it in a safe place. (You can always put the file back in the PrintOutput folder should things go horribly wrong.)
Customing the Print Output Template used to Create Print Documentation
Using Microsoft Word, open Adobe Captivate.dot . You can find the file in the Adobe Captivate application folder on your computer, within Gallery > PrintOutput. (The Adobe Captivate.dot file is shown selected in the image below along with its location on my computer. Mac users, the path is the same for you except the Captivate program is typically located in your Applications folder.)
In the images below, I’ve modified both the Header and Footer in Word.


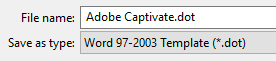
When finished editing/modifying, save the template to the Desktop as a Word 97-2003 Template (so you can keep the .dot extension). Then copy the file on your Desktop and paste it into the PrintOutput folder. (Replace the existing template file when prompted.)
When I create print files from my Captivate projects these days, the resulting documentation is always formatted just the way I liked it! No more manual formatting, or head banging, is necessary.
***
Looking for eLearning training (including beginner and advanced Captivate training)? Check out these live, online classes.
***
 Kevin Siegel, CTT, COTP, is the founder and president of IconLogic. Following a career in Public Affairs with the U.S. Coast Guard and in private industry, Kevin has spent decades as a technical communicator, classroom and online trainer, public speaker, and has written hundreds of computer training books for adult learners. He has been recognized by Adobe as one of the top trainers world-wide.
2 Comments
2019-07-13 07:47:15
2019-07-13 07:47:15
Thanks for the tip Kevin.
I played with the .doc template but other than changing the diagram sizes and default print format size, even the line I insert into the header and right-aligning the Lesson title doesn’t work.
I would at least like to add my company logo into the header, keep the formatting, specifically the bolding. Do you have any suggestions on how it can be done?
I have the latest Captivate 2019 version.
Side note: The template is MS Word 1997 and the print option publishes to MS Word 2003. That’s like 20 years ago.
Like
2017-10-30 12:38:59
2017-10-30 12:38:59
What a great tip; I’ll definitely be using this! Thanks for sharing.
Like
Add Comment
You must be logged in to post a comment.


Adobe Captivate

Adobe Events
ADOBE CAPTIVATE: Branding Print Documentation
