At eFront we have created all our video tutorials using Camtasia so we wanted to share with you our tips and tricks in a step-by-step guide!
Step 1: Build your scenario
The first and most important step is building the scenario of your video tutorial. It should be a detailed description of the functionality (or whichever content you choose to portray) that will be presented. The more descriptive it is the easier it will be for you to capture your video.
Step 2: Capture your video.
Using your scenario as a guide, start the procedure that you want to show. When ready click on the rec button to capture your screen. Note that you can change the capturing dimensions so that you get the best quality.

When you are done stop the capture and click to save and edit the video.
Step 3: Editing your video
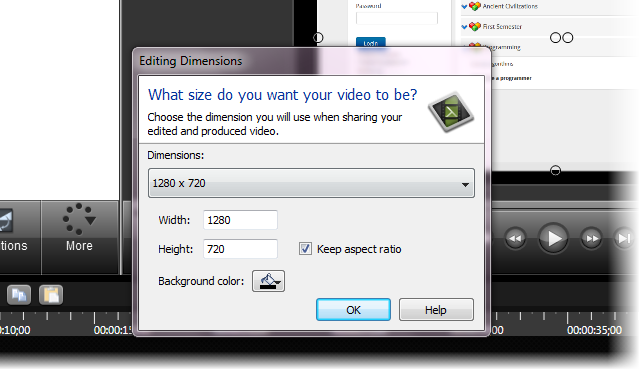
At first you have to select the size of your video. If your intention is to upload it to YouTube you can select the 1280×720 dimensions which are recommended for YouTube use. After clicking ok the video is inserted in the timeline as Track 1.
Start playing the video to check if it matches your scenario. The interesting part is the editing. You will have to cut some parts out of the track to avoid “idle time” or to hide some things that you don’t want to show.
Step 4: Voice narration
When you are done editing your capture you can add narration to your video, using the Voice narration option.
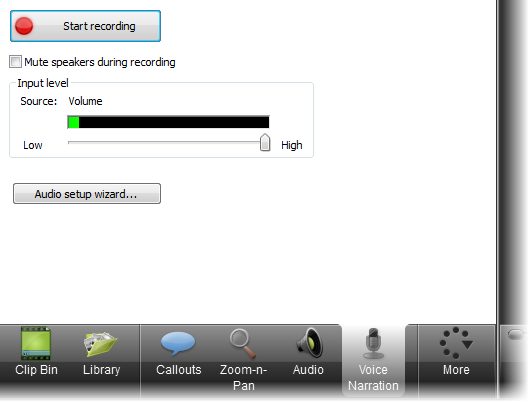
You can use a headset to achieve better audio quality. Don’t forget to use the audio setup wizard to choose your audio settings. Through the Auto-Adjust Volume option you can allow the system to automatically adjust the volume level.
When ready and again using the scenario as a guide, click to start recording. It is better that you select the option “Mute speakers during recording”. All you have to do then is to start your narration, reading the scenario and making sure that you keep up with the video stream.
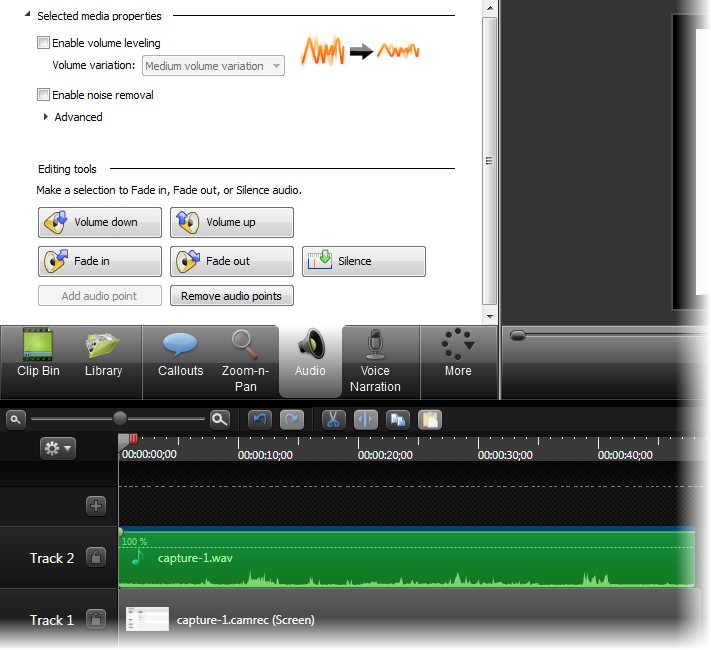
When done, click to stop recording. Save your audio file. The audio file is now added to the timeline as Track 2. You are able to edit the audio using these options:
Step 5: Add music to your video
You can use the Camtasia Library to add music to your video, using the available music files. Through the top menu go the View option and select the Library. You will see some Music folders with different tracks. Select the track that you like, right click on it and select the option “Add to Timeline at Playhead”.
The track is then added to the timeline as Track 3. In case it is too long, you can cut it so that it ends together with your video. In case it is too short you can add it again, at the point where the first one ends.
When you are ready play your video with the voice narration and the music to check its quality. You have to be careful so that the music does not cover up the voice narration so you may need to decrease its volume. To do this right click on the music file, click to edit the audio and then just drag the volume line:
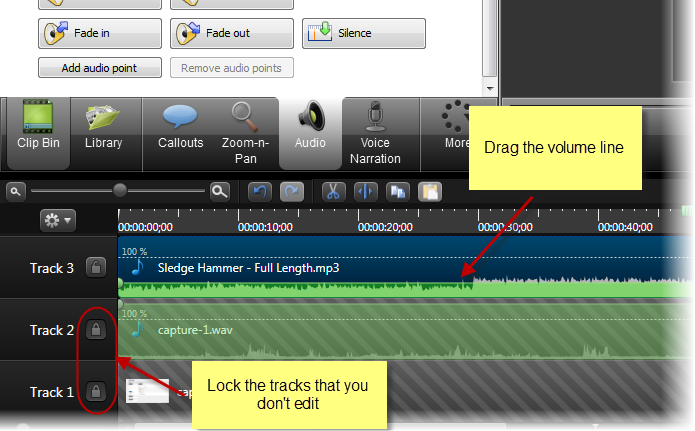
Important Note: Remember to lock the other tracks while making changes to another one.
Step 6: Produce your video
The last step is the production of your video. After saving your project, click on the File option through the top menu. Move to the Produce and share option. There are some options available for your video production. We usually use the Custom production settings.
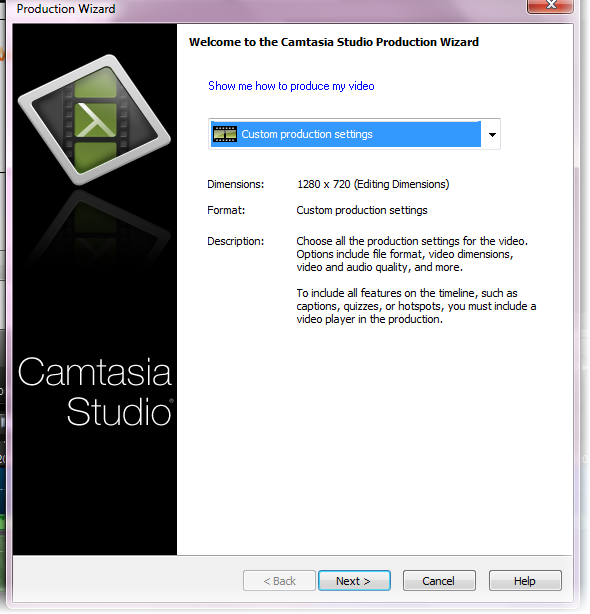
Click on the next button and select the recommended option Mp4 – Flash /HTML 5 Player. In the next screen you are able to increase your quality through the Video settings tab. We usually set it at 90%.
You can set some other options for your video and also produce it as SCORM. Click on the Finish button and let the production begin! When done you can move to the folder where you saved it and watch it.
If you have any questions about using Camtasia we welcome your questions here 🙂 Happy recording!