
Want to increase the interaction between your learners and your course material? Taking notes has long been considered a way to increase engagement and retention. What if your course included a feature that enabled learners to take notes directly inside the course and then print them out later? Open up Lectora® and follow the easy step-by-step instructions below (or steal from the example files), and your learners will be typing notes and printing them in no time.First, let’s list the things that we want to include:
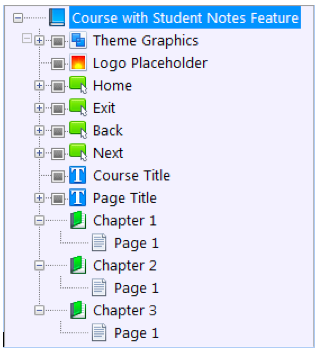
For this tutorial, we’ll be using a shell title containing three chapters with one of the Lectora themes applied (On Display – Gray). The number of chapters is not significant as the feature will be global to a title of any size.
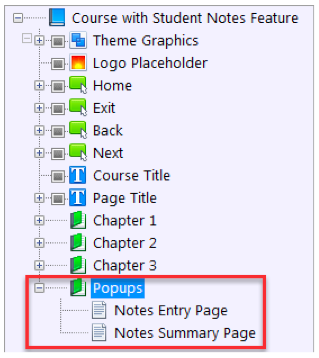
Let’s start by setting up a Popups chapter and the two popup pages we designated in the list above.
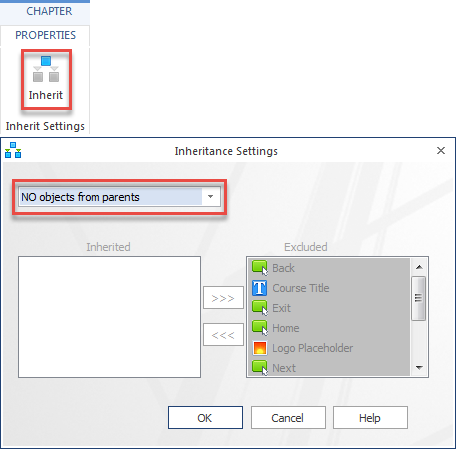
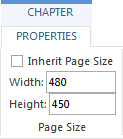
Now let’s set some properties for the Popups chapter and the pages it contains.
Now let’s add the elements needed for the Notes Summary Page.
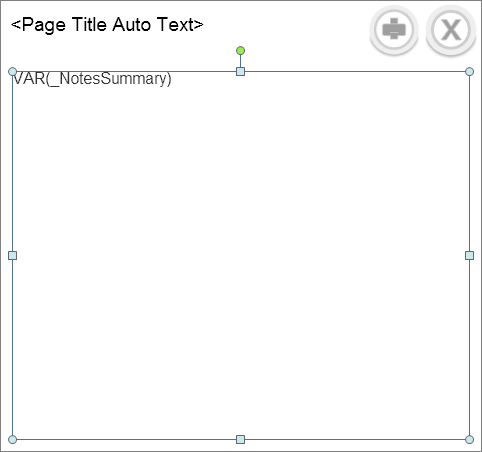
This completes the elements needed for the Notes Summary Page. Now let’s put the Notes Entry Page together.
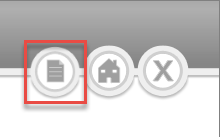
Now that our pages for the feature are in place, we need to add a button to allow access to them.
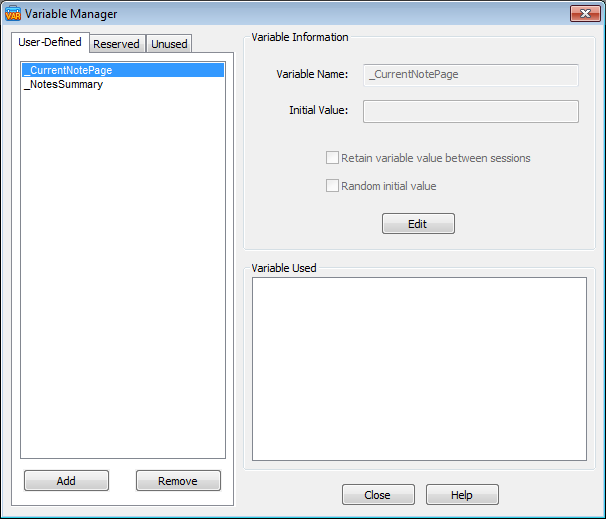
This completes all of the elements needed for the feature. Now let’s make it functional. First, let’s add a couple of User-Defined variables.
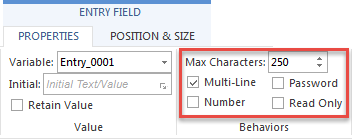
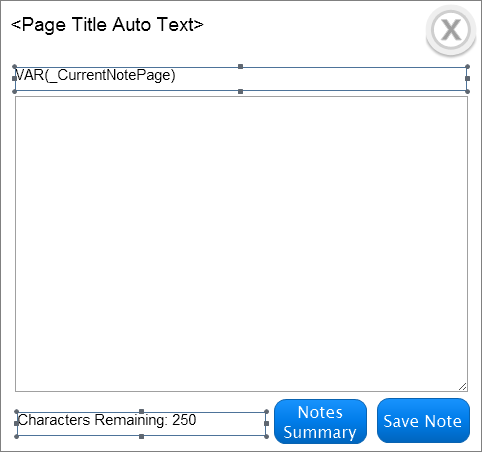
When the user clicks the Notes button, the _CurrentNotePage variable will be set to the name of the current page in the title from which the Notes Entry Page was popped up. The value will then be used in two ways. It will be used to display the name of the page for which the user is taking notes on the Notes Entry Page itself. The value will also be added to the beginning of each note that the student saves to identify on which page the note was taken.The _NotesSummary variable will hold the contents of all of the student notes taken. Its value will be displayed in the text block on the Notes Summary Page. When the Save Note or Notes Summary buttons are clicked, the current value of the entry field on the Notes Entry Page will be added to the value of _NotesSummary.
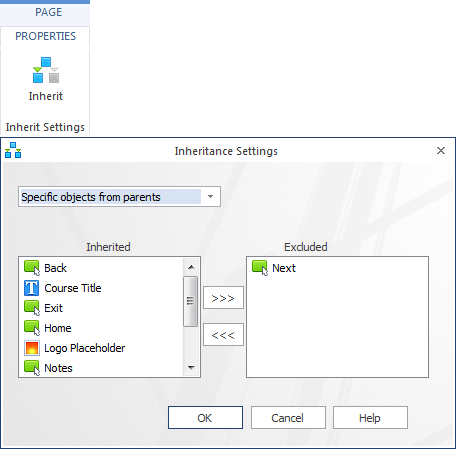
Now let’s add the actions for the title level Notes button.Add the following actions to the Notes button in this order:Action 1 – This action will set the value of the _CurrentNotePage variable which will be displayed on the Notes Entry Page. Name: OnMClkModVar _CurrentNotePage Trigger: Mouse ClickAction: Modify VariableTarget: _CurrentNotePageType: Set Equal ToValue: VAR(CurrentPageName)Conditions: All conditions must be trueVariable: CurrentPageNameRelationship: Not Equal ToValue: Notes Entry PageAction 2 – This action will pop up the Notes Entry Page in a lightbox window. Name: OnMClkPopUpPage Notes Entry Page Trigger: Mouse ClickAction: Display Page in PopupTarget: Notes Entry PageScroll To: Top of PageNext, we’ll add the actions needed for the Notes Entry Page to function. First, we’ll add two actions to the Save Note button.Add the following actions to the Save Note button in this order:Action 1 – This action will save the value of _CurrentNotePage plus the current value of the entry field (Entry_0001) to the _NotesSummary variable. The value of Entry_0001 will be whatever the student has typed into the field.Name: OnMClkModVar _NotesSummaryTrigger: Mouse ClickAction: Modify VariableTarget: _NotesSummaryType: Add to VariableValue: Notes for VAR(_CurrentNotePage) page: VAR(Entry_0001) [End] - -Action 2 – This action will close the Notes Entry Page lightbox popup window.Name: OnMClkExitCloseTrigger: Mouse ClickAction: Exit Title/Close WindowNow add the actions for the Notes Summary button.Add the following actions in this order:Action 1 - This action can be copied and pasted from the Save Note button. It is exactly the same.Name: OnMClkModVar _NotesSummaryTrigger: Mouse ClickAction: Modify VariableTarget: _NotesSummaryType: Add to VariableValue: Notes for VAR(_CurrentNotePage) page: VAR(Entry_0001) [End] - -Action 2 – This action will open the Notes Summary Page in a new window.Name: OnMClkGoTo Notes Summary Page Trigger: Mouse ClickAction: Go ToTarget: Notes Summary PageScroll To: Top of PageOpen In: New WindowNow add an action to the Notes Entry Page itself that resets the Form when the page shows.Action 1 - This action will reset all of the elements contained within a Form object and the values of their associated variables to their original empty states. In this case, it is just the entry field and its Entry_0001 variable. Without this action, the student would see whatever it was they had previously typed when they opened the Notes Entry Page again and duplicate entries would be added to the _NotesSummary variable. Name: OnShowResetForm Trigger: ShowAction: Reset FormTarget: Form_1 There is one final thing that needs to be done to prevent the user from accidentally navigating to the Popups chapter using the Next button of the main interface.
The student notes feature is now functional. Publish your title and give it a try!One thing you may notice while typing a note is that once you’ve reached the 250 character limit on the entry field, you can no longer type into the field with no warning. In my next blog, we will add a nice bit of user feedback to the Notes Entry Page that counts down the number of characters remaining that can be typed into the entry field.For you hands-on learners and for those who cannot wait to see the characters remaining feature, you can download the completed example built from this tutorial on the Trivantis Community!
Lectora Advanced is for developers who want to get more creative with Lectora. In this blog series, Wendy Miller, Lead Content Developer here at Trivantis, will share Lectora tutorials that go beyond basic course development. Wendy is a visual designer and computer programmer with extensive experience developing software, courseware, web sites, games, and multimedia.
.svg)
