When you think of a split screen video, a lot of things can come to mind.
One example I always think of is the opening scene of The Brady Bunch.
What is a split screen video?
A split screen simply places more than one shot into the frame; whether it’s your subject or some b-roll, this effect can produce a wide range of results.
Even though you might not be creating a television intro, split screen is a great technique to show cause-and-effect or illustrate how one thing relates to another.
There are many products and tools out there that can help you make a split screen video, but we prefer Camtasia. It has a simple timeline and canvas so that you can quickly make a split screen video with as many or as few items as you’d like.
If you don’t already have Camtasia, click the button below to download a free trial.
Create your own split screen videos!
Looking to make your own split screen videos? Download a free trial of Camtasia and get started today!
Now, I’ll walk you through the exact process used to create a split screen video with Camtasia.
Let’s get started.
Step 1: Import your video clips
The first thing you’ll want to do is load all of your video footage into Camtasia.
Personally, I like to drag and drop my clips from my computer right into Camtasia. But if you prefer, you can right-click the media bin and import your clips that way.
To import multiple clips, you can hold the CTRL button while clicking on each individual video to import them all at the same time.
I want my split screen to show three separate videos.
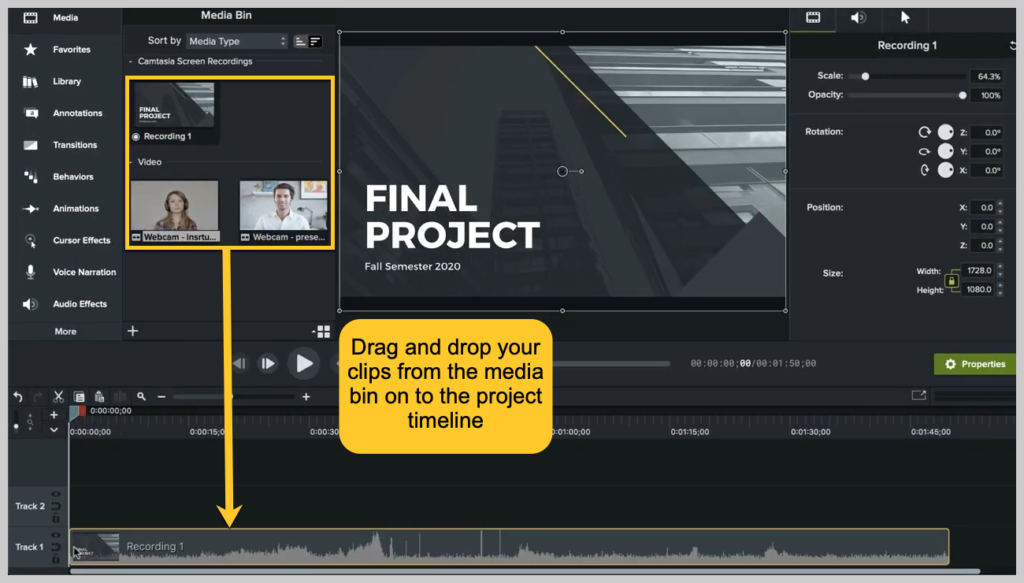
After importing, drag and drop the video clips you want to use from the media bin on to the project timeline. Use a separate track for each video clip.
Step 2: Crop, resize, and move
Next, You will need to resize, move, and crop your videos so that everything fits together nicely on a single screen.
Start with the media on the top track, so you can see the changes you make as you crop and resize. Think of the tracks like a stack of pictures; the preview pane will display the uppermost track.
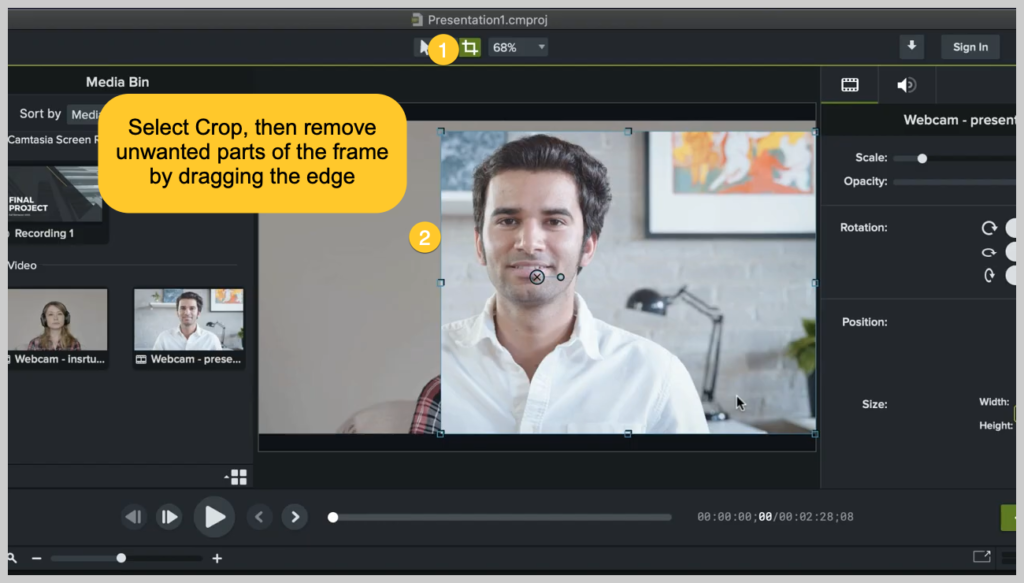
Select Crop. Remove any unwanted parts of the frame by dragging the edge.
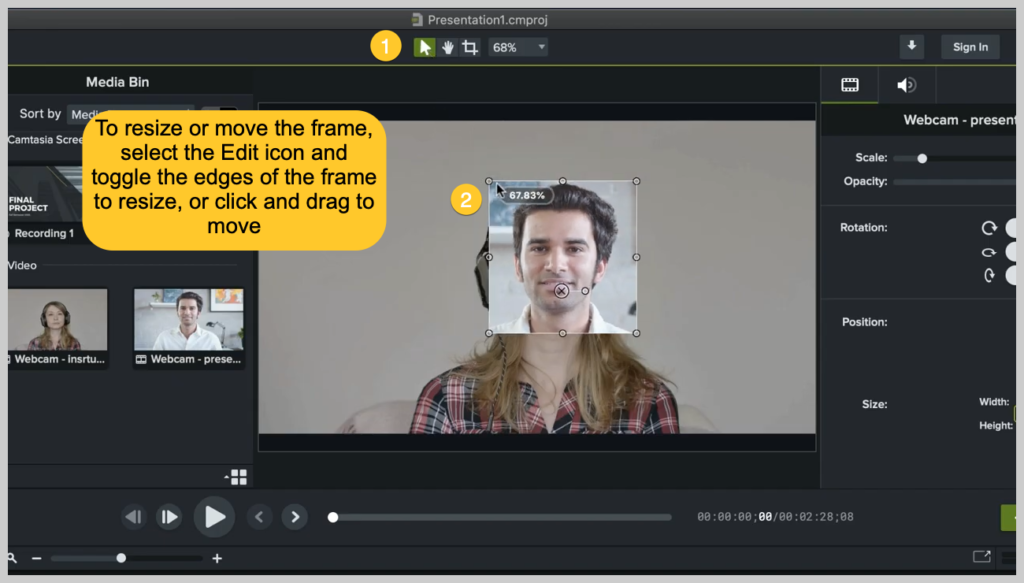
To resize or move the video frame, select the Edit icon and toggle the edges of the frame to resize, or click and drag to move.
Step 3: Edit audio
Once you’ve cropped, resized, and rearranged, the last thing you might need to edit is your audio.
Your desired outcome will determine whether or not this step is necessary. For this example, I only want to use the audio from one of the videos, so I’ll delete it from the other two clips.
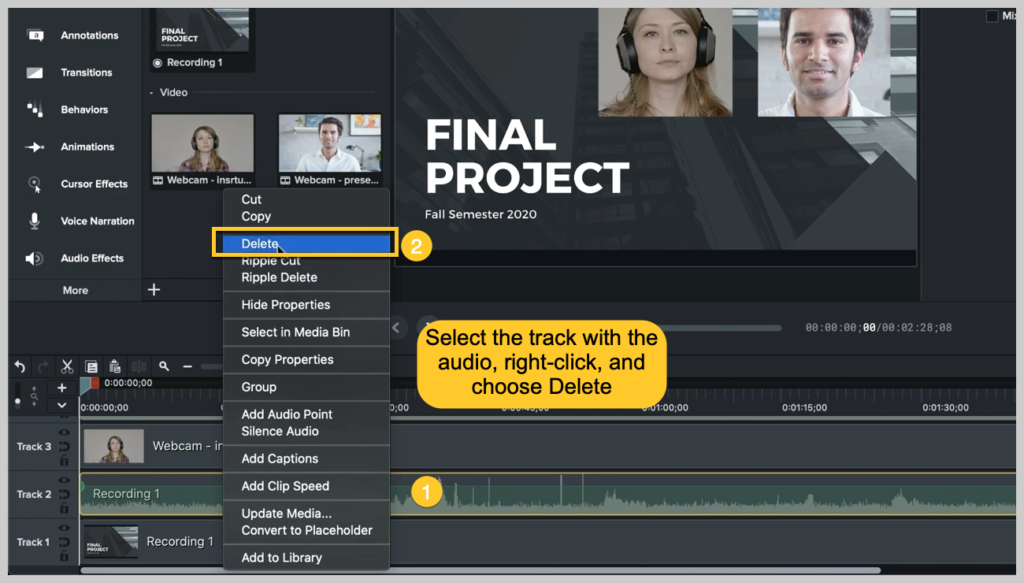
To remove audio from a clip in Camtasia, right-click on the media and select Separate Audio and Video.
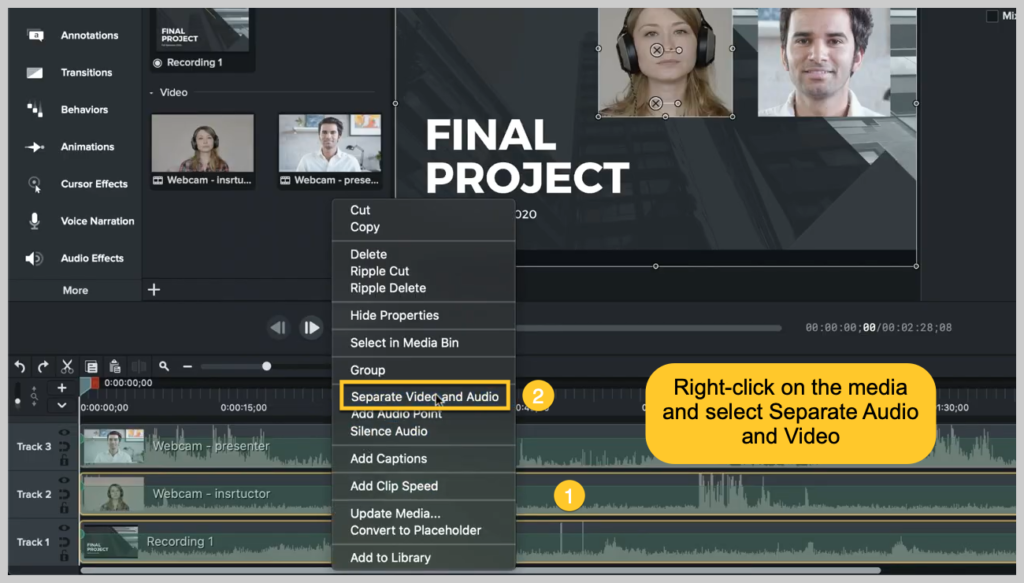
Then, select the track with the audio, right-click, and choose Delete.
That’s pretty much it! You can now make a split screen video with just a few steps.
Bonus step: Produce and share
Don’t forget to produce and share your project. This will finalize your video file. You can upload the finished video to a hosting site, such as YouTube, Vimeo, or Screencast.com, or save it locally as an MP4.
For a great video walkthrough of this process, watch the tutorial below!
Ready to make your own split screen video? Download a free trial of Camtasia and get started today!


