If you attended any of our recent webinars about the immersive experiences you can build in CenarioVR, you know how super cool and exciting this tool is. There aren’t any other virtual reality tools out there that get you from 1 to 100 in just a few minutes when it comes to building VR training. And we’ve just added a new feature that allows you to take it to the next level.
What’s New: Motion Paths
Put simply, motion paths allow you to animate objects along a path over a period of time. Here’s a simple example:
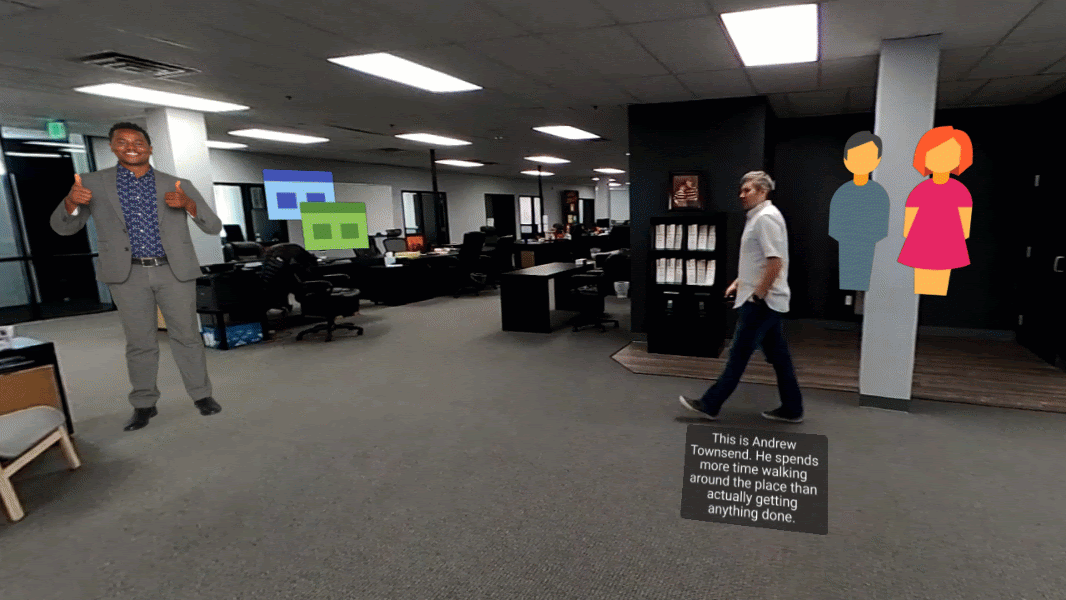
Using a motion path, I am able to create a moving caption that follows the movement of a figure in my captured 360 video.
You can make any object that you place in your scene move using motion paths, not just text copy. You can also animate images, 3D objects, sounds, hotspots, and videos.
How is it done?
Using motion paths is extremely easy.
Step 1
Insert your object that you’d like to animate.
Step 2
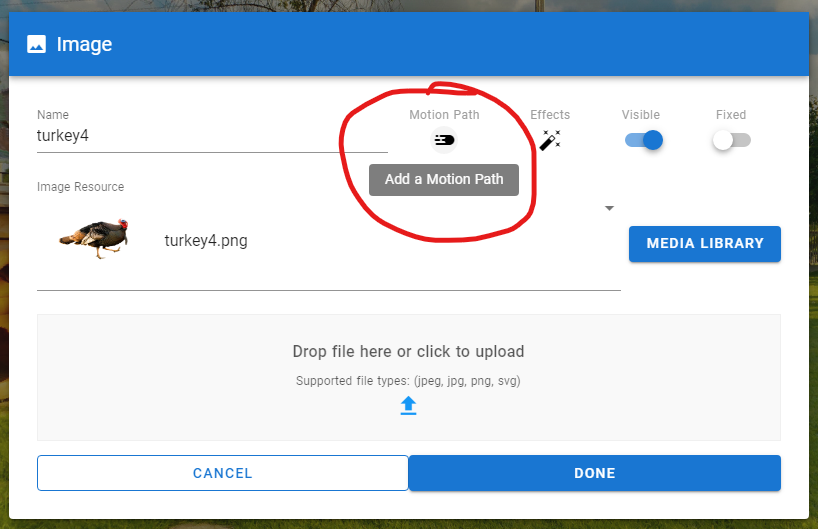
Open its options and select Add a Motion Path.
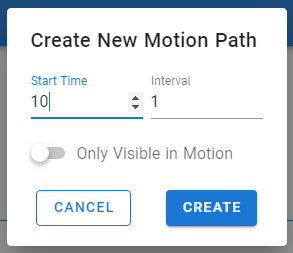
Step 3
Select a start time and the animation interval in seconds. This will determine when your object will begin moving, and how often you’ll be setting its path points. You can also select whether the object is visible before and after its motion with the “Only Visible in Motion” toggle.
Step 4
After clicking create, you will now identify each of the path points. Remember the interval you set and imagine the object moving from point to point for each interval. Moving from one side of your scene to the other in one second is VERY fast. Also keep in mind that you can adjust rotation and scale at each point, allowing for additional animation.
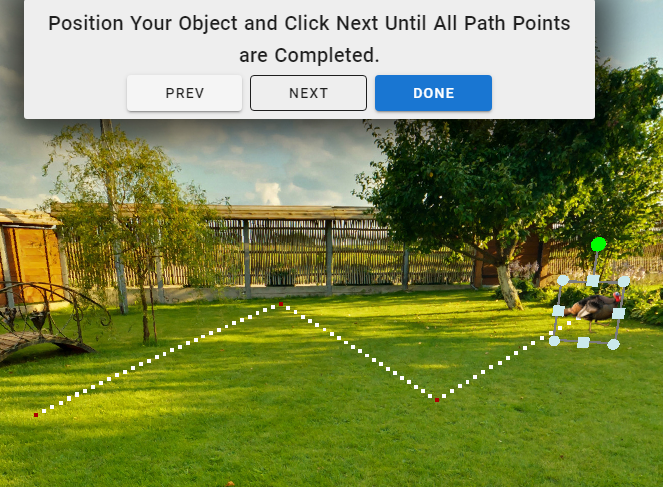
Step 5
Once you’ve completed the path, select done. And just like that, your object is ready to move.
It really is that easy. However, if you’re like me you’ll find yourself placing a LOT of motion paths at a time and you’ll want to keep timing in mind.
It’s worth noting a couple of things to help you out with that:
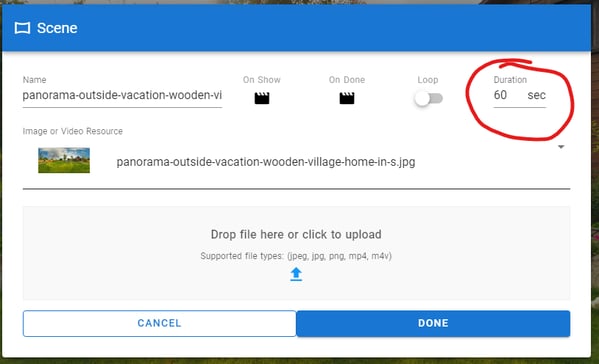
- If your scene is an image and not a video it will default to one minute in length. This can be shortened or lengthened in the scene properties. This will be important if your motion path starts at 45 seconds and runs for 20 seconds.
- If you’re using a video for your scene you will NOT have the same length options for playback, though you can set it up to loop. However, looping does not continue your timeline but rather restarts it.
- If you want your object to be clickable you need to Slow. It. Down.
Where could this be useful?
We’re glad you asked.
We’ve already seen this be used in several types of courses, and can think of a few more where it’s extremely useful.
- Threat Assessment
- Identifying a potentially dangerous person in a crowd
- Reacting to active shooters
- Anti-terrorism training
- Theft Reduction
- Identifying and preventing shoplifting
- Gamification
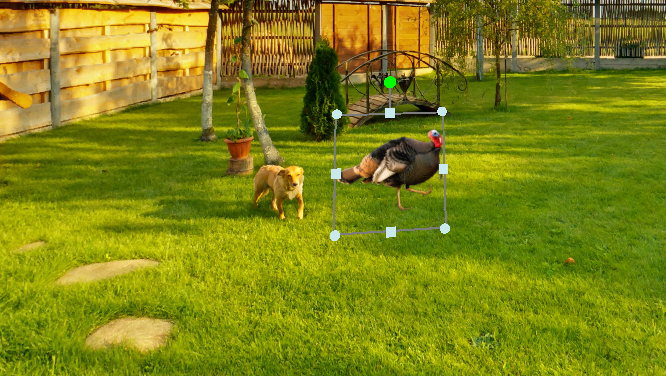
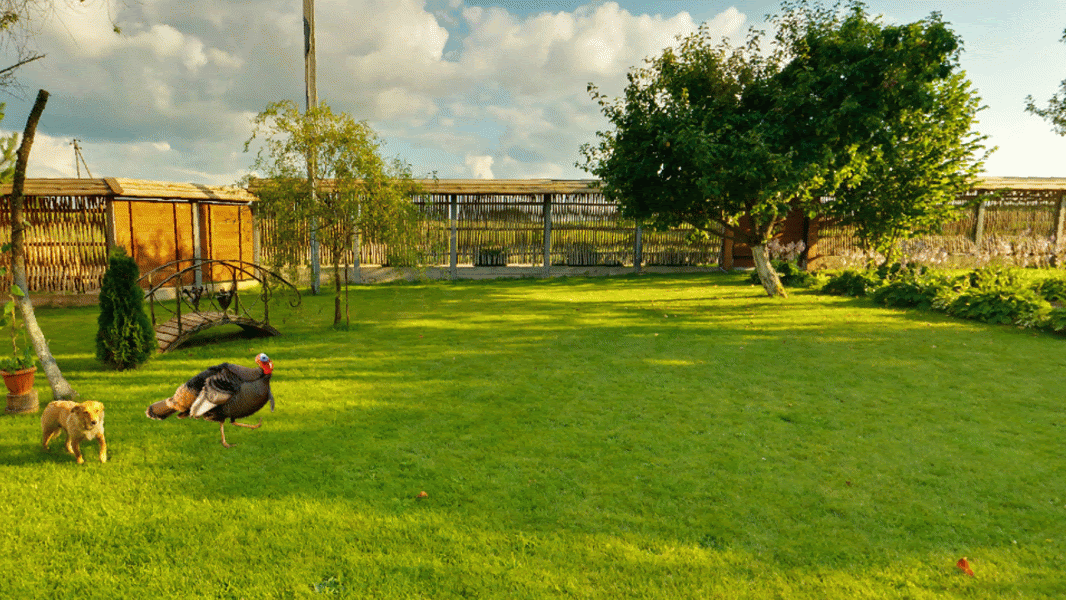
- Catch a moving object—like our Snag a Turkey game for Thanksgiving
- Identification
- Identify an object—which of these moving fish is a rainbow trout?
- Identifying the right person to talk to in an onboarding training
Play our Snag a Turkey game now to get a taste of what you can do with motion paths, or sign up for a free trial of CenarioVR.