By Dean Hawkinson
I recently had the chance to attend a two-day course on using Lectora. Although I have been using Lectora extensively for a few years, what I know was self-taught or learned through the example of others who use the software. I never had any formal education on using it. So, attending this course was a good “back to basics” for me, and I was pleasantly surprised to learn a few tips and tricks that I did not know about Lectora.
In this post, I would like to address four different tips that I picked up:
- Using Editors
- Adding Notes
- Title Properties/Additional Files tab
- Snap To Guides
Using Editors
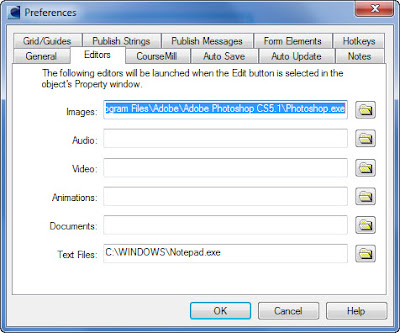
Little did I know that Lectora provides you with a place to designate outside applications for editing objects such as images, video and animations. You can access the Editors by selecting File/Preferences and then clicking on the Editors tab.

Let’s assume you edit a lot of images for your course. Click the folder icon next to the Images field, and navigate to the launch file (usually located under the Program Files folder in Windows, and with an extension of .exe). Once your Editor is set, simply right click on your image in Lectora and select “Edit” and it will automatically launch your image in the selected software such as PhotoShop. In addition, when you save the file in the application, it will automatically save the image in Lectora! It is that simple. You can follow the same process to select Editors for audio, video, animations, documents and text files.
Adding Notes
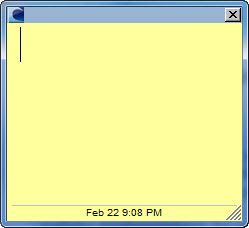
Imagine you are developing a course in Lectora, and there is a particular page that still needs additional information from your SME. This is where Notes come in handy. Simply go to that page and select Tools/Add a Note from the menu bar, and a text box will appear.

Simply type your text in the Note, and save your file. A little note icon will appear in the upper-left corner of the page. This note will be viewable to you when you access the file in Lectora, but will NOT be shown to your end users when you publish your course. You can even right-click on the note and select Note Color to set different colors for the note. This is a great tool for you as a developer to write notes to yourself about the development without impacting the actual course itself.
Title Properties/Additional Files Tab
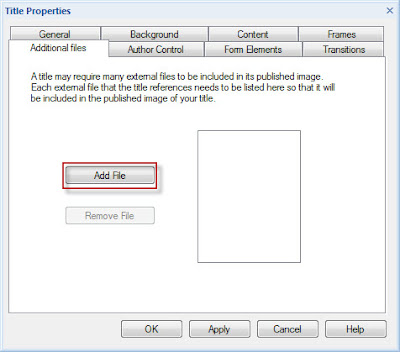
Highlight the title in the “tree” of the page and right click. Selecting Properties will bring up the properties dialog box. Clicking on Additional Files will provide you with one location to add any PDF or other file that your participants will launch during the course. Simply click on Add File and select the file you want to use.

On the page where you want to launch the file, simply go to the properties dialog box and select the file from the drop down list.
Snap to Guides
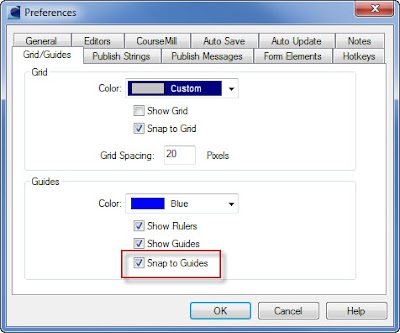
If you are like me, you live by the Guides in Lectora when developing to make sure your text and images line up properly. Using Snap to Guides takes your text or image and aligns it with the Guide if you drop it anywhere close to it. You don’t have to worry about spending time making those tiny adjustments making sure it fits!

Select File/Preferences and choose the Grid/Guidelines tab. Then, check “Snap to Guides.”
Know of any other small tips or tricks for Lectora? Feel free to share!


No comments:
Post a Comment
Thank you for your comments.