

What You Can Customize in Drive
The Knowledge Guru Drive authoring tool allows you to create a Drive game that’s unique to your organization by customizing it with names, logos, registration fields, and more. This article focuses on the look and feel of your Drive game and explains the steps to create a unique Drive experience for your learners.
Customize Your Drive Game
Let’s start with your game name and introductory text. Your players will see this introductory text the first time they log in after your Drive game launches. It typically explains what the game is about and how they will play.
Here are the steps to customize your Drive game name and introductory text:
Quick Steps
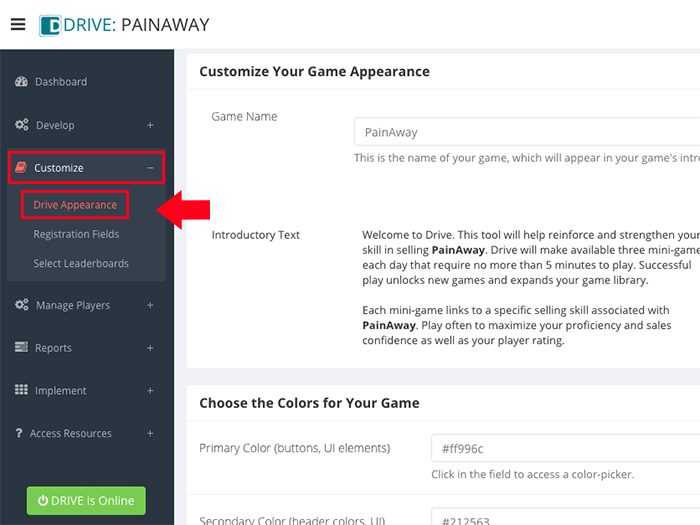
- Expand Customize option within left-hand navigation pane, and select Drive Appearance.
- Enter the name of your Drive game in the section next to Game Name. Your game name will automatically appear in your introductory text.
- Click SAVE.
Choose Colors for Your Drive Game
Every Knowledge Guru Drive game comes with a default color palette. If you want to change that color palette to reflect your organization’s colors and branding, follow this quick tutorial.
Quick Steps
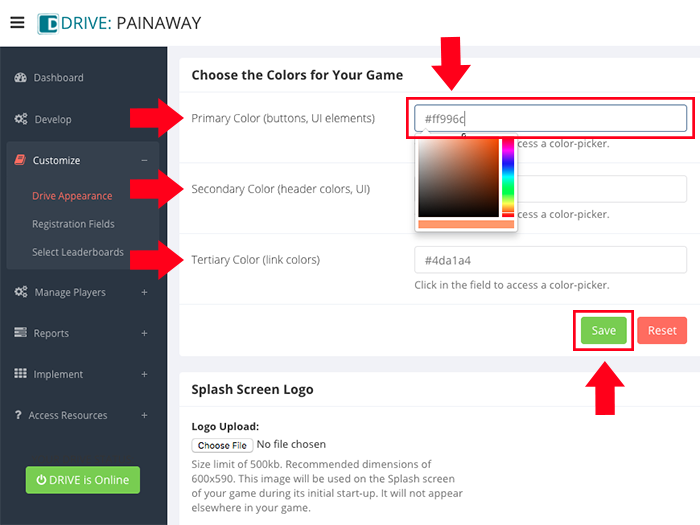
- Expand Customize option within left-hand navigation pane, and select Drive Appearance.
- In the field labeled Choose the colors for your Drive game, you can customize your Drive game’s branding with three different colors.
- Next to Primary Color, enter a color code or click the field to access a color-picker to choose the primary color for your Drive game. Repeat this step for your Secondary and Tertiary colors.
- Click SAVE.
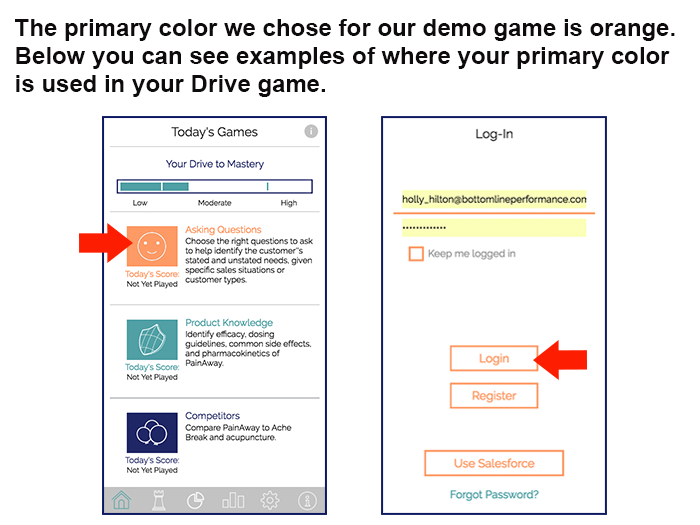
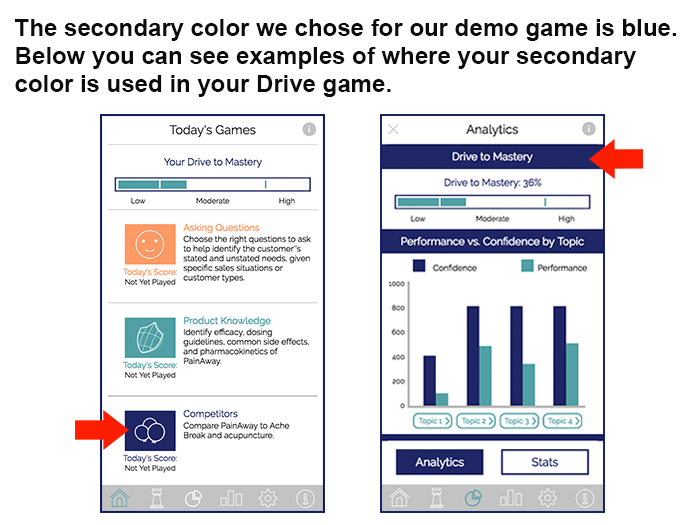
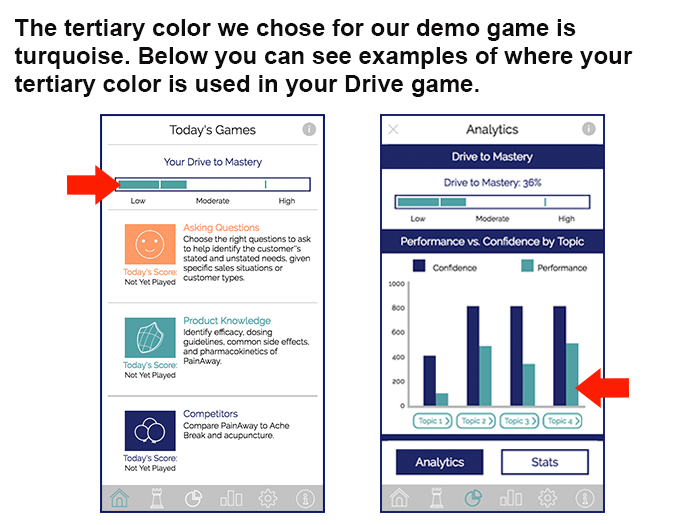
The primary color you choose dictates the color for all buttons and user interface elements in your Drive game. The secondary color is the color for headers and user interface elements. The tertiary color is the color for all links in your Drive game.
Click through the slideshow below to see the steps in action.

Swap Out a Logo
Every Knowledge Guru game comes with its own default logo. If you want to change that logo to reflect your company or the game’s name, follow this quick tutorial.
Quick Steps
- Expand the Customize option within left-hand navigation pane, and select Drive Appearance.
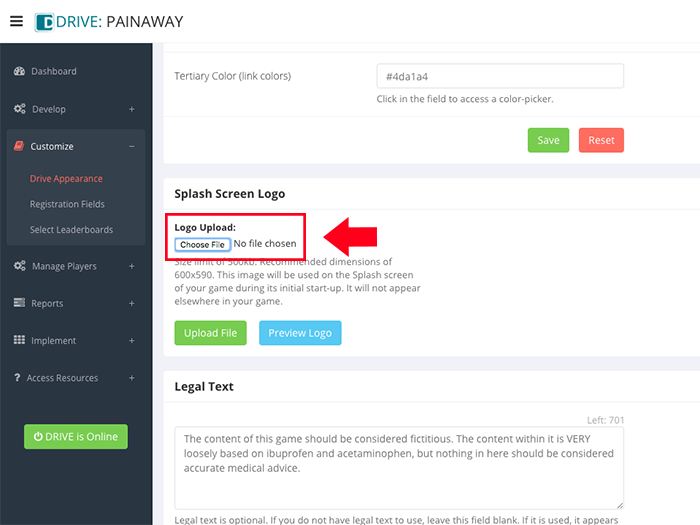
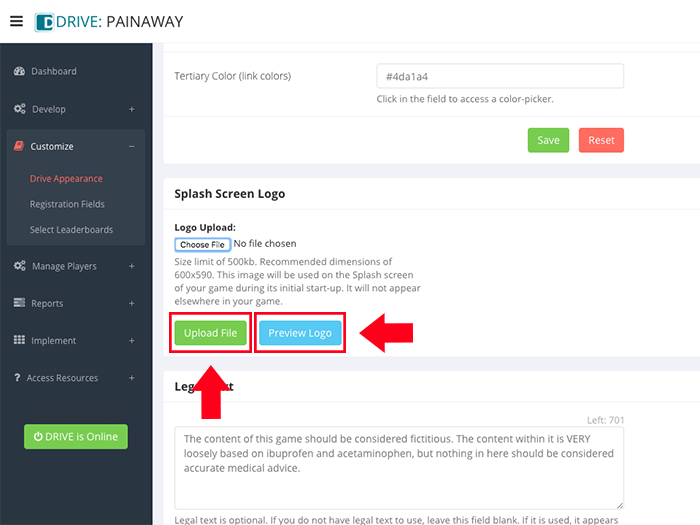
- Scroll down to the field labeled Splash Screen Logo, and click CHOOSE FILE. Make sure the new image has a correct file size and has the right dimensions as specified. The size limit is 500kb and the recommended dimensions are 600 x 590.
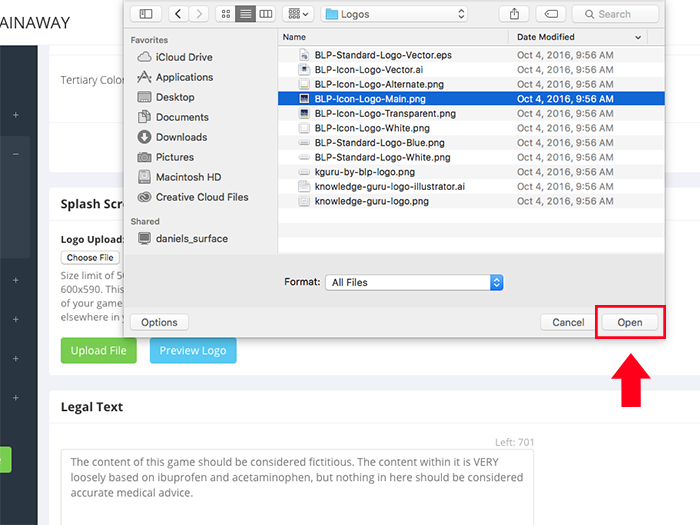
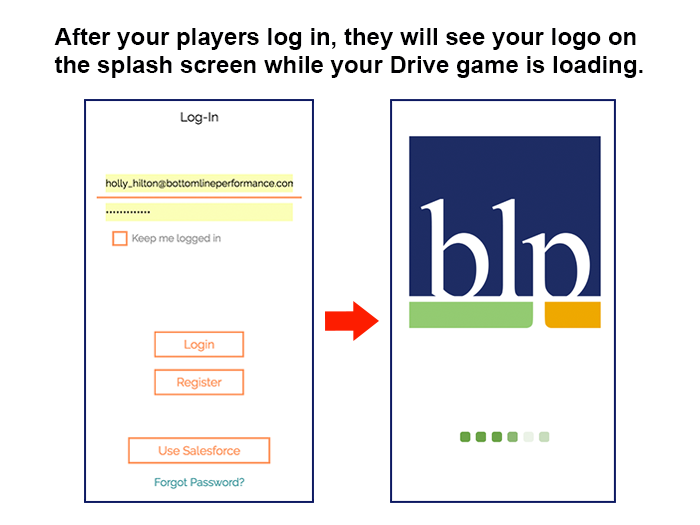
- Click OPEN and UPLOAD FILE. You will see your new logo on the splash screen of your Drive game during start up. It will not appear elsewhere in your game.
- Click PREVIEW LOGO to preview what your logo looks like.
Create Legal Disclaimers or Notices
Companies often want to include a legal disclaimer when using Drive. This optional text will appear after your splash screen on your Drive game during start up, unless it is left blank.
Follow these steps to insert a legal disclaimer or notice:
Quick Steps
- Expand Customize option within left-hand navigation pane, and select Drive Appearance.
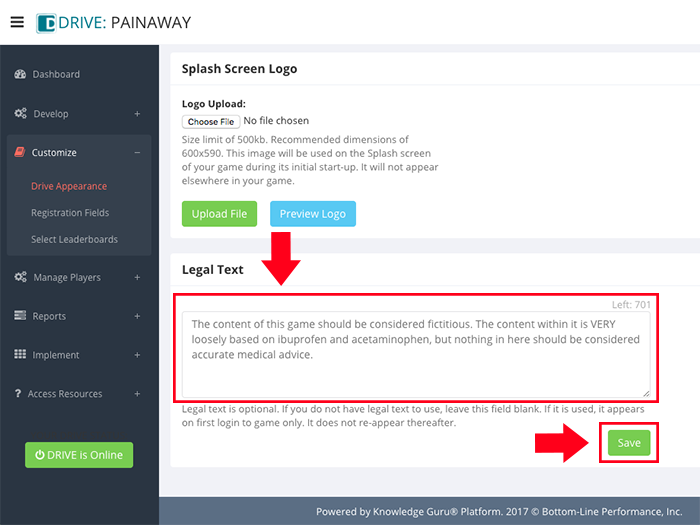
- Scroll down to the field labeled Legal Text at the bottom of the page and enter your legal disclaimer or notice.
- Click SAVE. Your legal text appears on the first login to game only. It does not re-appear thereafter.
Click through the slideshow below to see the steps in action.

For information on how to customize your registration fields, click here. For information on how to select leaderboards, click here.


