

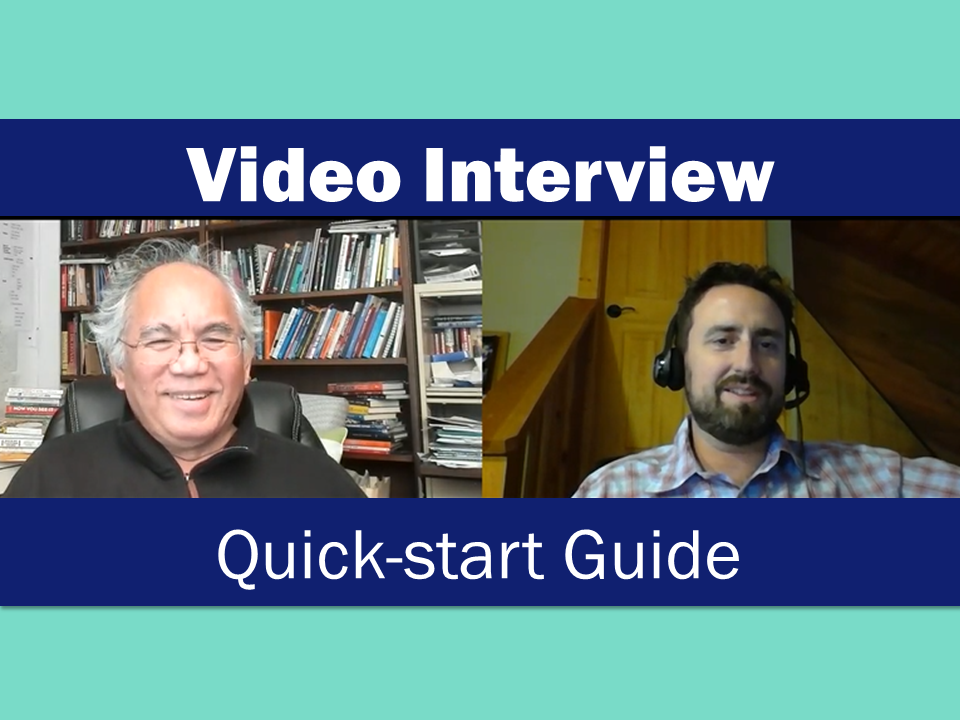
My recent attempt at recording a video interview was a fail.
Original plan: record a skype video call.
Sounds easy right?
But it required a 3rd party plugin. I spent hours trying to figure it out…And then I gave up… 🙁
New solution: Use Zoom Meetings to record an interview
That’s how I recorded all 11 of my “eLearning trends” videos over the past few weeks. It was a really good experience.
I’ll even share the exact workflow checklist I use for my interviews.
The reasons I love Zoom for interviews is that it’s
- Easy for both me and the interviewee to use
- It’s stable
- Built in recording features to MP4 (no 3rd party plugins!!!)
Oh… and you can do all of that with the free version.
Crazy, right?
FYI- Zoom is not an affiliate. It’s just a tool that I use and love. 🙂
So let’s jump into recording our first interview together!
0: Interview prep (10 minutes)
The overall goal of these “quick-start” articles is to take action on the eLearning trends picked by the experts.
Video was the #2 trend.
And conducting a video interview via Zoom is one of the easiest (and free) ways to get started.
So let’s jump right in.
A: Pick a person to interview.
Don’t shoot high with this one (no CEO or C-level anything!). Interview someone respected, but who won’t get mad if the video is a fail and you have to reshoot.
B: Pick a “Goldilocks” question
From the microlearning lesson, let’s pick a question from the “Goldilocks” video section.
Not so long that it’s a 30-minute response…
And not so short that it’s a yes/no response.
A good goldilocks question could be something like this:
What’s your #1 tip for [INSERT ROLE] to [DOING A SPECIFIC TASK]?
C: Set your expectations
The goal here is twofold:
1: “Try not to suck” as [Sam Rogers said in our interview about video]. Yes, the bar is low. This isn’t a Hollywood blockbuster. You’re not buying expensive equipment. You’re just creating something quickly and hoping it doesn’t fail 100% (but it’s ok if it does).
2: Run a complete interview production cycle from start to publish so you can identify errors BEFORE batching and scaling the process.
Now…
Let’s dive into Zoom and get this first interview rocking!
1: Install the free version of Zoom meetings (5 min)
Signup on Zoom Meeting on their website here with you email address.
Then follow the instructions and prompts.
Everything we’re doing in this tutorial can be done with the free account.
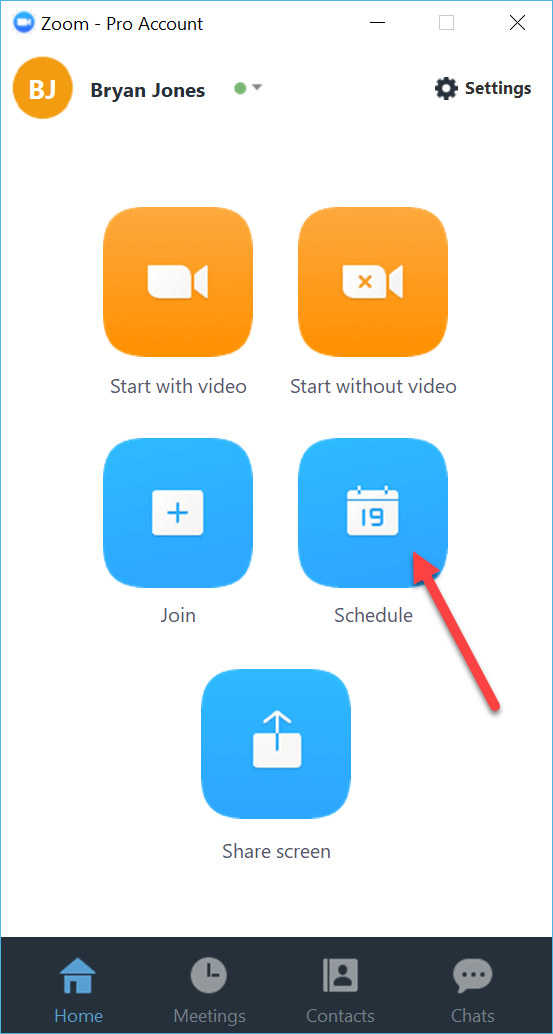
2: Schedule the call (5 minutes)
One of my favorite features with Zoom is the scheduling option.
Click “Schedule”
You’ll see a window like this:
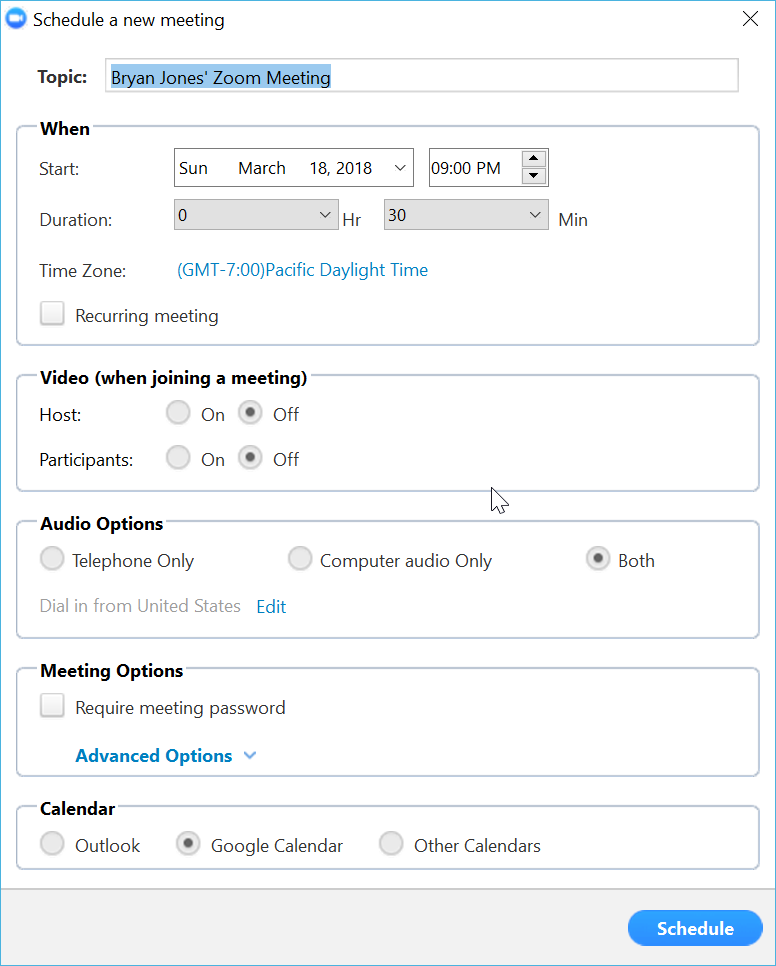
Here are the important settings:
- Topic: Interview [topic] [interviewee name] & [interviewer name] (note: this is how it’s saved to your computer AND how it’s titled on your calendar, so change the default!)
- When: Select from the calendar
- Audio: Computer audio only (we’re recording locally & also don’t want sync issues)
- Calendar: Select your calendar type (I use Google)
Once you click “schedule” you’ll add it to your calendar using the calendar prompts.
3: Send the details to the interviewee
Zoom isn’t sending the invitation to your interviewee. The invitation will come from your calendaring app.
In a Google calendar, you just invite them as a guest.
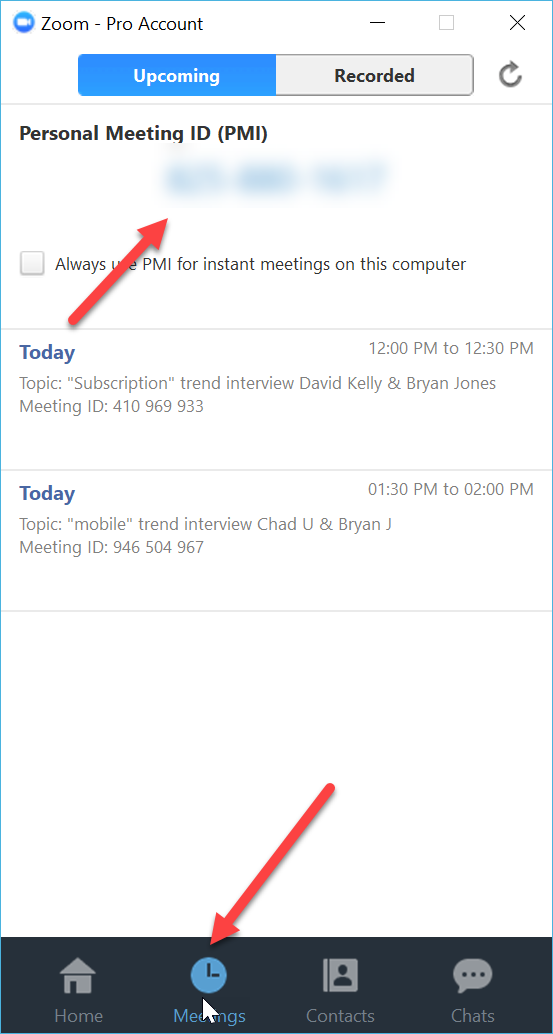
If you’re having trouble setting up the calendar, just copy the meeting room ID and email it directly with a link to the Zoom “join” page.
Note: To get your meeting ID, go to “meetings” and look at the big blue number at the top.
4: Go live with your meeting (10 min early)
Plan on getting to the meeting early to test your lighting, mic, and settings (see next step).
To launch a scheduled meeting, just click on the “meetings” tab:
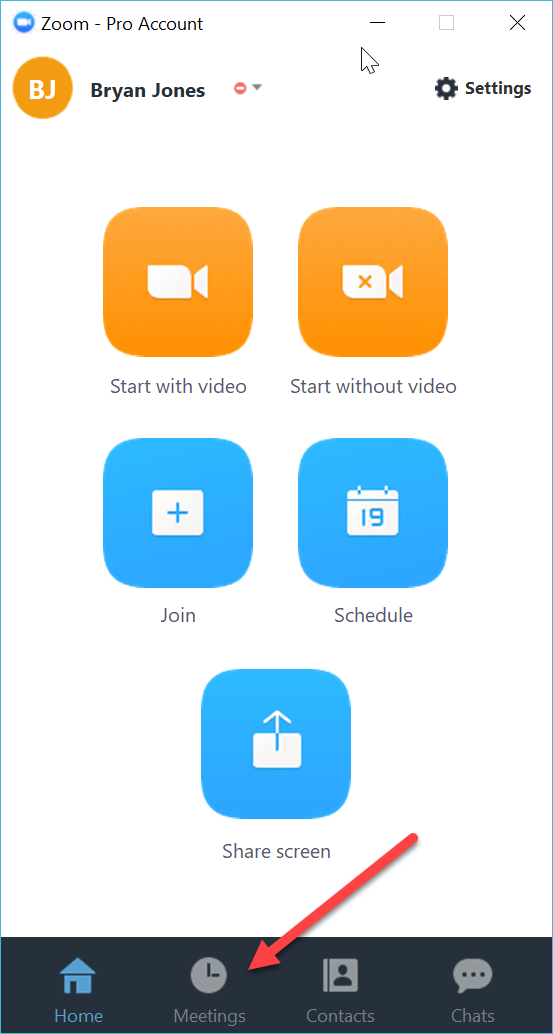
You’ll see this screen:
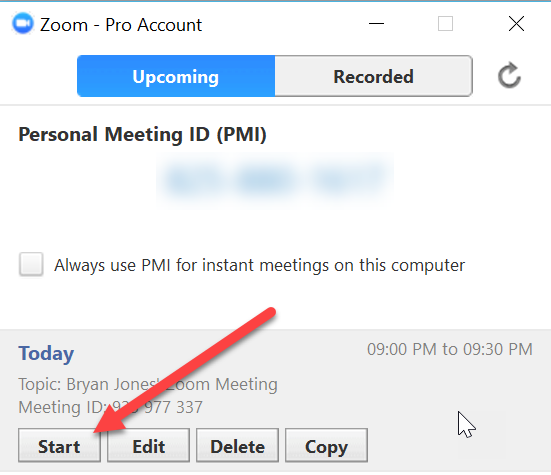
Scroll down until you find the meeting, then click “Start”
5: Check the following settings
This is your first video, so don’t worry about things being perfect.
When you launch, you’ll be asked about how you want to join the audio:
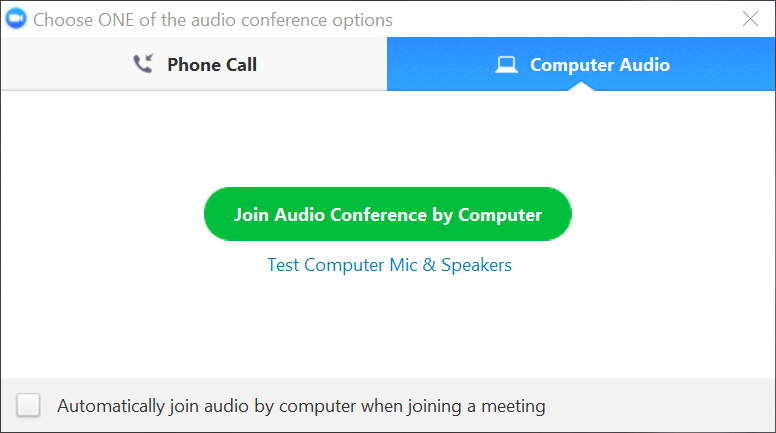
For your first time, I suggest you “Test Computer Mic & Speakers”
Ideally, you have an external microphone. I use a cheap, $30 USB headset mic and it works great.
If you don’t see the prompt above, you can always go to the “settings” here:
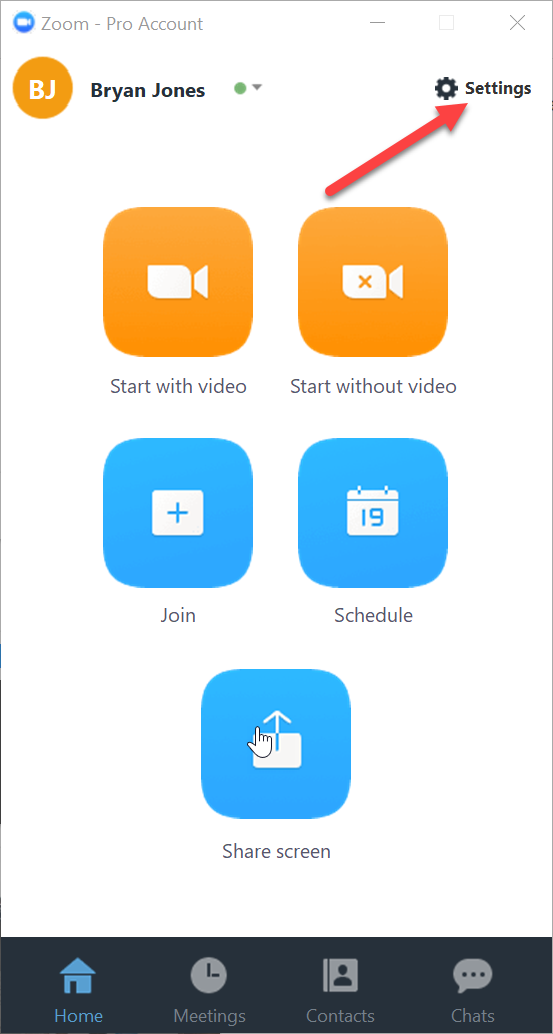
I also suggest you check the video settings.
Click “settings” again
You’ll be on the settings window:
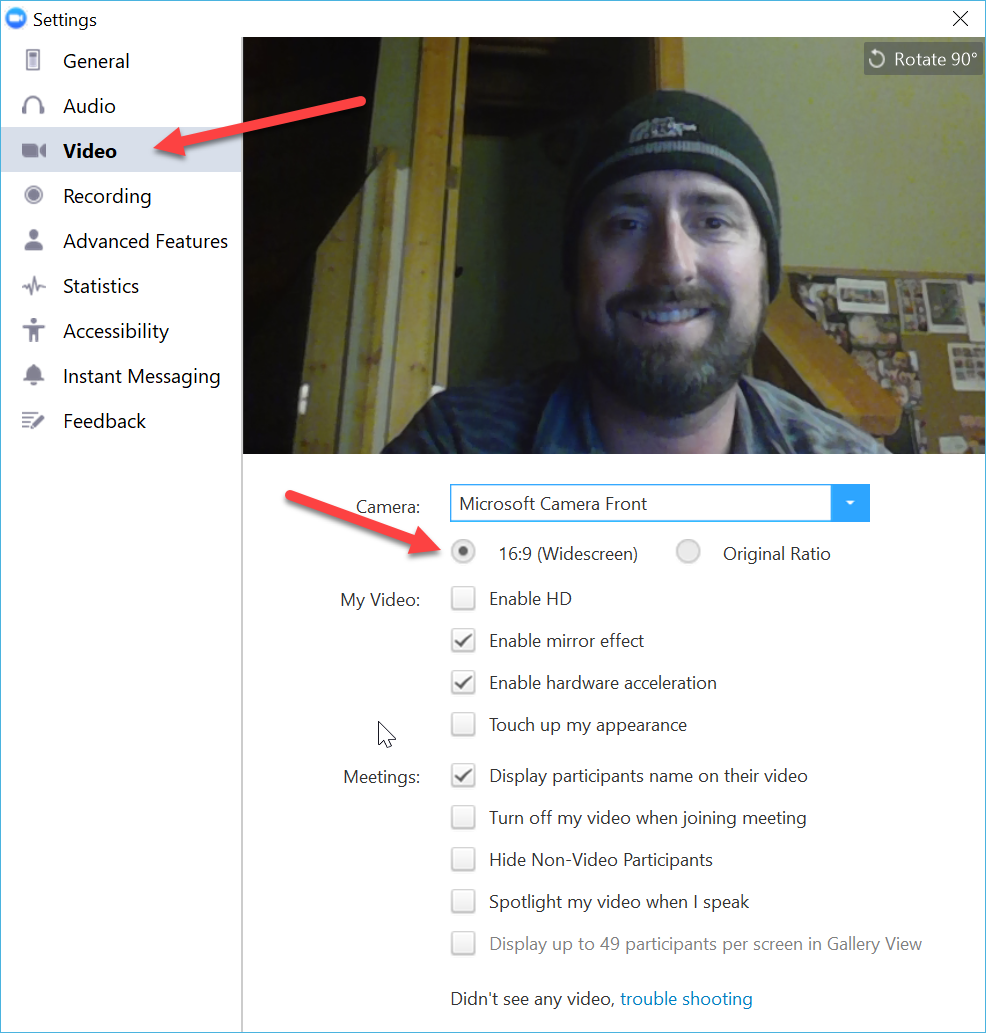
Go to the “video” tab and make sure it’s set to 16:9 (widescreen)
Advanced settings tips:
- Put your notes close to the camera: Put anything you plan to look at (questions, notes, the zoom window) close to where your computer camera is so you’re not staring off into space during the recording.
- Change your settings for screen share: If you’re doing a screen share, not just videos of faces, be sure to set “Optimize for full screen mode” or you’ll end up with a wonky aspect ratio.
6: Chit chat with the interviewee to test the system
You’ll want to verify:
- They can hear you
- You can hear them
- Audio and video look good
- Internet connection is stable (no freezing)
Advanced tip: Once a 2nd attendee is in the meeting, you have two viewing options, and the recording will be whatever you select:
Gallery view (both of you will be visible): It’s nice to see both people, but it won’t fit perfectly in a 16:9 aspect ratio when you publish. You’ll get a black box above and below in the output.
Default output resolution is: 1280 x 720, which is large enough for HD!
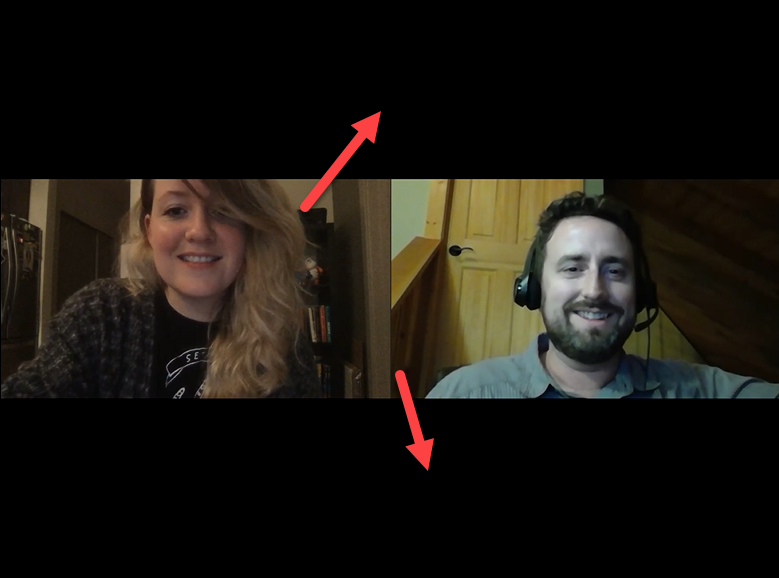
Speaker view (the video automatically shows only the person who is speaking). It’s nice to have a full view of the speaker. But you can only see the speaker and the process is automated on who shows (you can’t control it). The system does a really good job, but it’s not perfect. One potential issue with this view is that it sucks up more bandwidth, so the default output resolution is 640 x 720 (which is ok, but not HD) unless you enable HD (“business” plan or above required).
My advice: It’s personal preference. For my video interviews, I mostly used the “gallery” view and didn’t worry about the black boxes above and below. I also like having the higher resolution video output.
Note: for resolution issues, you can check out real time statistics to see what zoom is using.
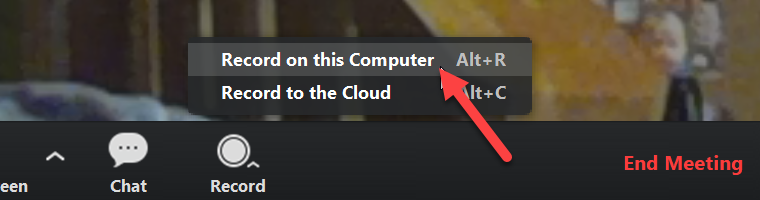
7: Start recording
Click “record” to start the recording, then “Record on this Computer”
Wait a few seconds before starting you interview so that you can:
A: Make sure the record light is going.

It’s not cool if you do a long recording only to find out you’re not recording
B: You don’t start talking before the recording has started.
You can always trim that intro silence. But you can’t add back in anything that’s been cut off.
8: Conduct the interview
Ask your question and listen during the response.
I’d recommend waiting a few seconds before ending the interview so you don’t cut anything off.
When you’re done, stop recording by clicking “stop” in either of these places:
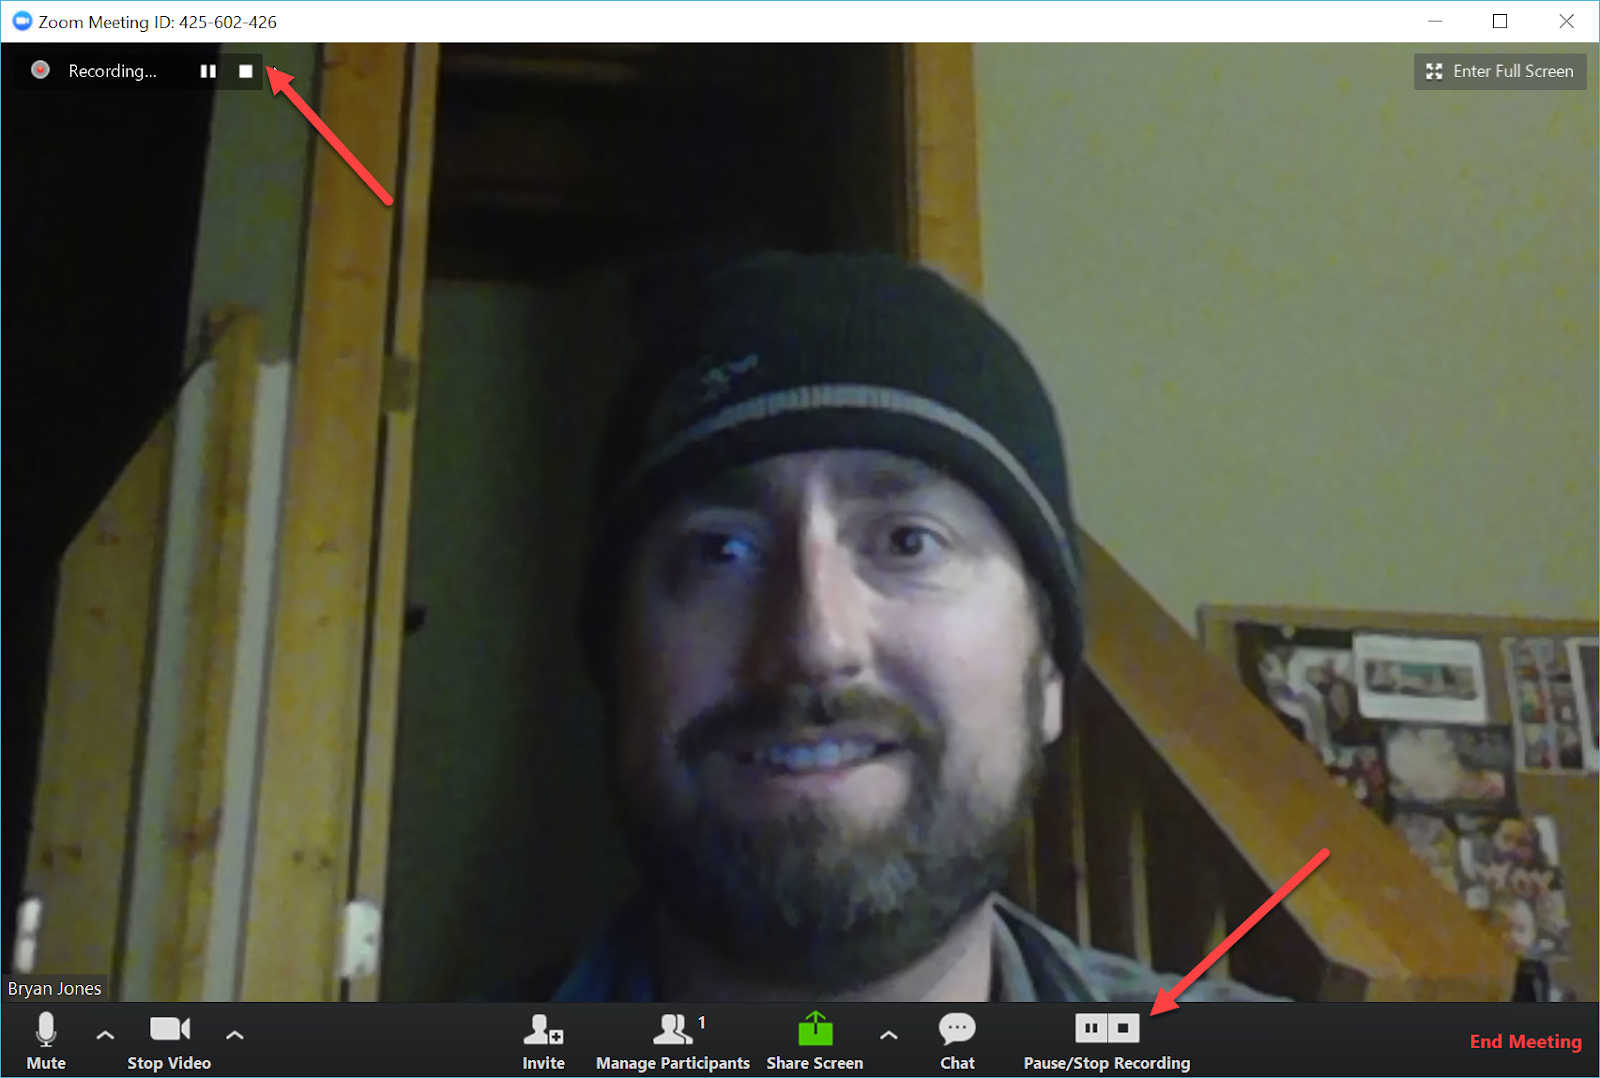
Note: the mp4 won’t download yet. That happens once you “end meeting”
9: Close out the meeting
While you stopped the recording after the question was answered (above), the meeting will still continue past the recording.
Thank your interviewee and talk about whatever you want. It’s not recording anymore.
Click “End Meeting” in the lower right of the screen:
![]()
Once you “end meeting” the conversion process will start.
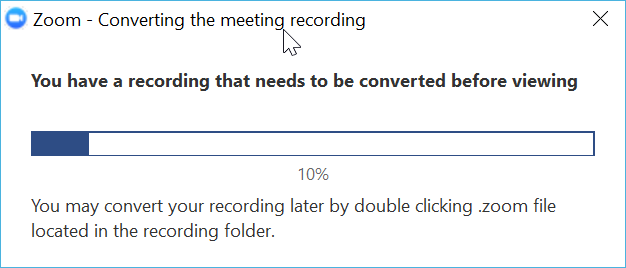
I recommend you don’t do anything with your computer until the file has completed.
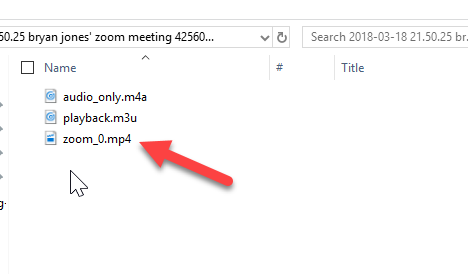
Once the conversion finishes, the folder should open. The video file is the mp4.
10: Edit if necessary
My advice: Don’t edit it! At least for your first video.
Your video should only be a single question and answer for now.
So very little editing should be required.
Unless there’s something really messed up…
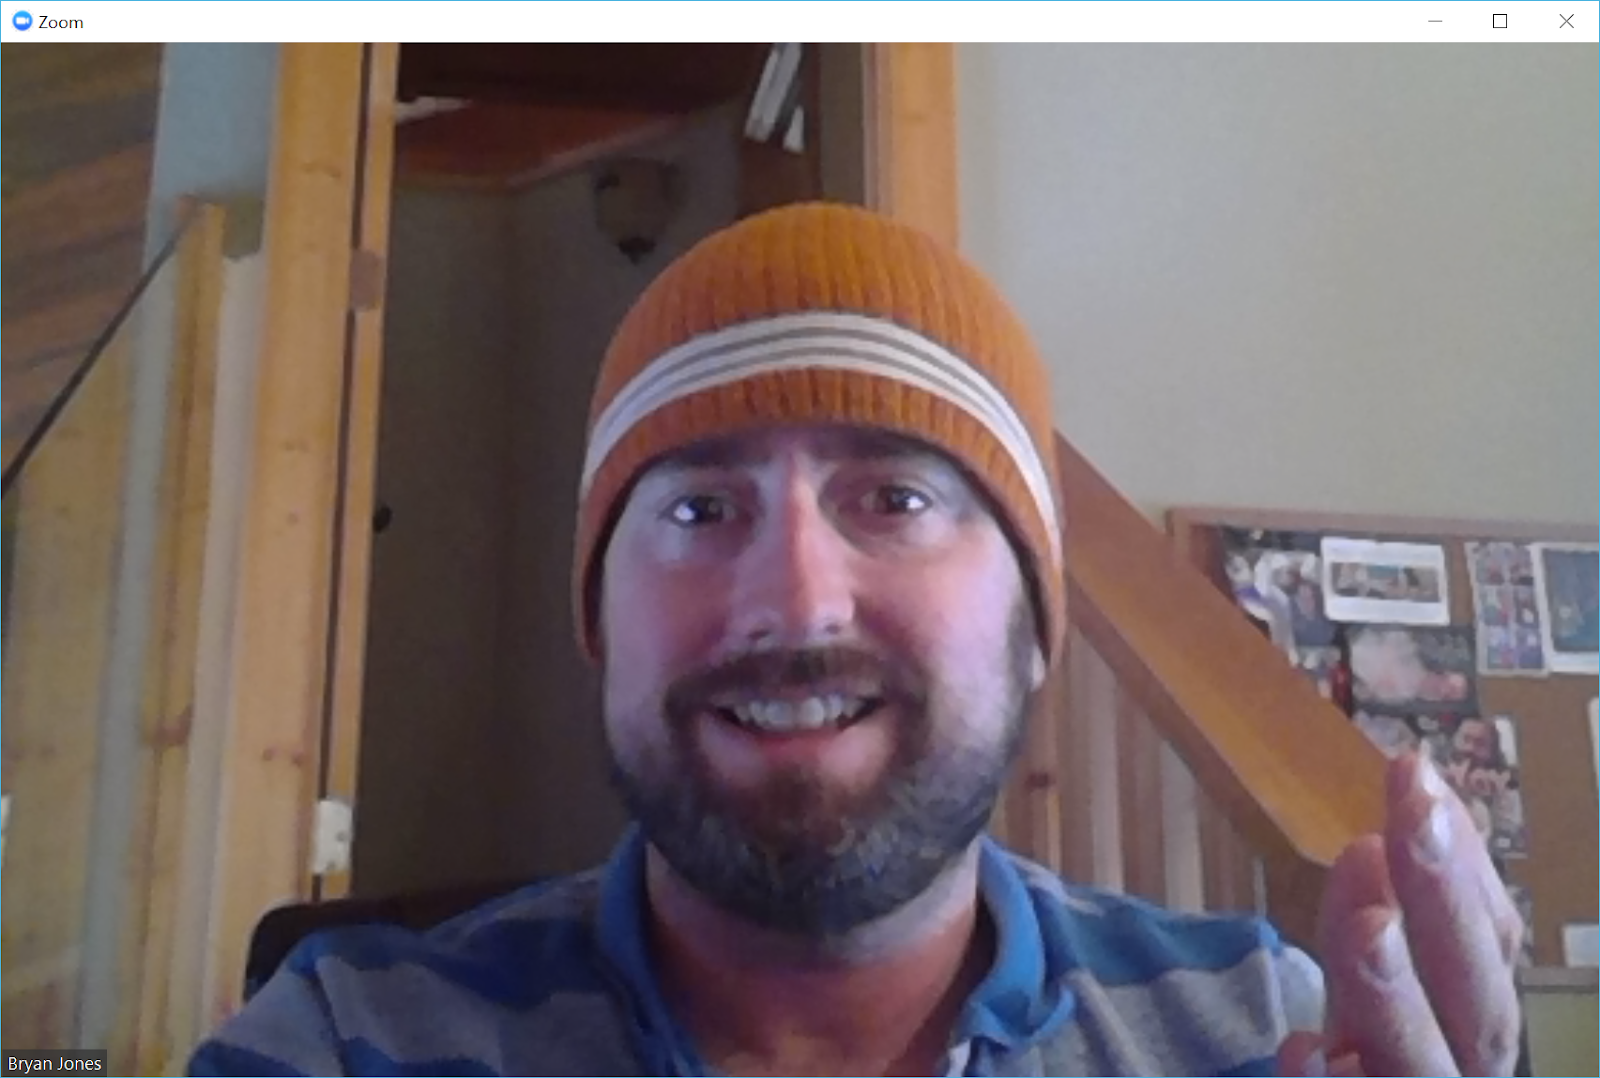
Or embarrassing… like this…
True (and embarrassing) story… my nose whistled really loud when I took a breath right before starting my interview with Ray. Even just using YouTube, not a desktop video editing software, I was able to crop out what I needed to b/c it was at the beginning. It only took about 15 seconds.
But you can spend hours…
Dozens of hours…
Hundreds of hours…
…on editing
So just let it be if you can.
11. Upload the mp4 to your video provider
I used YouTube, but you can use Wistia or whatever program you want
Congrats! You just created a video interview in Zoom meetings!
If you’d like to see some example video interviews I’ve done, here you go:
Microleaning:
Video:
xAPI:
Science-based learning:
Subscription learning (NOTE: this one is the “speaker view”)

