


“The best-laid plans of mice and video creators often go awry.”*
When beginning any project, planning is of the utmost importance. A close second is the ability to shift those plans quickly when they come crashing down around you.

We’ve written a lot on this blog about the importance of pre-shoot preparation, such as scripting and storyboarding. You can even take TechSmith Academy courses on these very topics.
Prep work is crucial to guide your production toward success, but even a few simple video tips will help to boost your confidence and increase your success rate while capturing footage.
What if…
- you show up to film a training video and it’s raining at your outdoor location?
- the real-life setting you’re given to work with looks nothing like your manager-approved storyboard?
- the person you’re recording appears stiff and uncomfortable in front of the camera?
No matter what, you need to have the ability to regroup and still achieve your original goals. Here are a few ways to prepare for these possible hiccups.
TIP #1 – Scout your location.
 Visit your location ahead of time! See what it looks like on the ground. There are a few major benefits to doing this:
- Having a clear idea of what you want to see, coupled with what your location actually looks like will bridge the idea and execution stages. If you show up to film in a wooded setting and it looks like a suburb, you can be proactive (see Tip #3 for an example).
- Take your camera and snap some still images where you expect to film. Use these photos to build your storyboard with. When you pitch your idea, everyone will clearly see the setting and easily envision your concept.
- Google Maps don’t go everywhere. Be honest, after reading, “scout your location” you considered just using maps, right? That’s fine for some close-to-the-road exteriors of buildings, but you can’t see inside buildings. If it’s too far off a main road, it won’t be mapped at all. Plus, you’ll get distracted looking for crazy people posing for Google’s car camera, which isn’t terribly productive.
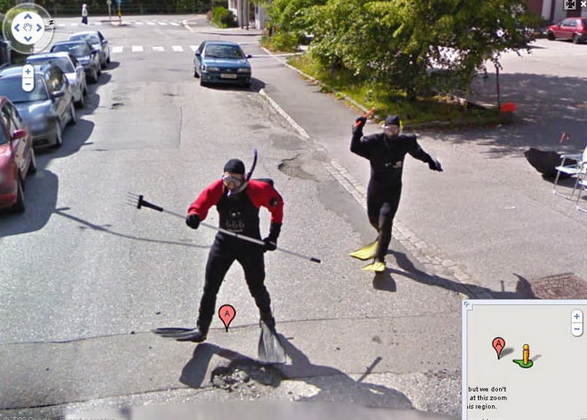
(Google Maps car-cam posers)
Going there in person gives you a chance to find the best spot to set up, lets you potentially look inside closed-off areas, and figure out any tricky location logistics in advance.
Not conveniently located to the area you’ll film?
Take an example from a recent shoot:
Here at TechSmith we recently completed a day-long shoot with marketing guru Jay Baer. Since this trip was out of our geographic area an advance scouting excursion wasn’t realistic. Fortunately, we asked, and Jay was kind enough to take us on a virtual tour. He filmed a quick walk-through of his space to give us an idea of how much room we’d have to work with, so we could come to the shoot prepared.
 (Thanks to Jay Bear’s pre-shoot walkthrough, we came to the location prepped to film.)
TIP #2 – Play to the strengths of your talent.
Maybe you’re lucky and get to work with someone as talented as Jay Baer. He speaks professionally for a living, after all, so rather than scripting him, we simply constructed an outline and idea for each piece. His natural gift took over and we walked away with exactly what we’d hoped for; something better than we could have scripted.
Unfortunately, it won’t always be that easy.
Most of the time you’ll need to write scripts that your talent can follow. Ideally, you want to write your script with your talent in mind.
I learned this the hard way a while back producing teaser videos for large events. Despite writing thoughtful scripts ahead of time, the outcomes yielded mixed results.
I finally realized the problem – I was doing it all backward.
I wasn’t writing scripts for our team, I was writing our team into scripts.
Once I began including our people in the process, the final video was much more dynamic and emphasized each person’s individual strengths. If it’s not possible to include your talent in the scripting process, do your best to tailor lines that you know will bring out the best in them.
One of my favorite examples of this was when we purposefully paired Matt Pierce, an extroverted Learning & Video Ambassador here, with Danny Wittenborn, one of our Development Managers who is more introverted. We knew their personalities could contrast well, so we put them together in one intentionally-awkward take:
So you’ve gone to great lengths to find someone comfortable on camera, or pair two contrasting personalities together to create a fun collage, but even after that, when you start recording, they stiffen up and get uncomfortable. A few last minute video tips here might include:
- Let your talent read from a script or cue card.
- Remind them to smile. Nerves tense people up, but smiling can remind us to relax.
- Have them talk toward you, off-camera, rather than right into the lens, which can be intimidating.
TIP #3 – If something doesn’t work, change it
Remember the conversation about not being able to personally scout a location for Jay Baer’s filming? While he gave us a virtual tour of his place, I’d neglected to mention that we also needed to film in nearby woods. The final destination of these videos was the ebook titled, “Can a Bear Make a Video in the Woods: The Marketer’s Ultimate Guide to Video.” So, clearly, finding the perfect wooded area was pretty important.
When we arrived, we went out to his yard and began snapping pictures. I realized while they were ‘woodsy’ it was still feeling a lot like a backyard. This was not what we had in mind during our many planning meetings.

It wasn’t right. We needed woods. Instead of staying quiet, I mentioned that I was seeing too much grass in the shot and without missing a beat Jay pointed down the hill to a ravine we had somehow neglected to consider. It was perfect.

In this situation, planning was crucial, but not because I immediately ‘nailed it.’ Instead, because we were flexible. Using our plan as a guide, I had the freedom to say, “Something’s not right here,” and the confidence in my decision to change it at the last minute.
TIP #4 – Try something new
The best way to lose interest in anything is to make it repetitive. A video is no different. Whether you’re the viewer or the creator, anytime can be a good time to break the mold.
Sometimes it can be fun to think so far out of the box that you aren’t 100% certain if it can even be accomplished. Want to learn a new method or practice while creating your next video? Push yourself and your equipment to the limit.
After TechSmith recently published new original research findings about the value of visuals in the global workplace, I was tasked with creating a video to share some of those results. I could have done some sort of narrated structure (been there), or interviews with key people involved in the research (done that). Instead, I decided to try making a completely animated infographic-style video, with each graphic element leading into the next and, most importantly, I wanted to only use Camtasia to do this. I’ve done lots of work in Camtasia, but I’ve often jumped into After Effects for more complicated tasks. Not this time. And I was really pleased with my results.
Doing something a bit out of my comfort zone rejuvenated me!
We can all find ourselves in a rut from time to time, and that won’t help you produce anything worth watching. This exercise really broke me free to get creative in new ways. I would run into challenges that I needed extra help on; I collaborated closely with our designer, Brean, who created new graphics for certain sequences to help move me forward. It also showed me how powerful Camtasia can be when I put it through its paces.
Tip #5 – Filming in the rain
Filming in the rain is not ideal. It’s wet. It’s noisy. And no one’s happy. Tip #5 can be boiled down to two solutions, and I recommend you plan for them both in conjunction during the scheduling stages of your plan:
- Two dates: an earlier date as your main option, and a later date in case of rain.
- An indoor location as a backup, on the second date.
Neither situation is necessarily ideal, but better to have a plan for all situations that may arise and meet a required deadline than to be startled out of your project by a sudden deluge.
Hopefully, you’ll be able to use these simple video tips to take your well-thought-out plan and execute it successfully, even when things don’t go as projected.
*Adapted from the common English expression, “The best-laid plans of mice and men often go awry,” which is itself adapted from a line in “To a Mouse” by Robert Burns.
