How to Record Software Simulation in Adobe Captivate 9
This blog will briefly describe the process of recording software simulation using Adobe Captivate.
If you belong to an organization that is involved in developing software, you know how tough it is to create training that will teach your employees how to use software the optimal way. Doing so with classroom trainings can lead to logistical and financial nightmares. How do you overcome these problems and train your staff effectively so that they become ready to use the tool?
E-learning provides the ideal solution to this issue through “Watch-Try-Do” simulations. Simulations give learners an opportunity to “watch” and get familiar with the nits and grits of the software tool. The “try” segment gives them a chance to get hands-on with the tool by running through all the steps they have watched. This practicality equips the learner to apply the knowledge that he has acquired, remember the steps and “do” them on his own.
Various other authoring tools provide this facility to record simulations, but Adobe Captivate 9 is the most easy-to-use tool to create software simulations. It allows you to create simulations in “show me”, “try it” and “test me” modes, which are basically “Watch-Try-Do” software simulations.
It’s a fairly simple process to record a software simulation in Adobe Captivate. Let us take a look at its workflow.
How to record a software simulation in Adobe Captivate
- To create a software simulation in Captivate, double-click the “Software Simulation” icon on the welcome screen, or select the icon and click the Create button.
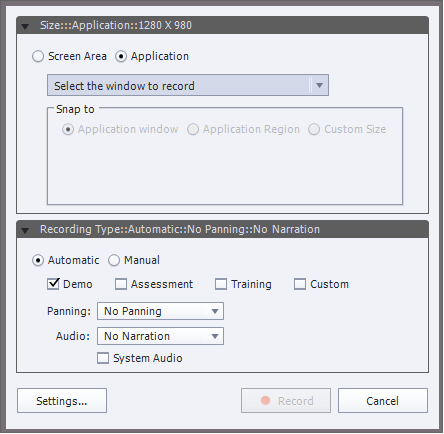
- Select the Screen Area or the Application you wish to record. You can choose Application Window, Application Region, or Custom Size to get started.
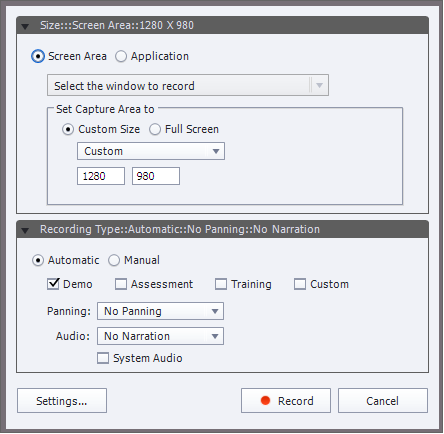
- Screen Area
Select the Screen Area to indicate onscreen actions are to be captured.
Custom Size enables you to record your project using a specific dimension – select from available sizes or specify a custom size.
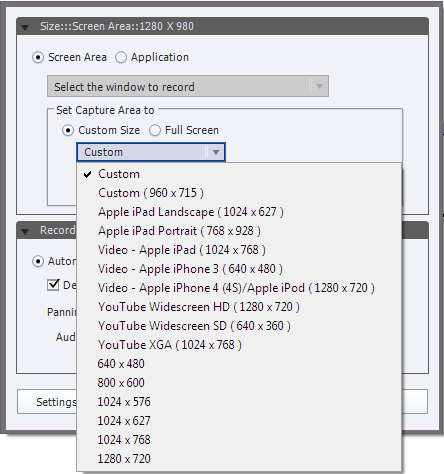
Full Screen allows you to set the size of the recording window to the size of your monitor screen.
- Application
Custom Size lets you modify the dimensions of the project you’re going to record. You have a list of standard sizes to choose from, or you can define a custom size.
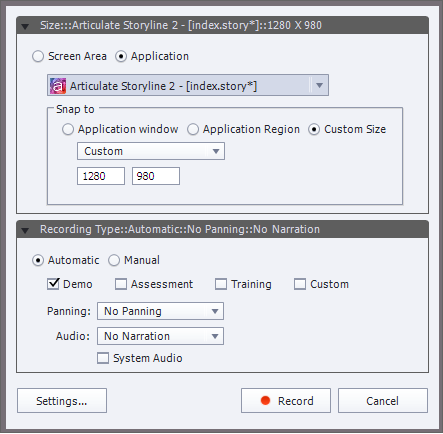
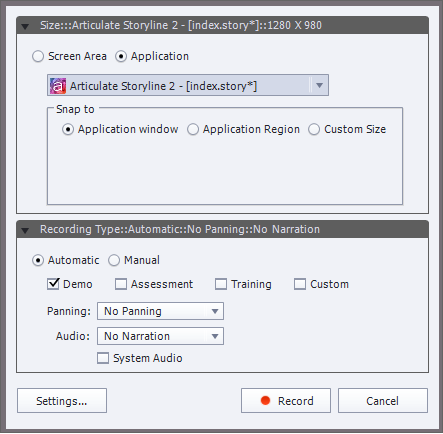
Selecting Application Window enables you to record the entire application window. It won’t change the dimensions of the application. Rather, the recorded area will be resized to fit in the application.
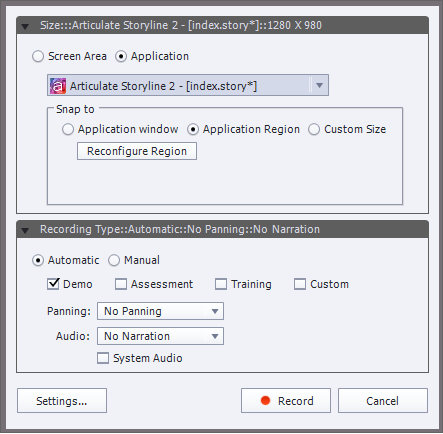
Application Region lets you record specific, defined areas in an application. Say, for example, you are recording a window with five frames, the recording window snaps to individual frames when the mouse moves over them.
- Now, you can choose to record a Demo (Watch), Training (Try) or Assessment (Do) simulation.
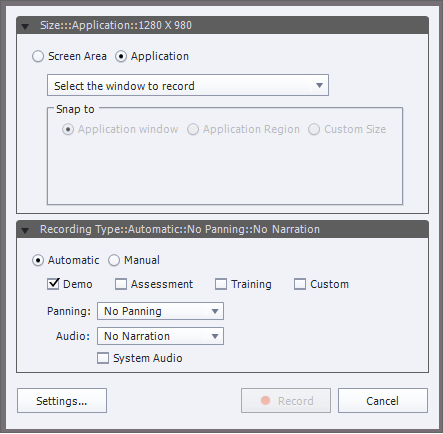
- You also have options to enable panning (recording window to follow movements on the screen), or include record narration for your software simulation.
- Once you are done tweaking the properties/settings, go ahead and click Record. Here, you can either select Automatic or Manual in the Recording Type area.
- After setting up the application window, click the Record button.
- A time counter (3…2…1…) appears after which, whatever actions (one mouse click will be captured as one screen) you perform on the screen will be recorded by Adobe Captivate. Pressing the End key stops recording the simulation, and Adobe Captivate will process all the individually captured screens and display them in the filmstrip view (on the left part of the screen) which basically lets you see an overview of your recording.
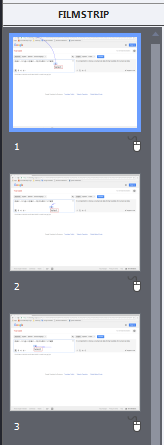
- You can move through this filmstrip to locate a recorded screen.
- At the bottom of the screen, you will find the Timeline which has elements such as the image, callouts, a mouse movement, a click box, or an audio recording. You can time these elements to appear, disappear, or pause. You can also sequence them.

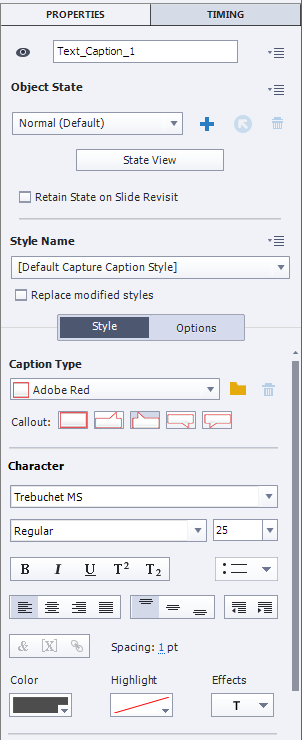
- If you wish to edit any callouts of the recorded project, find the Properties tab on the top right which enables you to edit its properties.
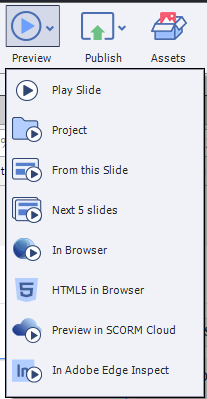
- To preview your presentation, simply head to the Preview icon above the application window. The Preview option lets you play just one slide, the next five slides, a part of your project, or the entire project.
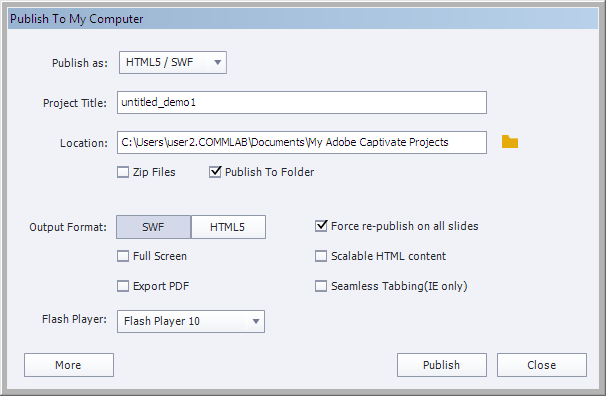
- When you have completed editing your simulation, you are now ready to publish. You can either publish to the SWF and HTML formats together, or publish them individually. You also have the option to select the Zipped version which gives you a duplicate of all the files generated by Captivate in a compressed format.
Here’s an example software simulation – Scheduling Sales Meeting with Adobe Captivate – created entirely using Adobe Captivate 9. To know more about what Captivate is capable of, check out this informative resource.
If you have any queries regarding Adobe Captivate, don’t hesitate to get in touch. Or you can always use the Comments section to voice your opinions.


