


Closed captioning is also a great tool to use for translations. Although the audio English, it is relatively simple and easy to translate the closed captions to other languages.
But you can set TOC to be hidden all the time and to appear on clicking a button in the navigation section. Maybe this would be a solution ?
Good afternoon! We have developed a course with CC and have hit a bit of a snag. In Captivate 9, there was a setting that allowed us to change the number of lines. In Captivate 2017, that is no longer an option and now the CC box only shows the first 3 lines of text without it scrolling (either automatically or with a scroll bar for the learner to scroll themselves). Anyone else have this issue?
Hi Dave,
Folks who are more knowledgeable about accsssibility than me can feel free to contradicts what I’m about to say but it is my understanding that more/shorter closed captions added to Captivate are more compliant vs. longer/fewer closed captions. It seems to me that if you have more captions per audio file/slide, you’d no longer have the issue you describe. We tend to chunk up our closed captions into smaller bits so they are easier for the hearing impaired to consume, and the captions perfectly match any pauses in the narrator’s speech pattern. Anyone else want to chime in?
You can adjust the “height”percentage that will allow you more lines. But, I found that is a better idea to use multiple shorter CC texts.
We’ve tried adjusting the height, but there’s a maximum height we apparently are hitting and that is limiting us to 3 lines.
Then I guess the only solution is to break your narration into smaller chunks. The whole implementation of CC in the latest Captivate seems to be somewhat broken, and I hope that they will pay attention to all the difficulties users are having!
CC text box alignment is a bug. CAP 4199917.
My temporary workaround is to have my TOC as an Overlay instead of having it always show. This seems to stop the CC text box from moving around…. whether you hide or show the TOC, the CC text box is then where you put it to begin with . My problem is that I put it “Bottom Right”, but when I used the fixed TOC on the left, the CC text box shifts closer to “Bottom Center”.
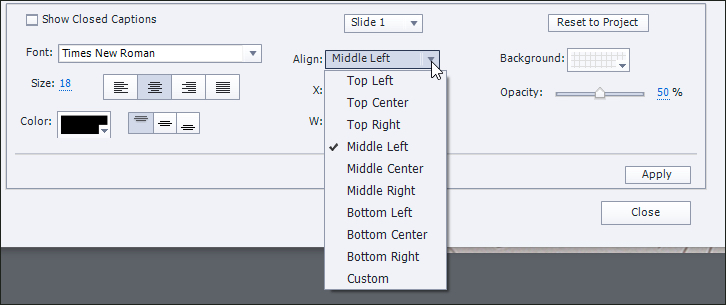
I have aligned my CC box to the right by selecting that option from the menu of alignment positions. While I am setting it up, it all looks fine, but when I go to Preview the slides, the CC text box is aligned Center Bottom!! What’s going on? “Improved” Closed Captioning??? I think not….
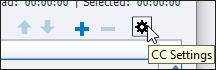
Did you notice the drop down list just above the Align option? It defaults to Slide 1, or to whatever slide you’re viewing when you select the closed caption settings. That means, whatever options you’ve selected apply only to that slide. If you want your settings to apply to the whole project you need to select “Project” from the drop down list.
Hi!
Thanks – yes, I did see the option to choose for the project, but I am still not able to get the CC box to align all the way to the right. The only setting that seems to be consistent, is if you choose center, whether it is for one slide or all.
The preview where you change the settings looks right, but then when you publish for review, it is not.
Unfortunately, if you have a lot of closed captions or they’re very long, the text window will scroll causing text you’ve entered in previous rows to scroll out of sight. When those rows come back into view, you may see the default text has replaced what you’ve typed or copied into that row. You can avoid this by saving before filled rows have had a chance to scroll out of view. It’s still frustrating and slows things down.
I’ve created a software simulation project in Captivate 2017 that demos some new features of an application and that has an audio narration. After I add closed captioning and preview or publish, there’s a very noticeable split-second gap in the audio narration when it moves to a slide with captioning. Slides that don’t have captioning don’t have the audio gap. When I remove the closed captioning, the gap goes away. I’ve tried everything I can think of, such as having the closed captioning text start later in the slide or by shortening the amount of text on the slide. Nothing has fixed the audio gap issue. I’m not sure what to do. Any suggestions?
I’ve used closed captions using previous versions of Captivate. Now I’m adding closed captions to a project using Captivate 2017. I follow the steps I normally used to add a caption at the appropriate point in the narration. I save, and close the closed caption window. Take a look at the closed caption text in slide notes. ALL of the text I’ve added (except for the first caption and the last) has been reset to the default message. It’s taking me three times as long to add closed captions because I have to repeatedly add text for various sections of narration. Am I doing something wrong? Or was it taken for granted that this feature would continue working after all those other changes were made to the closed captioning feature?
Yes, that is what I’ve been doing. My courses all have a Table of Contents. This seems to be where the issue lies. The cc box doesn’t align with the slide content but rather at the screen edge where the TOC starts. This makes the box either cover my TOC, or be shortened to show only on the slide.
I was recently upgraded to V10 via a new computer. This was not a ‘planned’ upgrade. What I am struggling with is the alignment of the cc box itself. We add table of contents to all of our courses. In this new version, the closed caption box wants to align beneath the table of contents and spread partially over the slide content itself. This is Very unprofessional looking. I figured out how to adjust the settings so the cc box doesn’t start until the left edge of the slide content itself, but I can only get the box to stretch about 2/3 accross the screen. Again, very unprofessional looking. What am I missing? How can I position a full size cc box centered over the slide screen shots w/o it covering my table of contents on the left?
Mary, have you tried playing with the X & Y % options in the Aliign area?
I am following because I am having the same issue. Could you share the settings you used to at least get it off of the TOC? I actually successfully did it on one project, but using the exact same settings on a project with all the same dimensions (stage size, etc) the CCs turned up in a different spot on the screen. Very frustrating.
I’m not happy to hear you are having the same issues, but honestly am happy to know that at least someone else understands what I’m talking about now. 🙂 I think I set my Y to about 30 and W to 70. You might need to adjust those numbers up/down by a number or two. It’s still not perfect but about the best I could get. And despite this being the same setting on all slides some of them are still displaying in a different spot. Extremely frustrating and annoying! I have the align set to Custom. You will likely have to set the W value before you’ll be able to set the X value.
I am STILL having this issue and I have not seen it addressed in any of the forums, but set to project level! I have done that over 10 times, still get this problem, and multiple slides are holding onto old X and Y coordinates. Anyone have an update on this? I need my TOC to show!
You must be logged in to post a comment.


