 Jennifer Hofmann
5 Core Strategies and Tactics for Effective Virtual Classroom Programs
Upskilling the “new normal” virtual world is no longer a “nice to have” but a matter of survival. Many facilitators learned the hard truth that...

 When facilitating a virtual event, the facilitator has three jobs:
But we know that things can still go wrong. With all of the economic and logistical benefits to using a virtual classroom, the downside of these collaborative technologies is that we are dependent on hardware, software, and bandwidth working at 100%.
As was especially apparent during the pandemic, all the required technical components do not always work the way we need them to. Even the most experienced facilitator can experience high stress when technology (either their own technology or that of the learners) start misbehaving.
Fortunately, adding just a bit more preparation to your routine can help mitigate potential problems. And applying a proven process to your web setup can help you to solve any unanticipated problems before they become disasters.
Hope for the best. Prepare for the worst….
First let's discuss what you can do in advance to minimize your own technical challenges.
With this routine established, you can breathe easier! But, as you well know, technology can still fail.
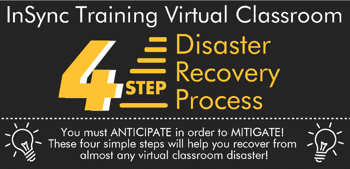
The Show Must Go On! 4-Step Virtual Classroom Disaster Recovery Process
A core component of the InSync Facilitator/Producer model is the “4-Step Virtual Classroom Disaster Recovery Process,” which addresses how to diagnose problems and minimize anxieties to keep the session going.
Just about any technology problem you have can be addressed using this approach.. And, when you come out the other side, you’ve established credibility with your learners that you, with the partnership of your producer, are truly expert at virtual facilitation skills.
Step 1 – Minimize anxiety.
If learners are experiencing problems, the first step is for you to minimize their anxiety. With your in-depth knowledge of the web conferencing platform, you should be able to understand what the learner is experiencing and what they are seeing — so put them at ease by explaining that these things can and do happen and that you have a resolution.
By staying calm and keeping your voice authoritative and controlled, you can exude an air of confidence that helps to alleviate their anxieties. Don’t panic and don’t blame the technology, just stay calm and carry on. Be like a duck, floating calmly on the surface, but paddling furiously under the water!
If you are working with a producer, let the learners know early in the session to connect with that person for technical support through chat. If something goes wrong with the technology, then the producer can chat with them, get their mobile number and call them to troubleshoot while the facilitator continues on with the session.
Step 2 – Identify that there is a problem, and what kind of problem it is.
This is where you need your detective skills. Learners must explain as best as they can what is happening and what they are seeing (or not seeing).
First, you need to determine if the problem is instructional or technical in nature.
A problem is ‘instructional’ if there isn’t a real technical problem; someone simply doesn’t know the points and clicks needed to complete a task. Perhaps they don’t know how to mute a microphone or activate whiteboard tools. If it’s instructional, provide clarification for the whole group, as more than one of the learners may be confused but only one has spoken out.
A technical problem is one that can’t be solved with simple clarification. For example, a corporate firewall doesn’t allow certain content to be displayed. If it’s technical, you need to drill down and establish whether the problem is affecting just that one learner or the entire group.
Ask your other learners to use the hand raise tool to indicate if they are also experiencing problems, whether they are instructional or technical in nature.
Once you have identified whether the problem exists and whom it is affecting, you can move on to resolving it.
Step 3 – Get learners up and running.
If you have determined that the problem is technical in nature, you need to do your best to get the learners back up and running as quickly as possible.
If support is available (your producer), have him or her troubleshoot with the affected learners. The producer should phone the learners and walk them through the problem.
If you’re by yourself, ask learners who have the problem to log out and then log back in.
Next, ask them to close their browser and click the meeting URL again.
Finally, ask them to reboot their computers and rejoin.
If the problem persists, ask them to contact technical support (either their internal IT contact or the web conference provider’s support). Because there are so many permutations of system configurations, virus checkers and firewalls that could be causing the problem, you need to cut your losses at this point to keep the learning going.
Remember; don’t sacrifice the majority for the minority. If there is one person who is having all kinds of issues, they need to try again another day. You don’t want to disrupt the entire class and make them sit through all of the gory details of getting just one person functional.
Step 4 – Determine the next steps.
If the fix works, acknowledge that the participant has re-joined the session and continue.
But if the fix does not work, then you will have to politely dismiss the participant from the session and follow up later with other options: contact technical support, take another session, access a recording or go one on one with a facilitator.
It doesn’t need to be a disaster!
When learners experience technical difficulties, the technology takes over and learning can stop. Using this 4-Step Disaster Recovery process will help you to deal with almost any technology issue that might come up. It will leave learners confident that this virtual learning environment can be effective, and leave the facilitator able to focus on creating engagement and ensuring learning transfer.
Resources:
1. Download the infographic that explains the 4-Step Virtual Classroom Disaster Recovery Process:

2. Enroll in an upcoming certificate program:


Upskilling the “new normal” virtual world is no longer a “nice to have” but a matter of survival. Many facilitators learned the hard truth that...

Jennifer Hofmann often states that the focus of virtual learning should be fundamentally on the learners, their experiences and their learning...

The team approach when creating learning experiences can make all the difference in whether a virtual session is successful or not! It feels amazing...