

You don’t have to be a professional designer to mock up websites. That’s because mock ups aren’t about design. They’re about communicating your ideas and gathering the feedback that will make the biggest impact. Polish and the flashy colors aren’t what we’re looking for. We want great ideas. With this in mind, screenshots offer a quick and easy way to create successful mock ups and communicate your ideas. Below I’ll walk you through how to do this using my favorite screen capture tool, Snagit. If you don’t have it, you can download a free trial.
Find a Starting Point
Don’t start from scratch. There are already a lot of great examples floating around the web and if you look hard enough, you likely can find one that’s similar to the design you’re trying to create. When you find the right example, capture the entire thing. Don’t worry if it doesn’t match perfectly, as we’ll add to the design and customize it later. If you’re not certain how to capture an entire webpage, including the parts that require scrolling, check out our Scrolling Capture tutorial.
https://techsmith-13.wistia.com/medias/xmgoc1yeav?embedType=async&videoFoam=true&videoWidth=640
Capture the Rest of the Idea
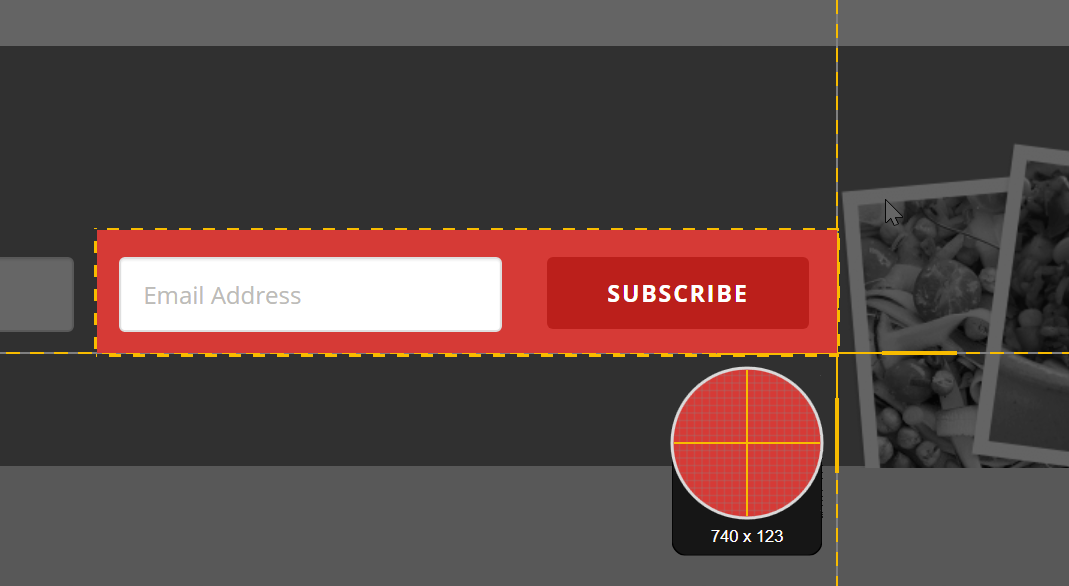
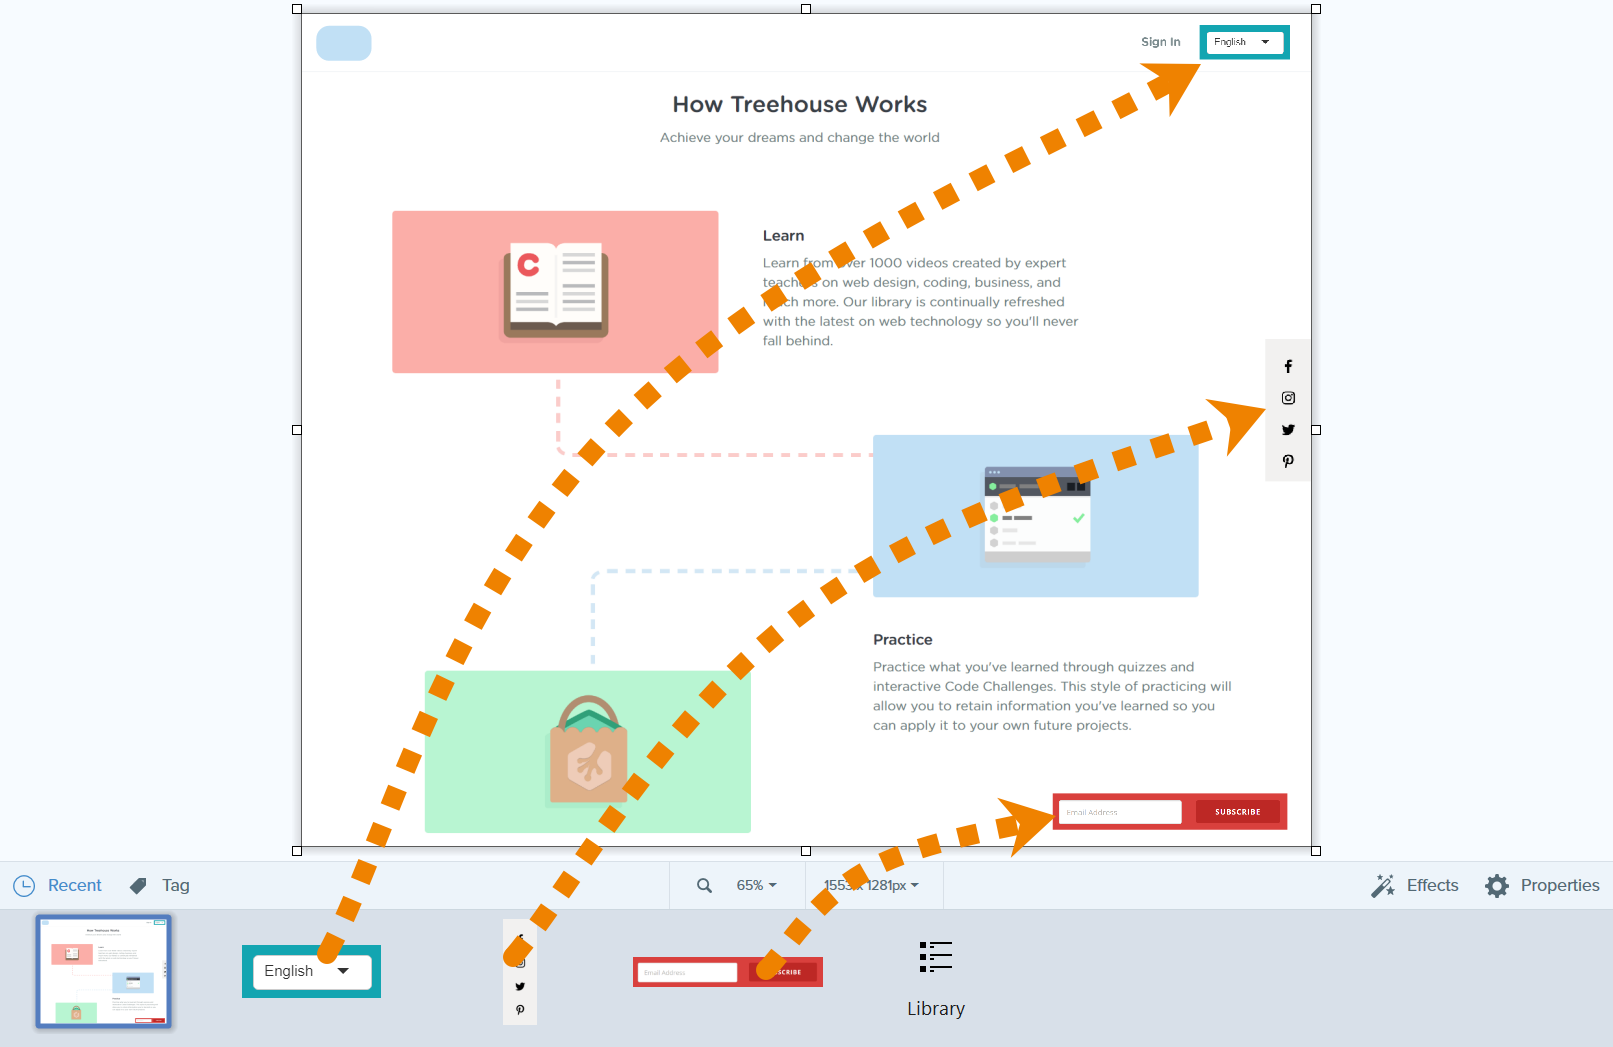
Next, find other pages you like and capture the parts of the mockup that the original capture didn’t include. For example, I’d like to have an email sign-up for a monthly newsletter and a login option that’s part of the top navigation bar. Keep in mind that you shouldn’t worry about things like colors and fonts at this point. Focus on finding concrete examples of the ideas and functionality you want to create. When making a capture, select exactly what you need with the Snagit crosshairs, then use the magnifying glass to perfect the capture.
If you capture too much or want to make changes to your capture, use Snagit’s editing tools. For example, use the selection tool to remove extra objects and automatically fill in the background to make it look like the objects were never there. Or, use crop to refine the size and shape of your capture.
https://techsmith-13.wistia.com/medias/r2rkorgo9h?embedType=async&videoFoam=true&videoWidth=640
Bring it All Together
With all of the parts for your mockup captured, bring them together in the Snagit editor. Start by selecting the initial full page capture. Then, drag and drop captures from the Recent Captures Tray directly on top of the full page capture. From there, you can click and drag to rearrange the captures and position them to fit your desired layout.
Customize the Design
When you’re comfortable with your layout, it’s time to customize the design. Start by right clicking on your mock up and choosing “Flatten All.” This combines all the images into one, which will make it easier to edit the finer details. Next select the move tool and choose the “Smart Move” option to magically make everything editable (it’s not actually magic, it uses OCR technologies). With Smart Move enabled, you can remove extra objects, change the text and adjust the position of just about anything.
https://techsmith-13.wistia.com/medias/5yz82p43st?embedType=async&videoFoam=true&videoWidth=640
To add those finishing touches, use the Paint Bucket tool to match colors, the Text tool to add text and the Shape tool to complete any design ideas. To learn more about editing in Snagit, check out these tutorials.
Get Feedback
With your mock up finished it’s time for feedback. Use the share outputs to quickly send your mock up to a colleague. If the person also has Snagit, they can quickly add callouts, arrows and use Smart Move to provide their feedback.
Screenshots are great for website mock ups, but they work for other types of mock ups, too, including software user interfaces. If you have any questions or comments, feel free to leave them below.
Mock up websites with Snagit
Snagit makes it super easy to mock up websites using intuitive features
Try it for Free
Share