Designing and developing engaging eLearning is now easy with authoring tools. Read on to explore ten quick steps to develop high-impact eLearning.

An authoring tool known as Adobe Captivate is popular for creating eLearning courses. Certainly! It can be exciting to start a new project. No matter what you're working on, whether it's a personal project or a business. Here are the basic steps to creating a simple eLearning course in Adobe Captivate.
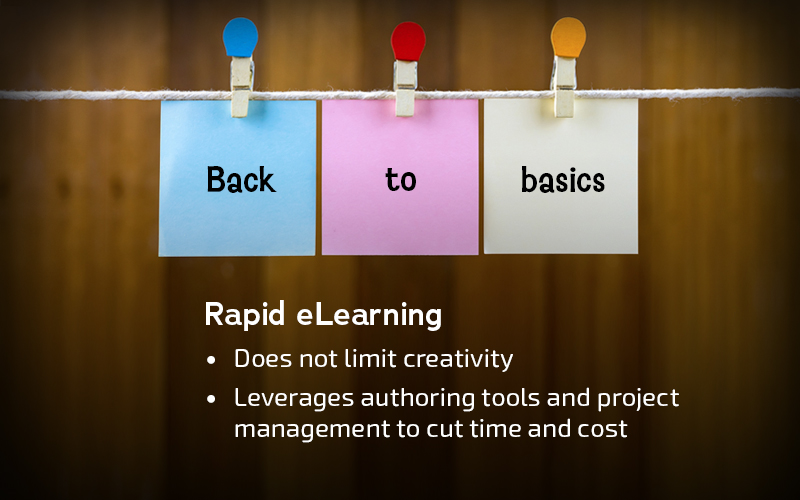
Developing eLearning is Now Easy!
Here are 10 quick steps to developing an engaging eLearning course:
- Create a New Project
- Add Slides
- Design Slides
- Add Media Elements
- Add Interactivity
Read the blog to explore the remaining steps.
10 Quick Steps to Develop an eLearning Course with Adobe Captivate
Step 1: Create a New Project
Adobe Captivate offers various project types such as responsive projects, blank projects, and PowerPoint projects. Choose the one that best meets your needs.
Select the blank project and set the dimensions according to your preference and click on the Create button.


Step 2: Add Slides
With Captivate, you can present your content through slides. A single slide will be displayed by default. There are many ways to add a new slide.
From the Insert menu, the Slides icon from the bar, Right-click on the slide, using the keyboard shortcut (Shift+Ctrl+J).
By creating individual slides for your course, you can organize your content visually appealing.

→ Access Tool: Authoring Tool Finder
Step 3: Design Slides
To deliver engaging knowledge to the learner, it is crucial to design effective slides. Customize each slide by adding text, images, videos, audio, animations, buttons, and interactive elements. You can also apply themes and templates to maintain a consistent look and feel throughout your course.
You can also take the help of the "Asset Library" which allows you to manage and access a wide range of assets, including images, audio, video, and more, within your Captivate projects. The Asset Library makes it easier to reuse and organize assets across different slides and projects.
Effective slide design is about enhancing your message and helping your learners to understand and retain information. Keep your slides clear, engaging, and focused on your key points.

Step 4: Add Media Elements
Your course can be made more engaging and dynamic by incorporating media elements. Captivate includes a variety of media elements you can add to your slides, including audio, videos, SVG, animations, and characters. Make your course more engaging with audio narration and video clips. With Captivate, you can record audio directly within the software or import pre-recorded audio and video files.
Test your slide with the media elements to ensure they work smoothly before publishing your course.

Step 5: Add Interactivity
Your course will be more engaging and effective if you add interactivity to your slides. A variety of interactive elements are available in Captivate, including buttons, click boxes, drag-and-drop interactions, quizzes, and more. Engage your learners by using these.
To avoid confusion, provide clear instructions on how to use interactive features. Describe how learners will navigate the course. If you want a more interactive experience, you can set up linear navigation or create branching scenarios.

Step 6: Create Assessments
To evaluate learners' understanding and measure their progress, you need to create assessments for your eLearningcourse.
Captivates quiz features can be used to add assessments and quizzes to your course. Setting up question types, scoring, passing criteria, and providing constructive feedback are all easy to do.

Step 7: Preview and Check
GUI/Branding, Design, Functionality, Multimedia, Assessment & Final quiz.
Ensure that all course materials, including text, images, videos, quizzes, and other resources, are accurate and aligned with your objectives.
Proofread written content for spelling and grammar errors. Make sure all content is clear and understandable.
Ensure that any links within the course lead to the correct resources. A test should be performed on multimedia elements (videos, audio) to ensure they work correctly.

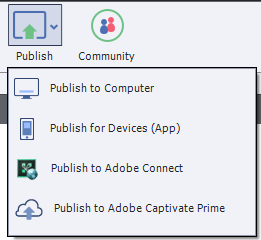
Step 8: Publish Your Course
When you're ready to publish your course, Captivate offers various publishing options, including exporting to SCORM or xAPI for integration with Learning Management Systems (LMS). When publishing an LMS course, set up tracking, completion criteria, and pass/fail conditions.
Set SCORM settings based on slides if there are only slides. If not, define grading criteria first. If your course includes a quiz, then the settings will change accordingly.
To generate the final output files, click "Publish" after configuring publishing settings. The content can then be uploaded to your LMS or distributed through another method, like a website or cloud storage.
Step 9: Track Learner Progress
Online education and eLearning require learners to track their progress,
Your course can be integrated with an LMS to track learner progress and collect data on quiz scores and completion rates.
Before sending it to a client make sure all settings are working perfectly. You can check through the SCORM cloud website which is free to access.

Step 10: Collect Feedback
Once your course is live, collect feedback from learners and instructors to improve future versions.
Watch this video for a recap of all the above steps.
Final Words
The features and capabilities of Adobe Captivate are numerous, so becoming proficient may take some time. You can maximize your use of the tool by exploring tutorials and documentation provided by Adobe. In addition, you can seek help from other Captivate users by joining online communities and forums.
Every organization has unique business and training needs. And finding an authoring tool that’s just right for you could be challenging. Here’s a free tool that can help you navigate the maze. Access it now!