03rd Jan 2024
5 presentation resolutions for 2024 (with BrightSlide!)
Here are five things you should commit to doing this year powered by our productivity and design PowerPoint add-in BrightSlide!

BrightCarbon is buzzing with excitement, because we’ve just released BrightSlide – our incredible PowerPoint add-in. BrightSlide was created by our team of PowerPoint experts with input from our professional presentation designers. Its purpose is to supercharge your workflow with a bunch of incredible PowerPoint productivity and design tools, functions and shortcuts way beyond PowerPoint’s normal functionality. And best of all? It’s totally free!
Click here to download BrightSlide now! Or read on to discover just six of the many ways BrightSlide can revolutionise your PowerPoint productivity.
What does it do? It splits one text box into multiple text boxes by line or by paragraph.
Why is this a useful tool? The alternative method of splitting up text is to copy and paste each sentence or line into a separate text box. It’s fiddly and takes a while. But splitting out blocks of text is really important as it helps you deliver information to your audience in easily digestible chunks.
Give me an example!
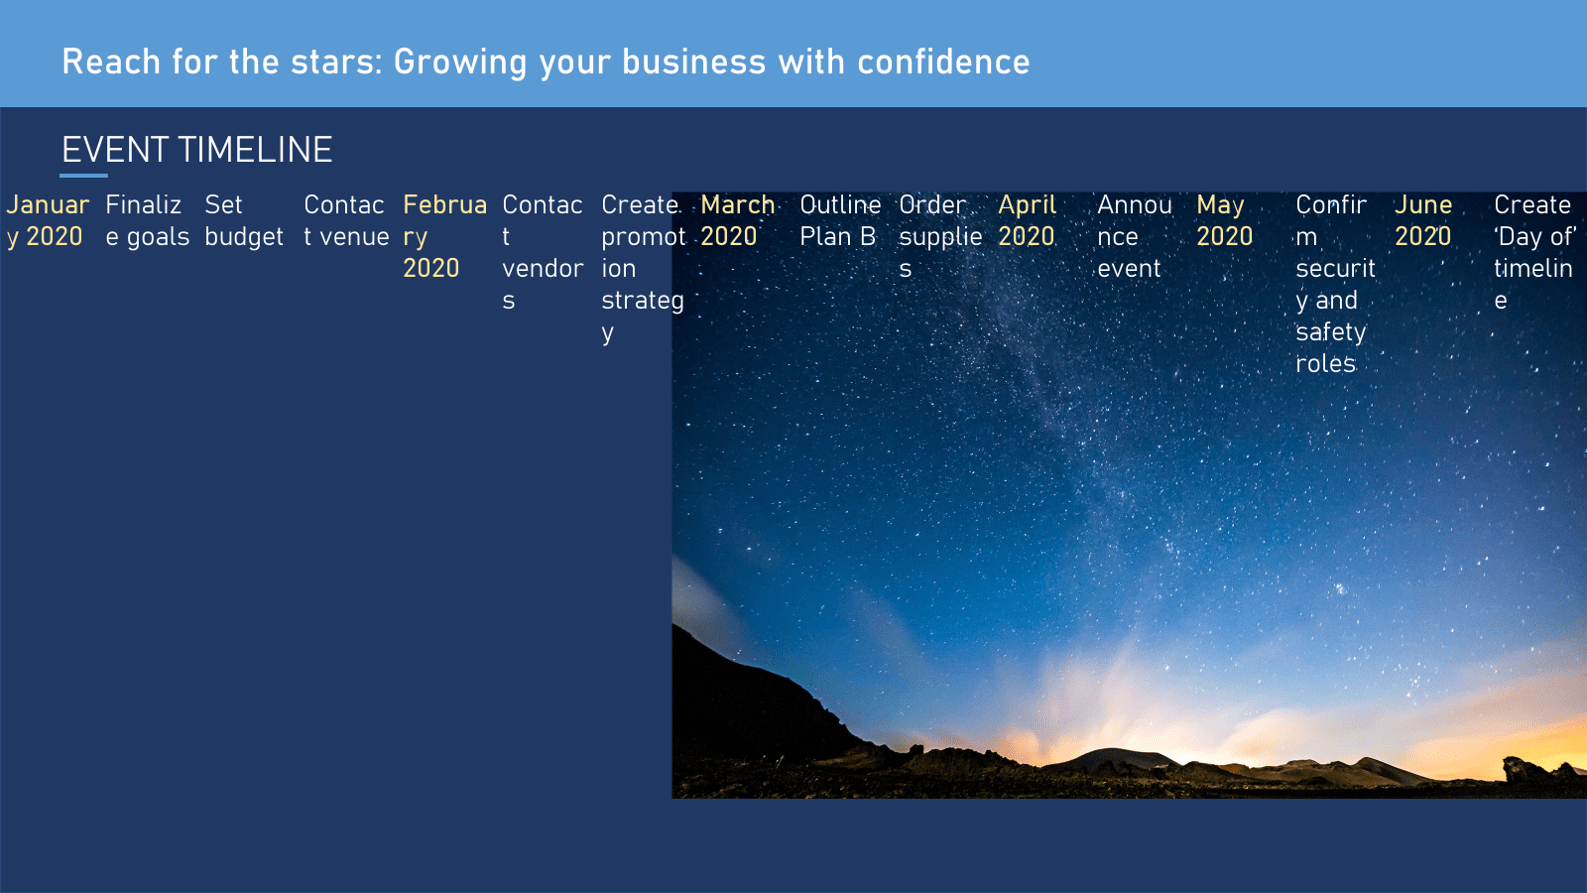
You can use Split/Merge Text to help you create a visually appealing timeline from a boring set of bullet points. Here’s the original slide:

Using this tool couldn’t be simpler, just select the text box then, under the BrightSlide tab, click Split Text. You’ll be given an option to split your text by paragraph or by sentence – bullet points count as both so it’s dealer’s choice.

This is what your slide should look like:
You can now arrange and animate these text boxes individually.
To merge text, select one text box, hold down Shift then select the text boxes you want to merge. Click Merge Text under the BrightSlide tab.
What does it do? The Match Size tool does what it says on the tin, matches the size of two or more objects to the first object selected. If only one object is selected, the object will be matched to the size of your slide.
Why is this a useful tool? This tool speeds up slide creation and will help you make more precise designs with no icons or text boxes that are slightly different sizes.
Give me an example!
Let’s stick with the timeline. First, use Match Size to make the small, awkward image into a full bleed image.
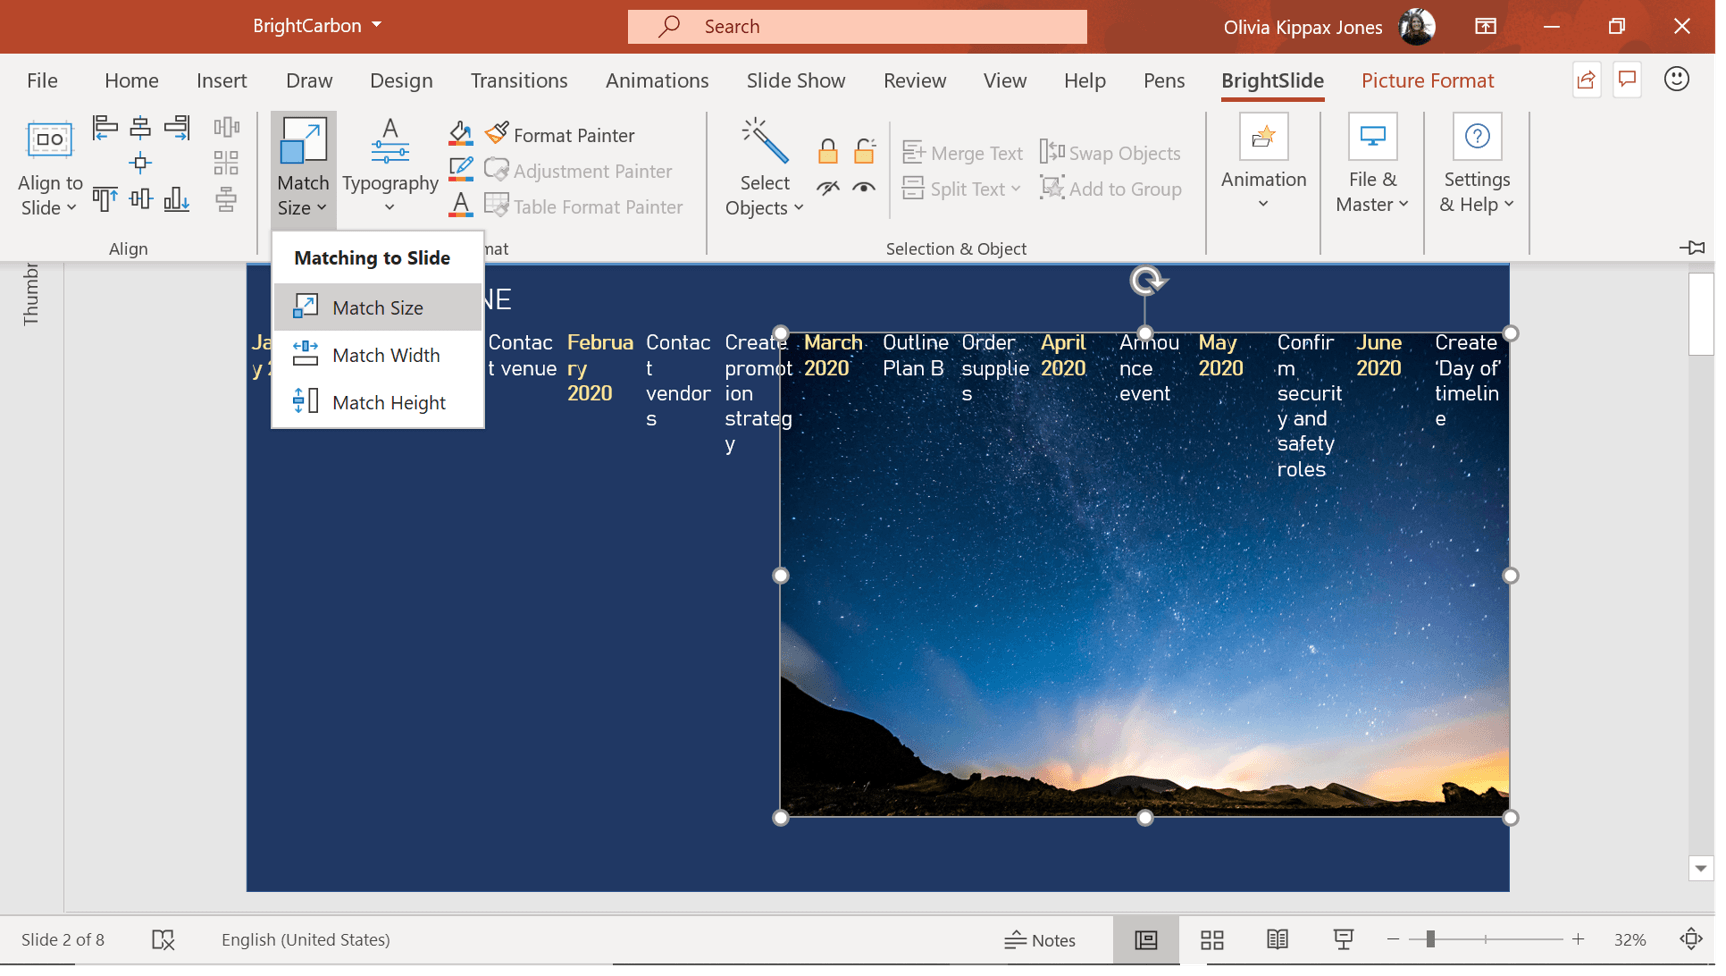
Select the image then click Match Size in the Format section under the BrightSlide tab. Your image will automatically be re-sized to the proportions of your slide, scaled and cropped so it isn’t stretched out. PowerPoint productivity magic!
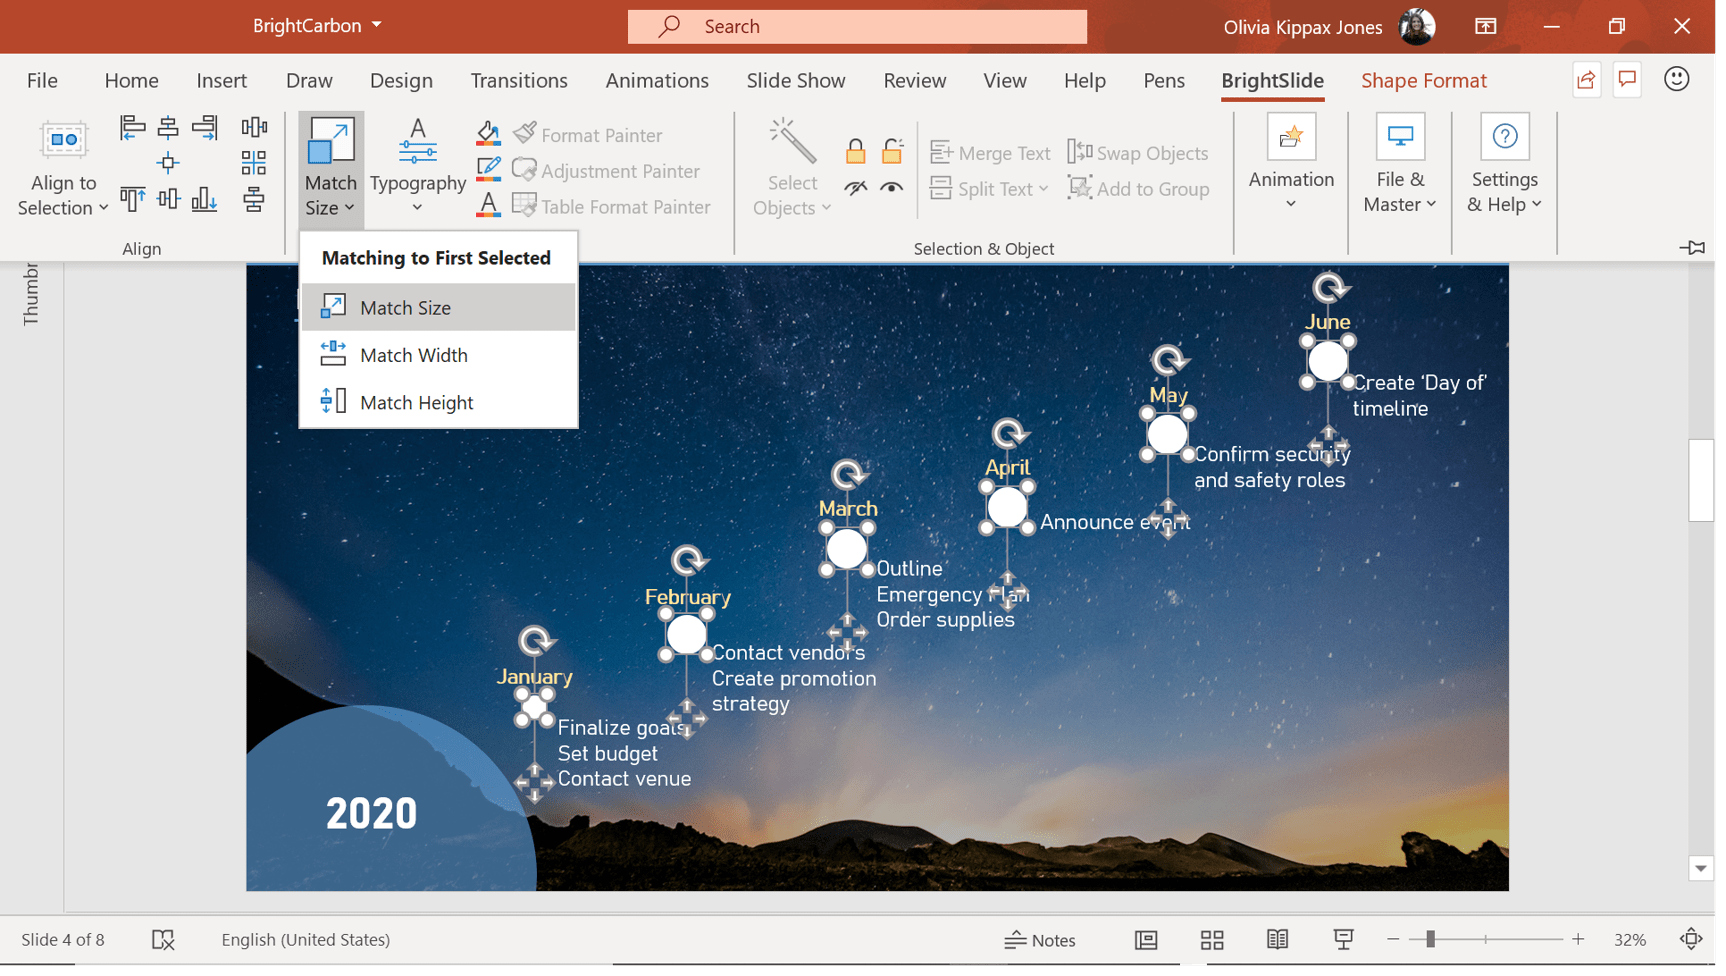
You can also use Match Size to resize groups of objects. First, select the correctly sized shape, then hold down Shift and select all the other objects you want to re-size. Then click Match Size under the BrightSlide tab.
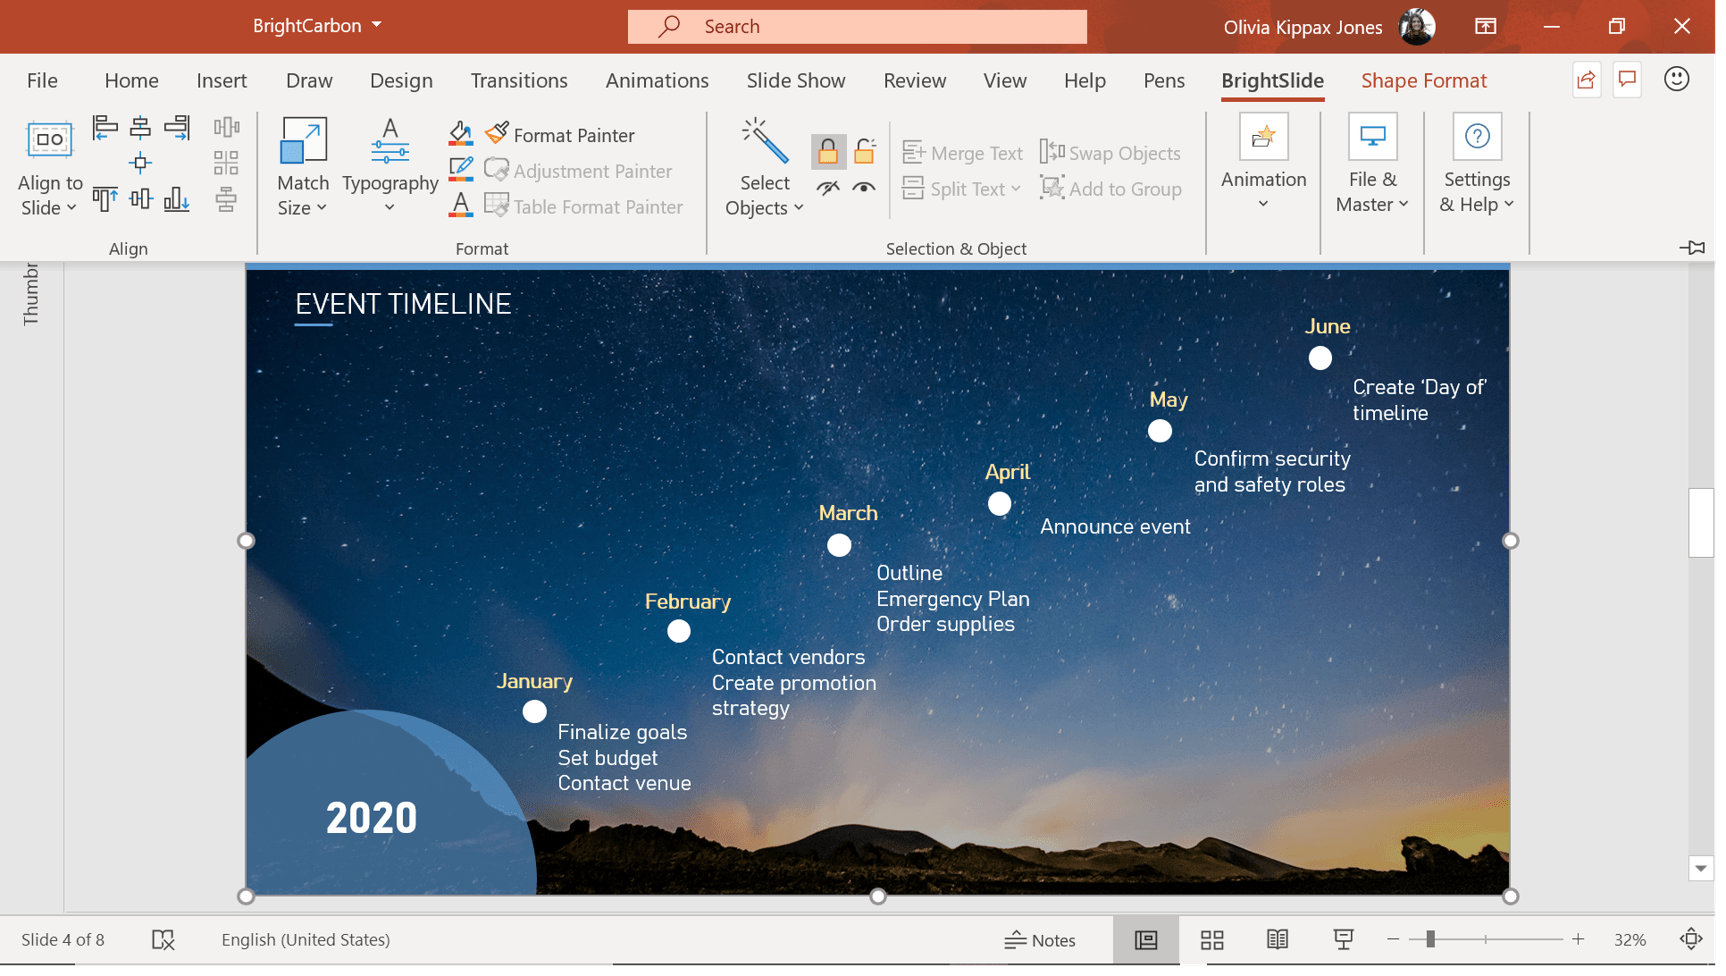
You are given an option to match size, width, or height. The objects selected will change to match the first object you selected. In this case we want to match size for the circles. A couple of clicks and everything looks perfect!
Top tip: When you’re working on top of a background image or shape, it can be super frustrating if you keep accidentally clicking on and moving it. BrightSlide’s Lock Objects tool under BrightSlide > Selection & Object > Lock Object, allows you to lock and unlock objects for easier editing.
What does it do? Adds an object to an existing PowerPoint group without changing the layout or animation settings of the original group.
Why is this a useful tool? Usually in PowerPoint, if you add an object to an existing group that group will lose its animation settings, layer, and name in the Selection Pane. A huge nuisance! Use this PowerPoint productivity tool to edit groups without starting from scratch each time.
Give me an example!
This slide has a short list made up of an animated group of shapes and text boxes. They slide out smoothly from behind an image. Swanky!
Let’s say you’ve decided to add another text point and don’t want to ruin this lovely layout. First, create the extra content and pop it in roughly the right place on the slide. Then select the existing group, hold down Shift and select your extra content. Click Add to Group under the BrightSlide tab and use BrightSlide’s alignment tools to line everything up properly.
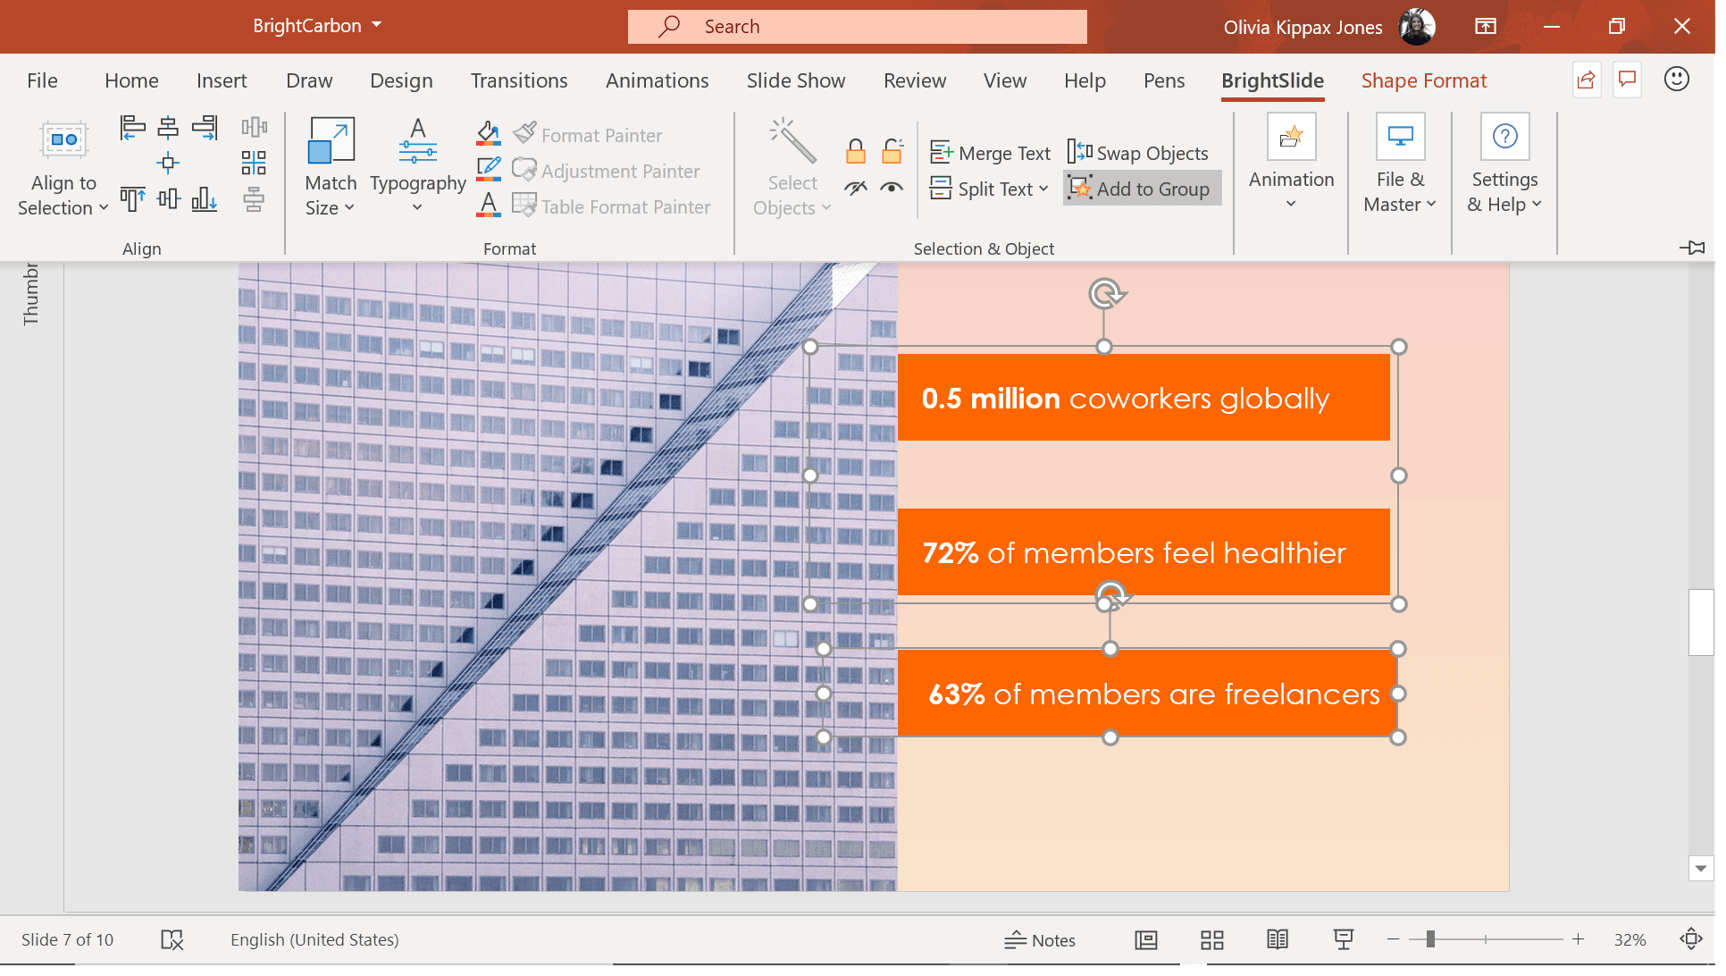
Bingo! No need to reanimate – the group’s existing animation is automatically applied to the new objects.
If you want to learn how to create these kind of slides – check out our great blog post on using masking effects in PowerPoint.
What does it do? We originally designed the Animation Library for our own designers, but it was too good not to share! My Animations is a library of animation combinations that you can access directly from the BrightSlide tab. Though it comes stocked with a few lovely combinations, courtesy of our expert animators, you can easily edit the library and add your own.
Why is it a useful tool? Having your favourite animation combinations at your fingertips helps you animate slides super quickly and helps you maintain consistency across multiple presentations.
Give me an example!
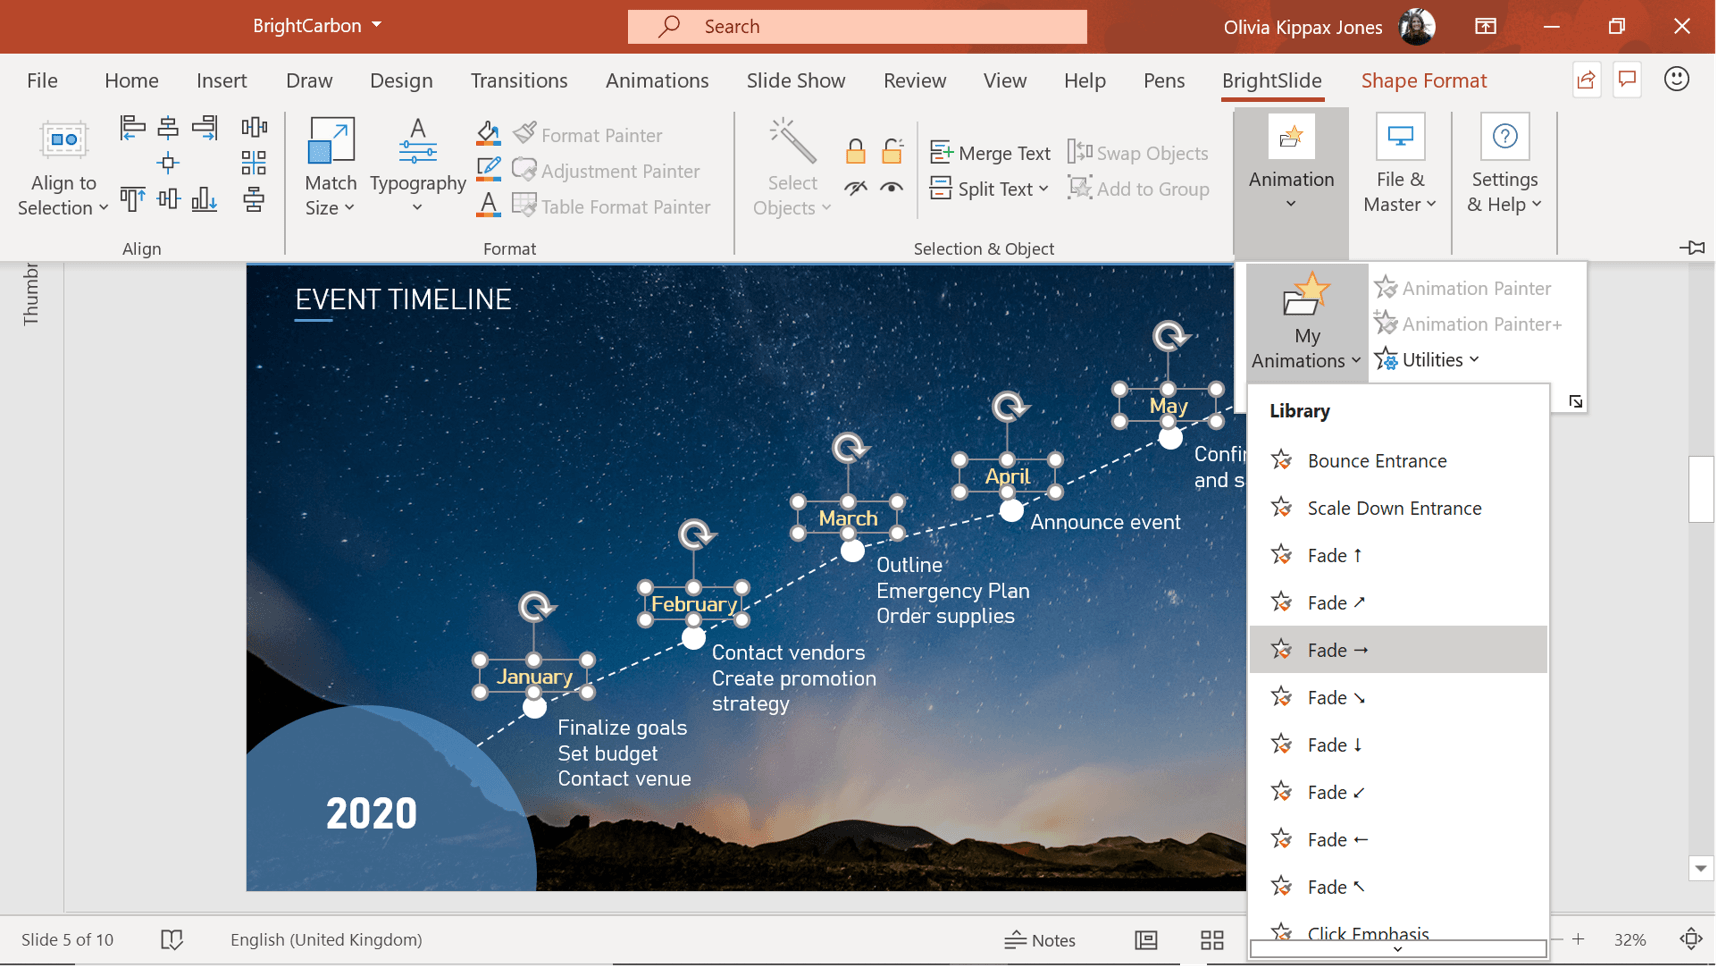
Let’s return to the timeline. It’s looking good, but could benefit from a few animations, helping the presenter to stagger the information. To add an animation from My Animations, select the object then click Animations > My Animations and pick an option. The Fade In combinations are sleek and professional – perfect for this slide!
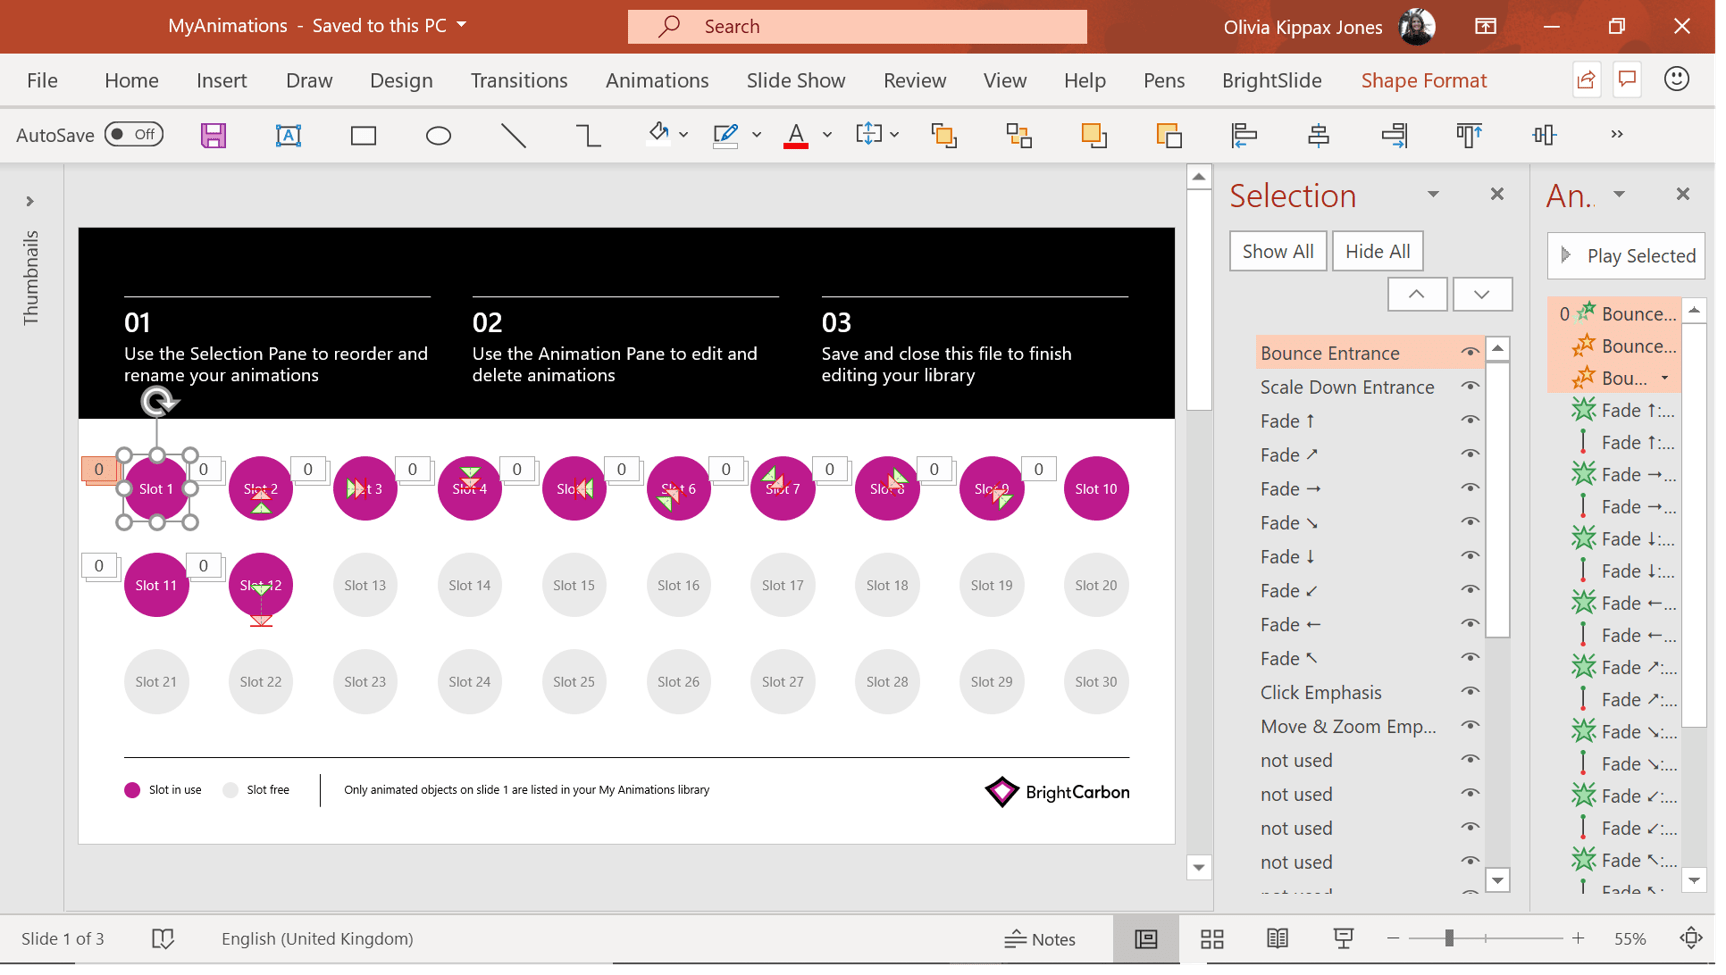
Top Tip To edit your animation library navigate to My Animations and, under the drop-down menu, select Edit Animation Library (right at the bottom). A separate PowerPoint file will open, and you can use the Animation Pane and the Selection Pane to add, edit, and delete animation combinations.
What does it do? Assigns layouts to slides in bulk.
Why is this a useful tool? It’s great for cleaning up unwanted layouts in your file, cutting down on confusing options, and reducing file size.
Give me an example!
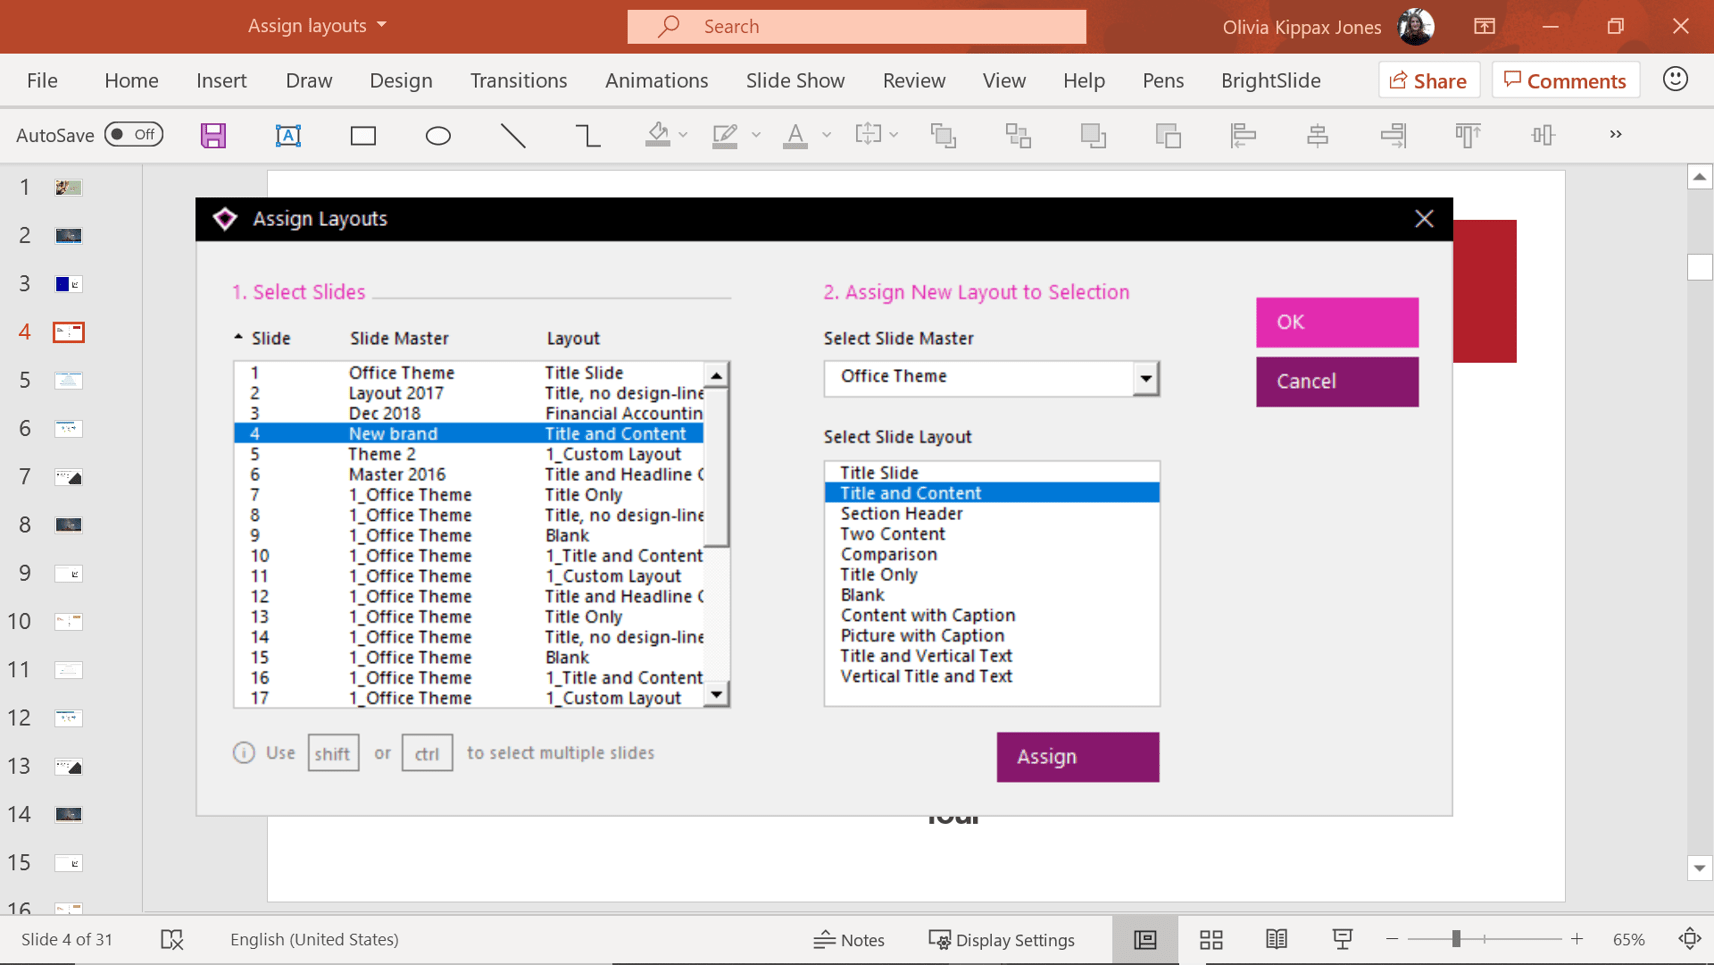
Imagine you have a 50-slide deck including slides copied from presentations created over the past three years, as well as a few new slides. Each presentation you pulled slides from had a different template with different layouts, and now your deck is a mess. Titles are in different places, footers don’t match up and even font sizes are not consistent. When you try to assign a layout to a slide, you get something that looks like this:
To tidy up this file, you need to cut down on the number of layouts you’re using. With BrightSlide’s PowerPoint productivity tools you can do this really easily. Under the BrightSlide tab, navigate to File & Master and click Assign Layouts. A window opens showing all your slides as well as all the Masters and all the Layouts within those masters.
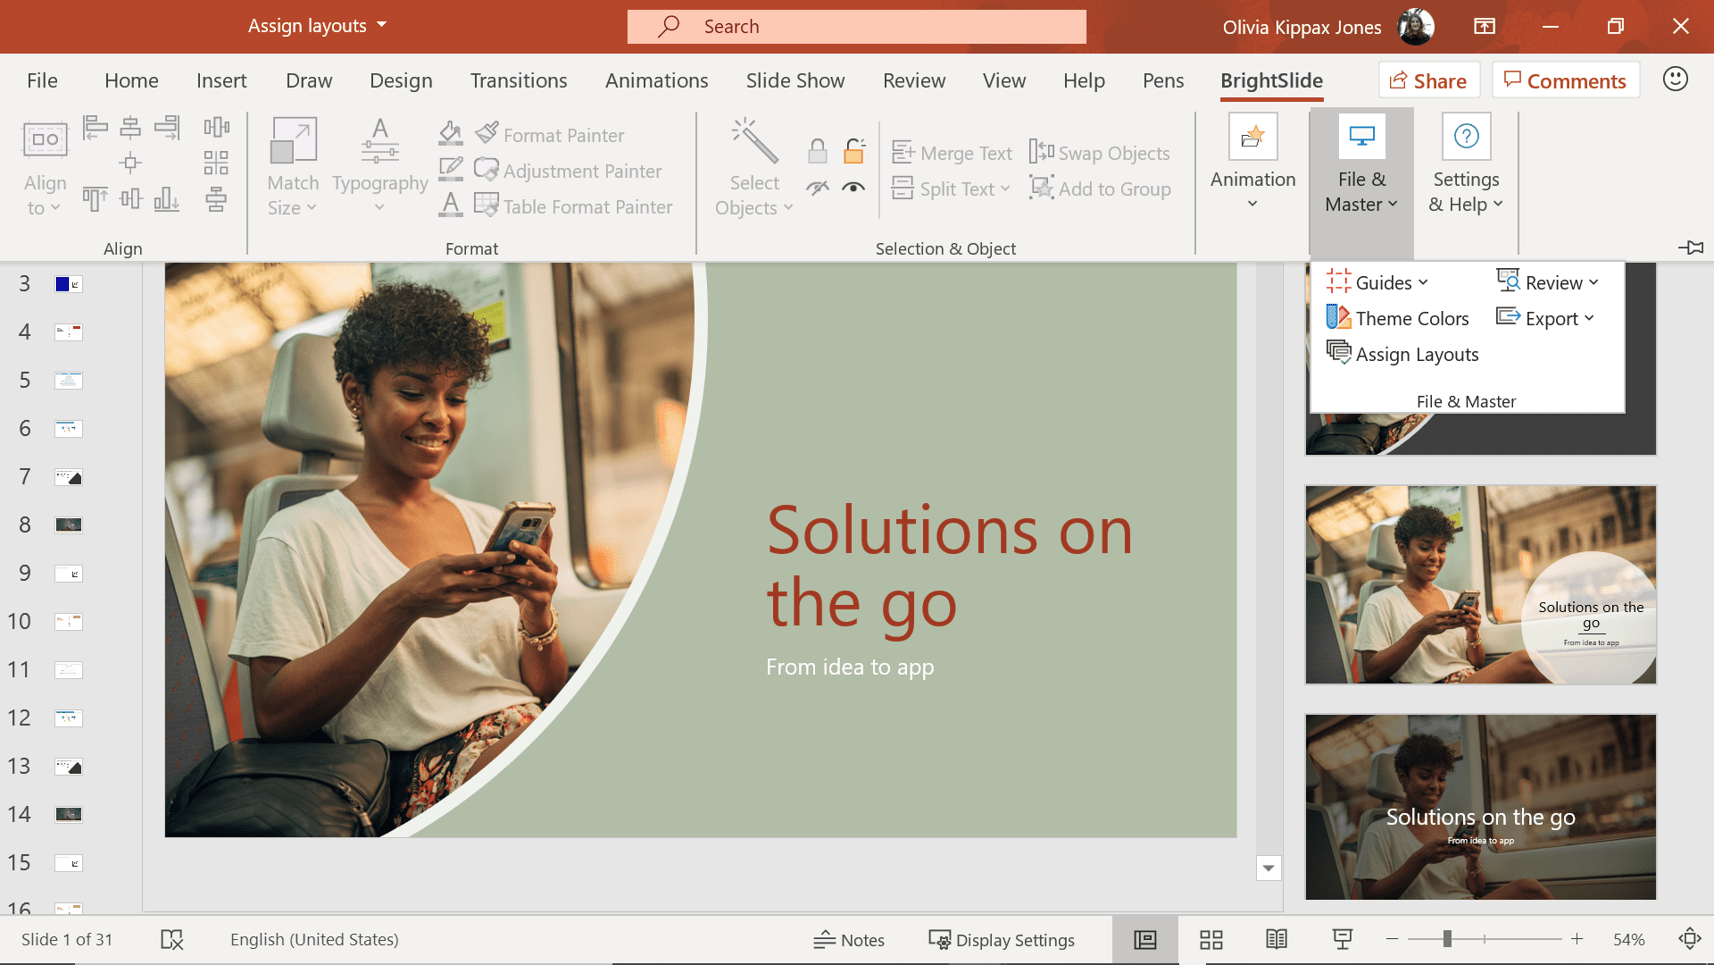
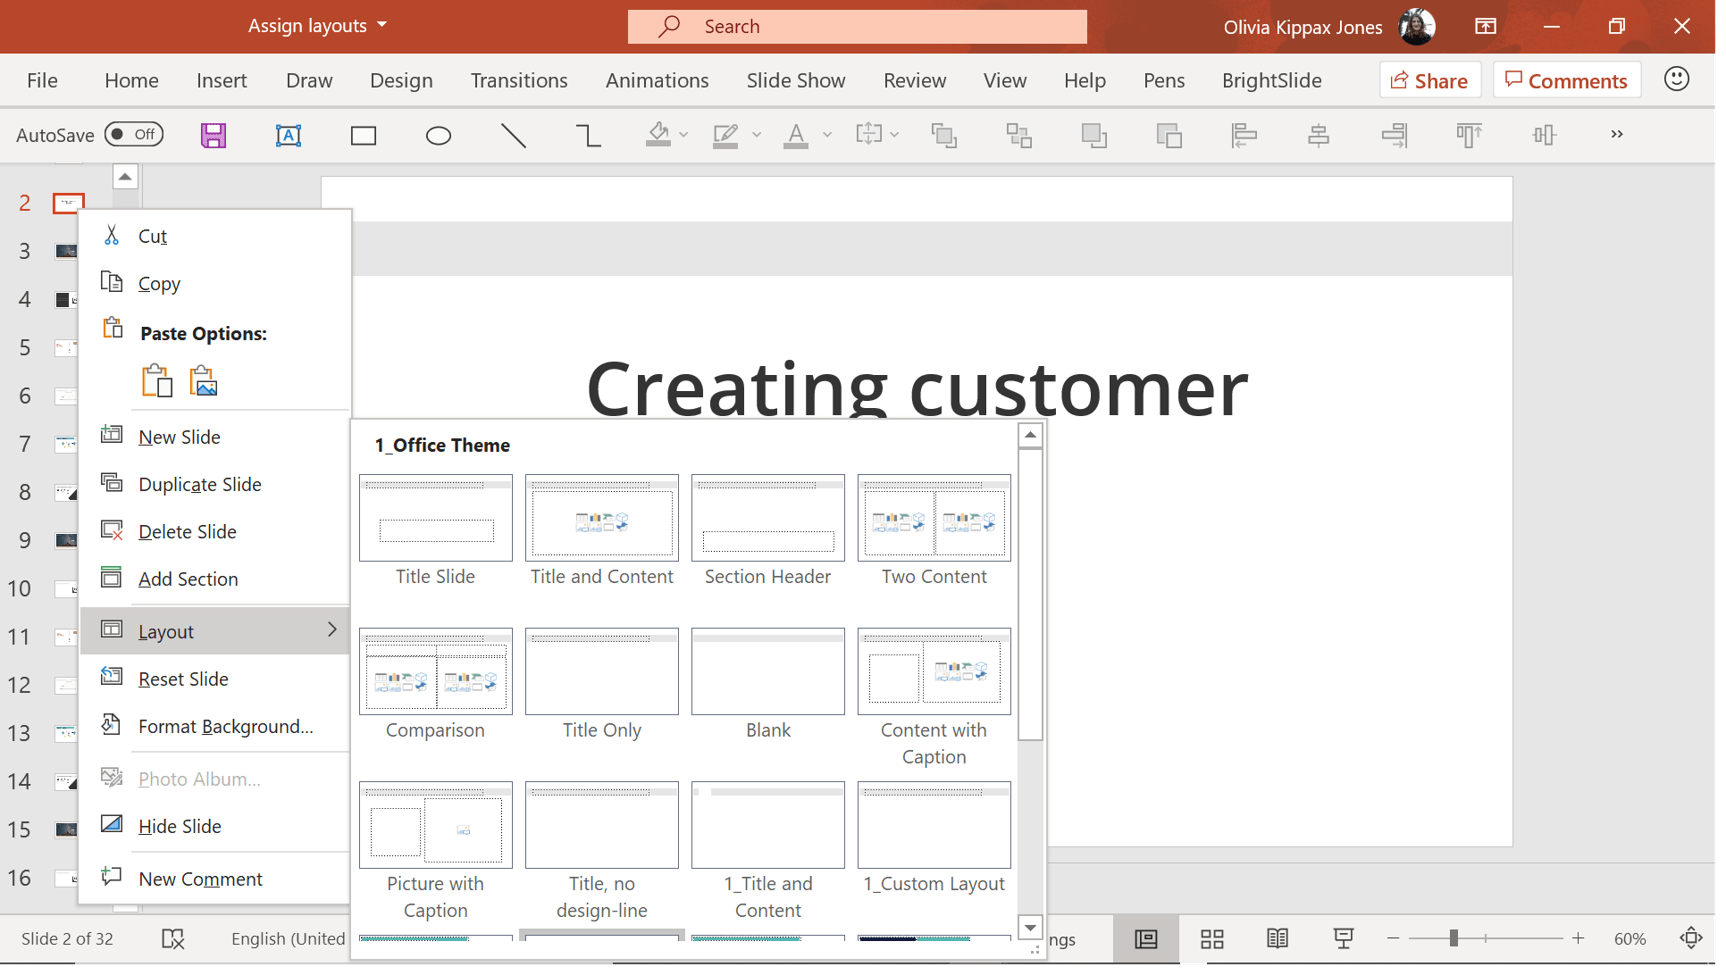
Simply select the slides on the left-hand side then chose which layout you want to assign.
You can clear up your slide master, making the deck lighter and easier to edit.
What does it do? It allows you to select and edit multiple objects that match a specific property of the first object selected e.g. outline color, font size, fill color.
Why is this a useful tool? It’s a real timer saver helping you edit complicated slides (like this monstrosity) quickly and get your presentation looking good in record time.
Give me an example!
Take a look at this slide, it’s pretty complicated with lots of objects placed precisely.
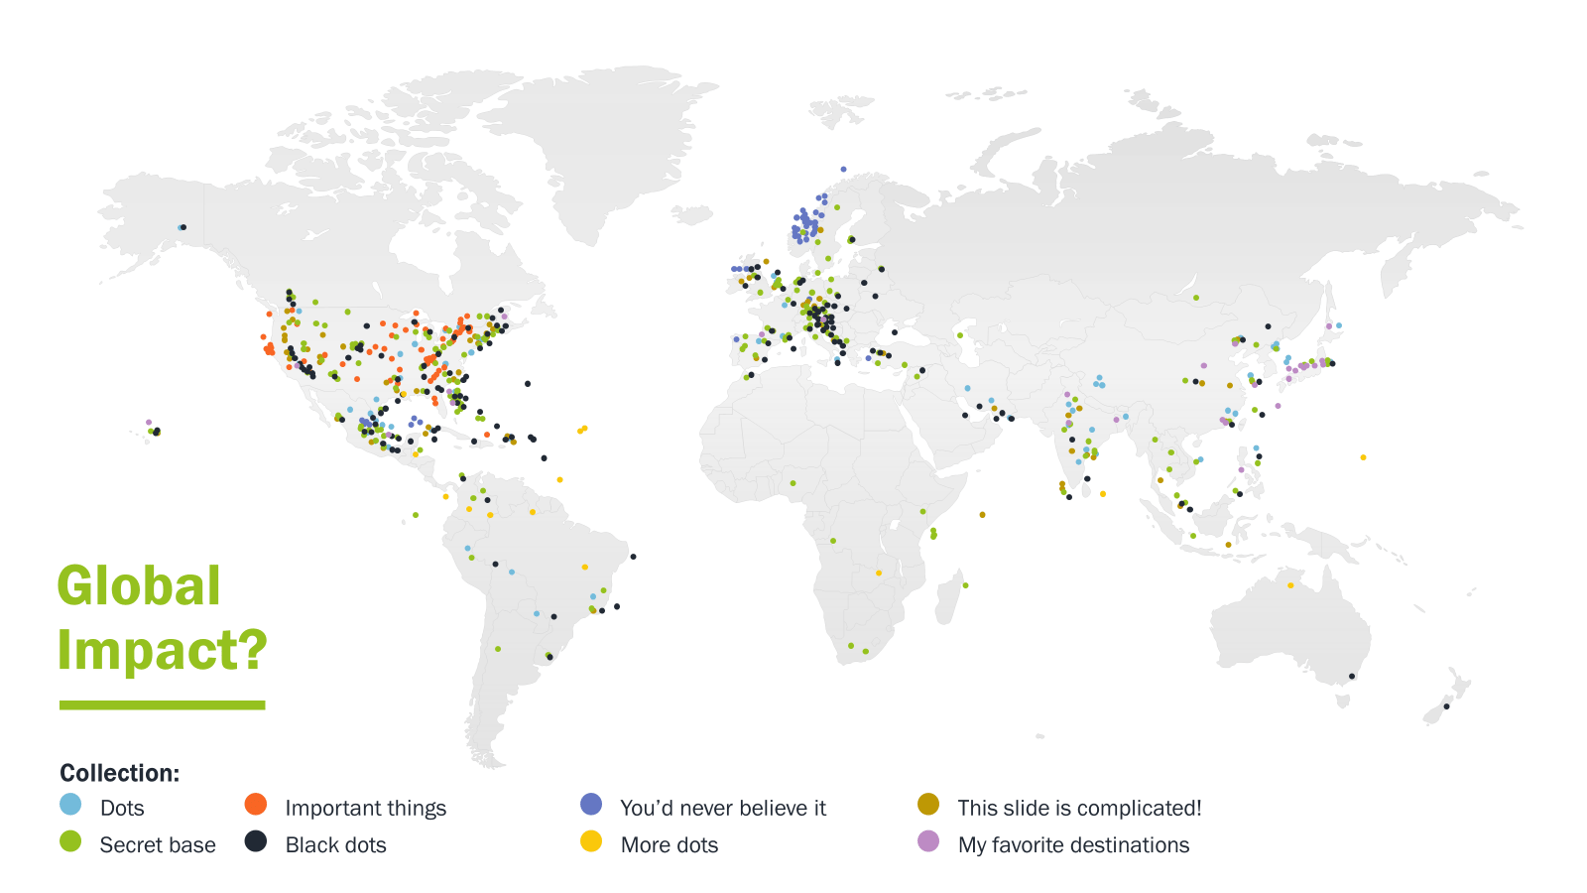
Without BrightSlide’s PowerPoint productivity tools, editing this slide would be time consuming and risky! If you wanted to change all the blue pins to a different shade, you’d have to individually select each shape. You might accidentally move objects, miss objects, or select the wrong thing. With Select Objects you can easily select objects with similar formatting without compromising your slides. Under the BrightSlide tab click Selection & Object then Select Objects. Under the drop-down menu select what makes sense, for this slide it’s Fill Color.
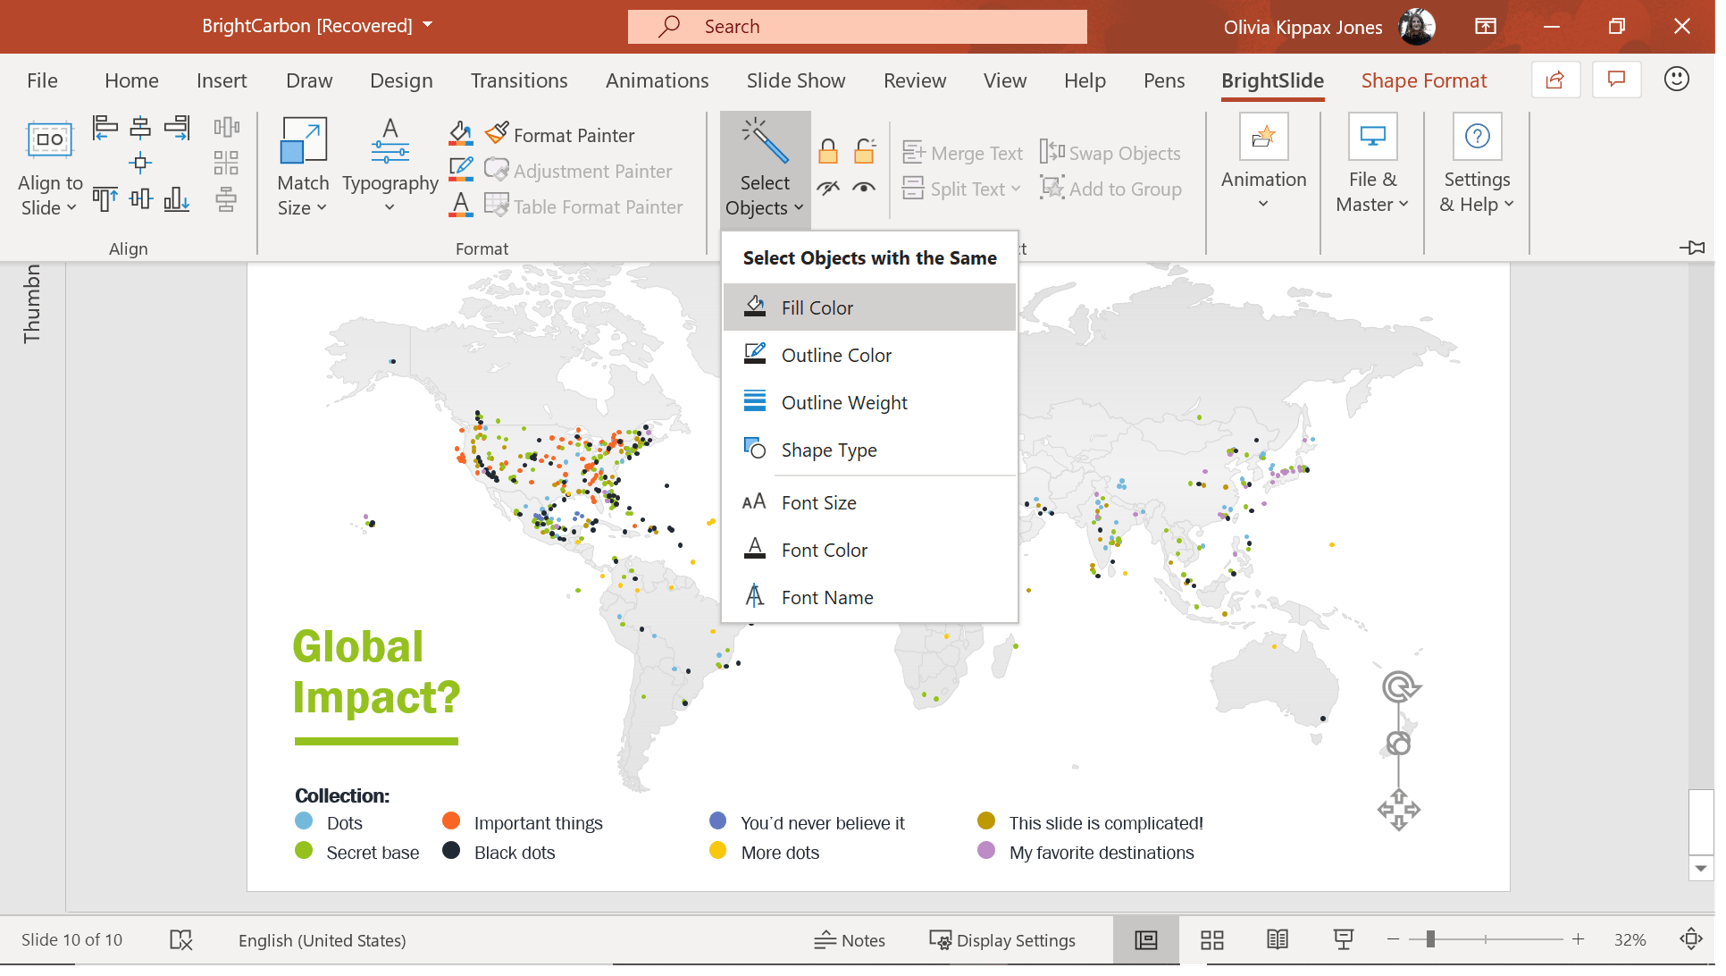
All objects on the slide with similar formatting are selected and you can make mass edits, saving you time and effort.
This tool can be used on all sorts of objects. For example, to change the font on the timeline select one text box, navigate to the BrightSlide tab, and select Select Objects then Font Name. Then make the changes you want.
That’s all for this post, but it’s just the tip of the iceberg of what BrightSlide has to offer. Ready to boost your PowerPoint productivity? Download BrightSlide here. Or, check out all the amazing features and functions of our new PowerPoint add-in.
Leave a comment
Here are five things you should commit to doing this year powered by our productivity and design PowerPoint add-in BrightSlide!
PowerPoint’s Morph transition is a game-changing feature in the world of presentations, but it’s not without it's faults. Here’s a handy tip for using PowerPoint Morph with multiple objects.
Here are five things you should commit to doing this year powered by our productivity and design PowerPoint add-in BrightSlide!
Join the BrightCarbon mailing list for monthly invites and resources
Tell me more!Thank you for today’s PowerPoint productivity masterclass. I’ve learned so much from BrightCarbon when it comes to PowerPoint. If there isn’t a BrightCarbon fan club already, I’ll be happy to start one!
Kimm Babo Wegmans Food Markets


I’m blown away by both your (Bright Carbon’s) talent and generosity. I’ve seen some of your previous work and greatly admired all that you produce.
As a wanna-be designer who is passionately focused on clear communication, I can’t thank you enough for making such a great set of tools available to all of us.
I love your generosity of spirit that is more committed to improving our world and community instead of monetizing everything. THANK YOU!
Linda, thanks for such a kind comment! We really see the value of investing our time and effort in our industry and community and it’s great to have such lovely feedback.
Jamie Garroch (the genius who programmed BrightSlide) is … well, I already said it, didn’t I? A genius. And a generous, genuinely nice human being. As are the BrightSlide folks who gave him the time to produce this amazing add-in, then turned ’round and gave it to us.
It’s taken me a while to compose myself this morning having read those very kind and emotive words Steve. You may or may not know that you have being a guiding light for over ten years and a shining example of what it means to contribute to a community we all love so dearly. Your free PowerPoint VBA resources at https://pptools.com/ are some of the best, if not the best available online. When I moved from corporate marketing to working for myself in 2009 I knew nothing about VBA. You and others like John Wilson taught me about that but more importantly, about giving back. I have learned and continue to learn so much about the world of extensibility from you. Thank you.
And, I feel exceptionally privileged to have joined the BrightCarbon team who have in turn pushed me to push VBA to its limits. That wouldn’t have been possible without our incredibly talented UX designer Taavi, who is the creative genius behind the beauty and simplicity that is BrightSlide. And then there’s the talent from others in the team like Olivia who create the stunning online content to accompany BrightSlide. It’s a big team effort.
We’ve not finished either. There’s more cool stuff coming to BrightSlide in the near future, for everyone in the presentation community, for free, forever.
Saw this tool used at the Learning 2023 Conference in Orlando last week. Amazing time saver and formatting tool. Looking forward to trying it out on some of my slide decks. Presenter at the conference was Richard Goring. Was fun to listen to and was knowledgeable of all the things he showed us.
Thanks for commenting Juan! It’s so great that you found Richard’s session valuable and I hope you find lots of ways to use BrightSlide in your work!