Simple Solution for AutoUpdating Office Content
Sometimes a solution for a problem is hiding right under your nose. For example, I recently started working on an enterprise software roll-out and one of the challenges we’ll face is building content before the system is completed.
The software vendor has provided a lot of documentation and other materials. The catch is that after configuration and customization almost all none of it will still be accurate. There will be changes to virtually every screen in the system. We can either start building everything now and deal with making a zillion updates later or wait for the system to be complete and miss our deadlines.
Or maybe there is a better way? I recently found an article talking about how to create documents in a way that allows for quick and easy branding updates. Branding usually involves a lot of graphical elements and if you add them to your documents a certain way, they are super quick and easy to update in EVERY DOCUMENT THEY’VE BEEN USED IN!
The trick for doing this in Microsoft Office documents is to use the “Link to File” technique for adding images. Most of you have probably added pictures, logos and other images to Office documents a gazillion times. And I’ll bet almost none of you have ever done it this way?
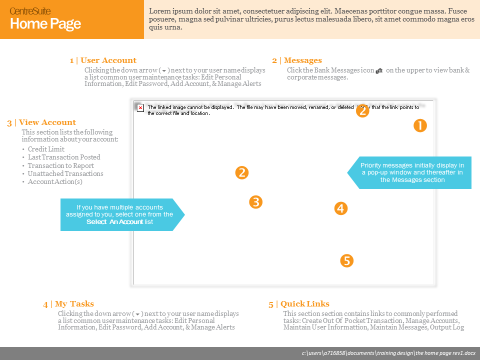
Let’s take this PowerPoint job aid/user guide as an example:
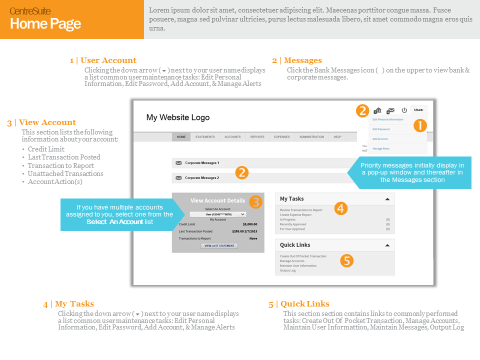
The screenshot is from the generic, out-of-the-box version of the software. Keep reading to learn how I can create content now and have the images automagically update when they change later.
The “Link to File” Way of Inserting Images
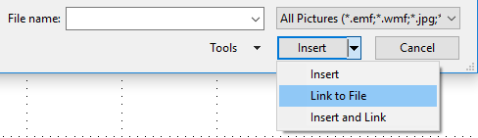
Here is the ‘secret’ trick you need to know if you ever want a way to update an image that you’ve previously inserted into a Word document or a PowerPoint deck.
When you insert your image, look for the drop-down arrow next to the Insert button. Selecting Link to File will create a connection between your slides or document to the image file wherever it is stored.
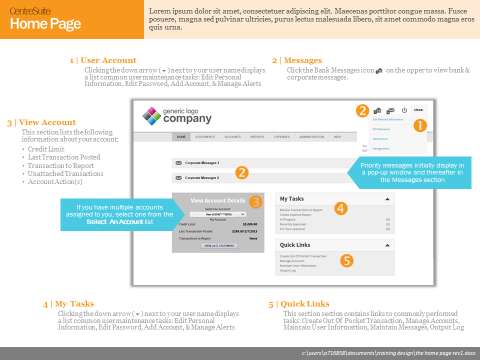
This works much the same way as images referenced in an HTML web page. If you edit or change the linked image, the change is reflected immediately in all the Word document(s) and/or PowerPoint slides that image was used in. (As long as they were inserted the “Link to File” way.)
That means that I can simply replace the original image with the new version by saving it in the same place with the same name as the old one. Next time I open my PowerPoint file, the new image is already there waiting for me.
Word of Warning
One caution to note. This requires that your file can “see” or access the location where your images are stored. If you email your file to someone else, they will not be able to see the images. (Unless you’ve inserted them from a shared location you both have access to.)
This same trick can be used if you’re a vendor and create similar materials for a variety of different brands. You can also use custom color and font themes to extend this concept further and save even more time when updating your Office content.
Insert and Link
If you want to cover your bases and avoid the error message shown in the example above, you can go with the “Insert and Link” method. This way you’ll be embedding a copy of the image which will display in case the original source file can´t be located.
Let me know if you have any questions.
