Remember the children’s book series Choose Your Own Adventure? The child reader is the protagonist making choices to determine the story’s plot. I used to love reading those books because I was involved in the action and I had to think and make decisions about a variety of scenarios that had consequences. Enter the amazing Articulate Storyline – its simple, flexible and the most powerful of all elearning development tools.
In the same way that Choose Your Own Adventure brings the reader into the action, some of the best and most engaging eLearning out there at the moment brings learners into the action by giving them scenarios and choices. Many eLearning designers are currently looking at ways to create courses that are non-linear and customised towards the needs of the individual. We are recognising the value of scenario-based learning that draws the learner into the action and requires them to make decisions that have consequences. At the same time, many of us are working within time constraints and are reluctant to spend time on complex programming.
In this post, I’d like to write about my experience of the Certified Articulate Storyline Expert training and a few standout points.
Articulate Storyline Basic
For newbies, you will be very comfortable with Articulate Storyline interface. The ribbon and tabs feature all the elements you need to create richly interactive courses. Having used Adobe Captivate in the past, its provides a much better workflow as well as being more appealing to the eye.
We’re introduced to the ‘Building Blocks’ of Storyline: States, Layers and Triggers. In simple terms these three functions allow eLearning designers to create an awesome range of screens and interactions. On our first slide we inserted one of Articulate Storyline built)in characters and then changed her state (e.g. facial expression) in a new layer. It is incredibly easy to do and the effect is marvellous.
Next we look at the Story View in Storyline (like an aerial shot of your course). It’s a great way to see the entire structure of your course, especially if you are adopting a non-linear approach. We also learnt how to insert a wide range of media and how to create custom interactions such as drag and drop. We finished the day looking at Storyline’s publishing options which include publishing for LMS and HTML5.
Standout from the sessions: With states, layers and triggers, I can build almost anything into my eLearning courses.
The next session begins by asking us for our impressions of Storyline so far. People talked about their favourite features such as the built-in character images and the ‘Zoom Region’ feature. It was great to hear other people’s perspectives and share our enthusiasm for Storyline. The first half of Day Two covered how to create assessments. I like the wide range of out of the box assessment options —Graded Questions, Survey Questions, Freeform Questions, Draw from Bank Questions, and Result Slides. But it is easy to build questions and to customise assessments according to your needs such as drag and drop and hotspot questions.
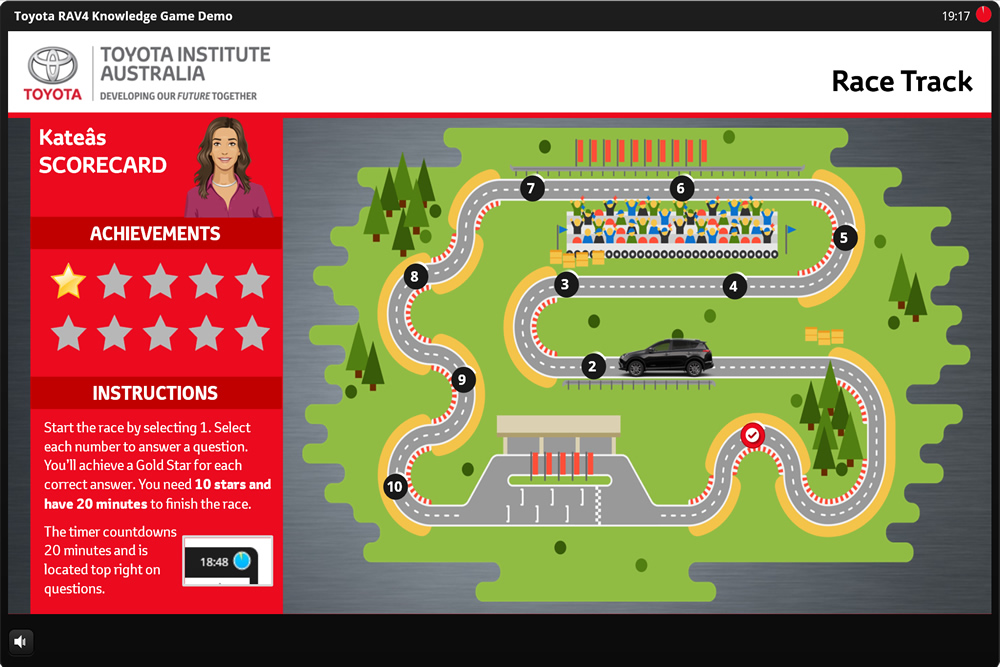
Next we get to see how to do screen captures and build a simulation in Storyline. According to our Resource Guide, “A simulation is a series of learning scenarios that are tied together by a set of common learning objectives for that learning event.” We were led step-by-step through building a customer service simulation in Storyline. All the graphics and text were provided—we just used the resources to create the simulation. We just had to think through the logical branching process and design accordingly. I found the process was easier than I expected and I really like the way it gives learners a challenge, choices and then consequences. This is truly engaging eLearning.
Later in the afternoon everyone recorded their own screencast, and we learn how Storyline can automatically segment the recording into multiple step-by-step tutorials. This is an amazing feature and a fantastic time-saver for eLearning designers.
Standout from session: Scenario-based learning is easy in Storyline and the branching possibilities are endless.
Articulate Storyline Advanced
On the Advanced Storyline Training Day we looked at how to use variables to customise eLearning courses even further. We also had the opportunity to consolidate much of what we had learnt on the first two days.
According to our Resource Guide “Variables allow you to conditionally perform actions in your course, based on variable values. With variables, you can capture what a user has done and act on that at a later time.” This opens up a wide range of possibilities for the eLearning designer including the ability to display customised information (e.g. the learner’s name), perform calculations, track progress and create custom learning paths. Although I found variables a bit challenging at first, I know it gives me the ability to create more sophisticated learning experiences.
Standout: A significant part of Storyline’s power comes from variables.
With Articulate Storyline the sky is the limit for the eLearning designer. The feedback from everyone on the course was fantastic. If you’re looking to build adventures with Articulate Storyline then consider completing the Certified Articulate Storyline training program. Get to know the apps you love more!