Articulate Storyline 360 – Publish as video – Review
In an eLearning course, the content is presented in chucks with page navigations and interactions. If you already have eLearning courses and you want to upload them to online course sites then it can be a challenge. There are many online course sites like Lynda, Skillshare, CreativeLive, Udemy, etc., that accepts video based content.
To convert the eLearning content into video format you may need to go for screen capturing tools like Camtasia to convert it into video, which is time consuming task. Articulate Storyline 360 has introduced a feature in which you can publish your eLearning course as a single video.
This feature is very helpful to create video based learning. While publishing one of our sample course as a video, we did comparison between the video output with LMS or Web based courses.
In this blog, we will demonstrate how to publish an eLearning course as a single video in Articulate Storyline 360.
Step 2
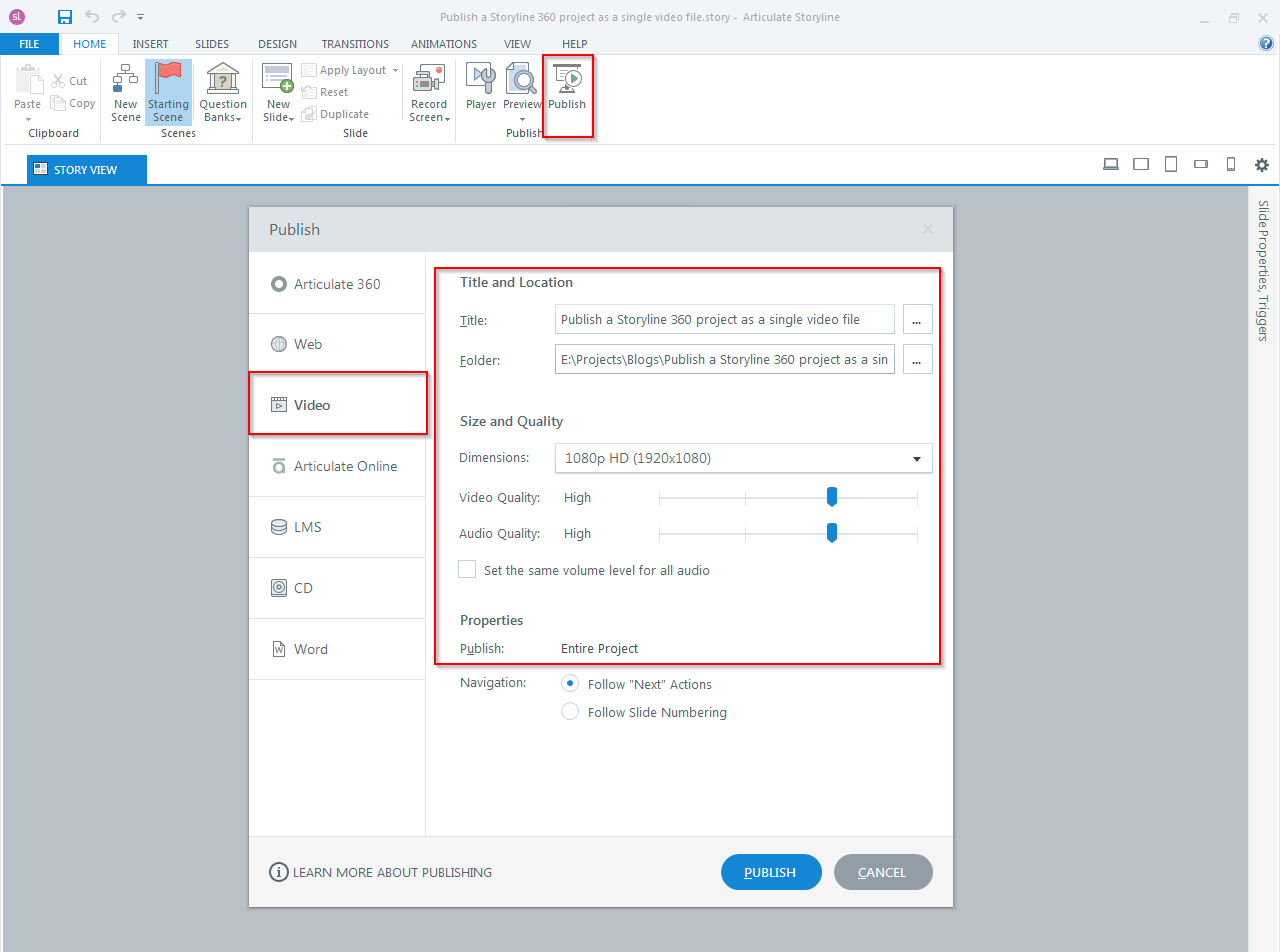
Publish Course
- Click on publish icon and then select the video tab
- Enter the title
- Choose the dimensions
- Adjust the video and audio quality if required
By default Articulate Storyline 360 will publish entire course. However, we can publish a single scene or a slide as video. Click on the entire project and then click OK.
Step 3
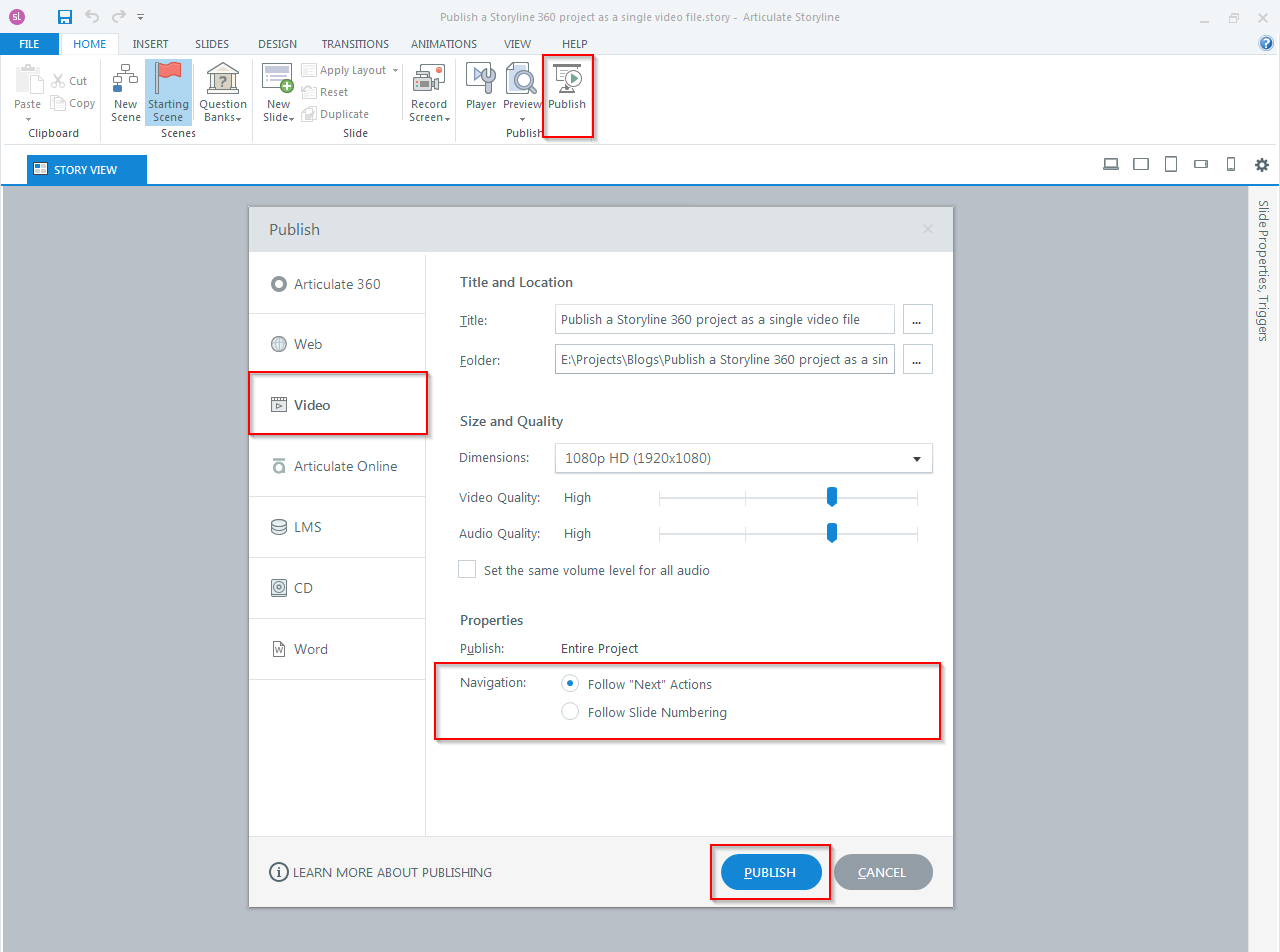
Navigation
Follow “Next” Actions: If you select “Follow Next Actions”, the video will progress through “Next” button action.
Follow Slide Numbering: If you select “Follow Slide Numbering”, the video will progress through slides sequence, such as 1.1, 1.2, 1.3, and so on.
Finally click on the “Publish” button.
Once done, you can upload the course on your server or any video hosting sites.
NOTE:
1. Some of the elements that doesn’t work in video output are:
- Flash movies
- Website videos
- Web objects
- Course player
- Closed captions
2. The maximum duration of a published video should be less than 120 minutes.
3. While publishing as a video, publish it to the local hard drive instead of network or a USB.
Here is a sample course published as video based learning.
https://www.swiftelearningservices.com/our-portfolio/
Our Services: eLearning Vendor, eLearning Solutions Company, Powerpoint to eLearning
Leave a Reply
Want to join the discussion?Feel free to contribute!