
How to Customize Table of Contents Using Shared Actions in Adobe Captivate 2019
Adobe Captivate is an eLearning authoring tool that is used for creating variety of eLearning content such as software simulations, branched scenarios, and training content in HTML5 format. You can create beautiful, mobile-ready courses with the all-new Quick Start Projects, ready-to-go slides, and out-of-the-box interactions.
In this blog, we are going to look at the menu feature or the Table of Content (TOC).
Step 1: To begin, choose a custom menu button and give it a unique name. Ex: Menu button.
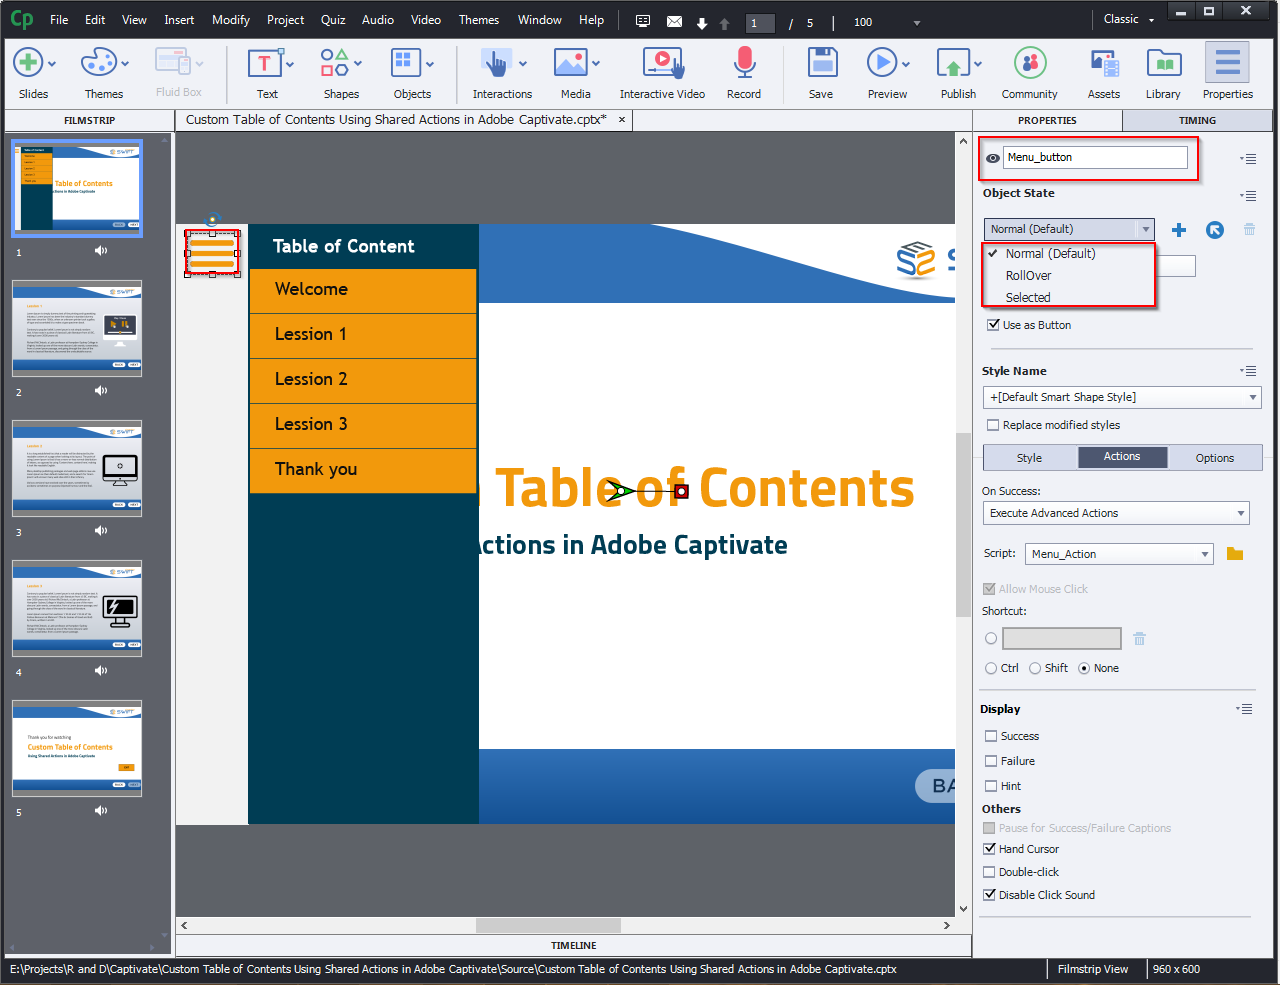
Step 2: Based on the slide headings, create a custom Table of Content as buttons and group it.

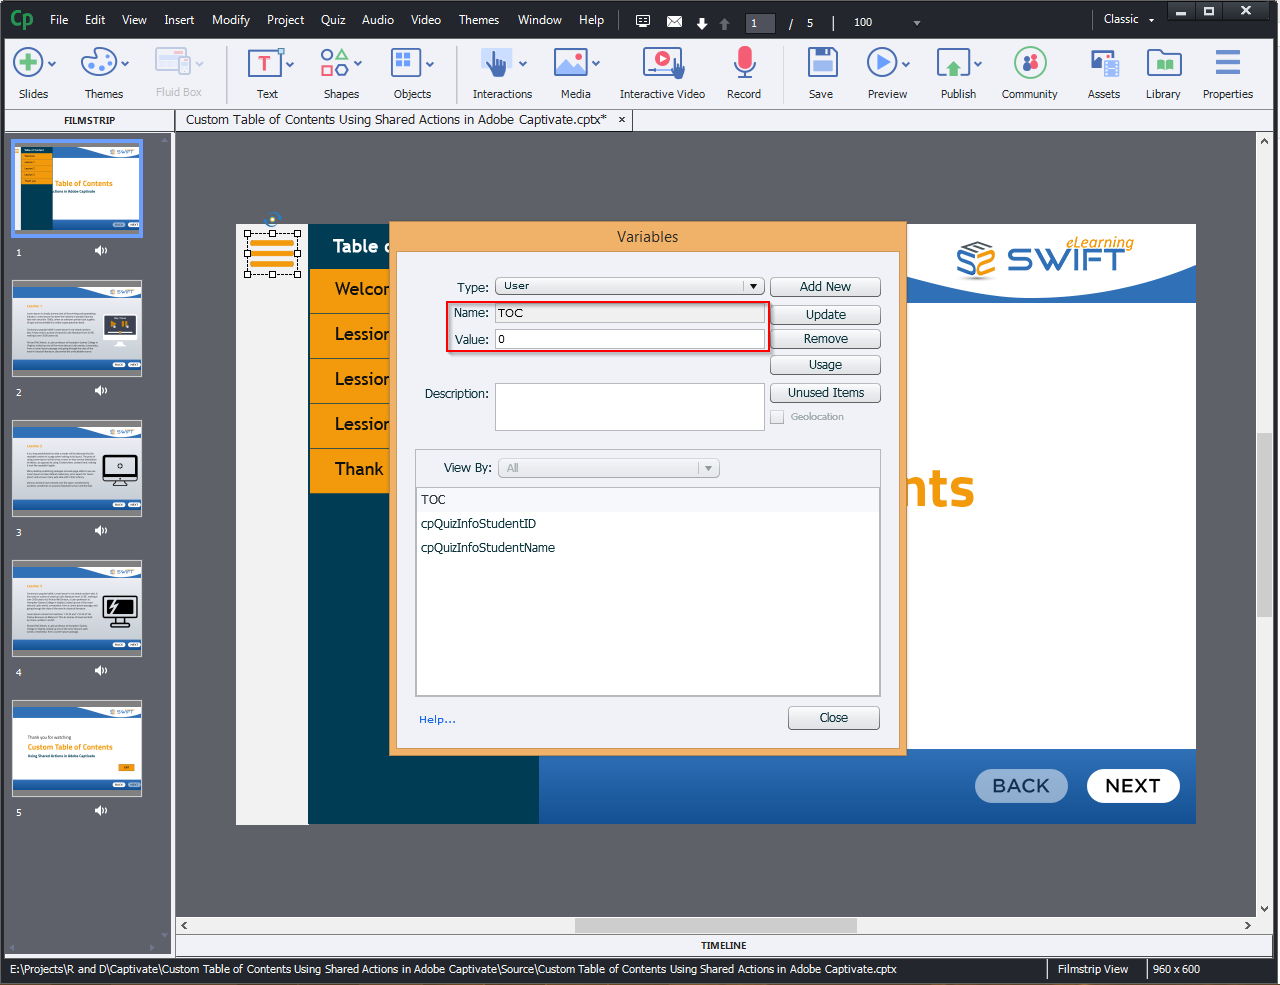
Step 3: Next, add new variable as shown below.
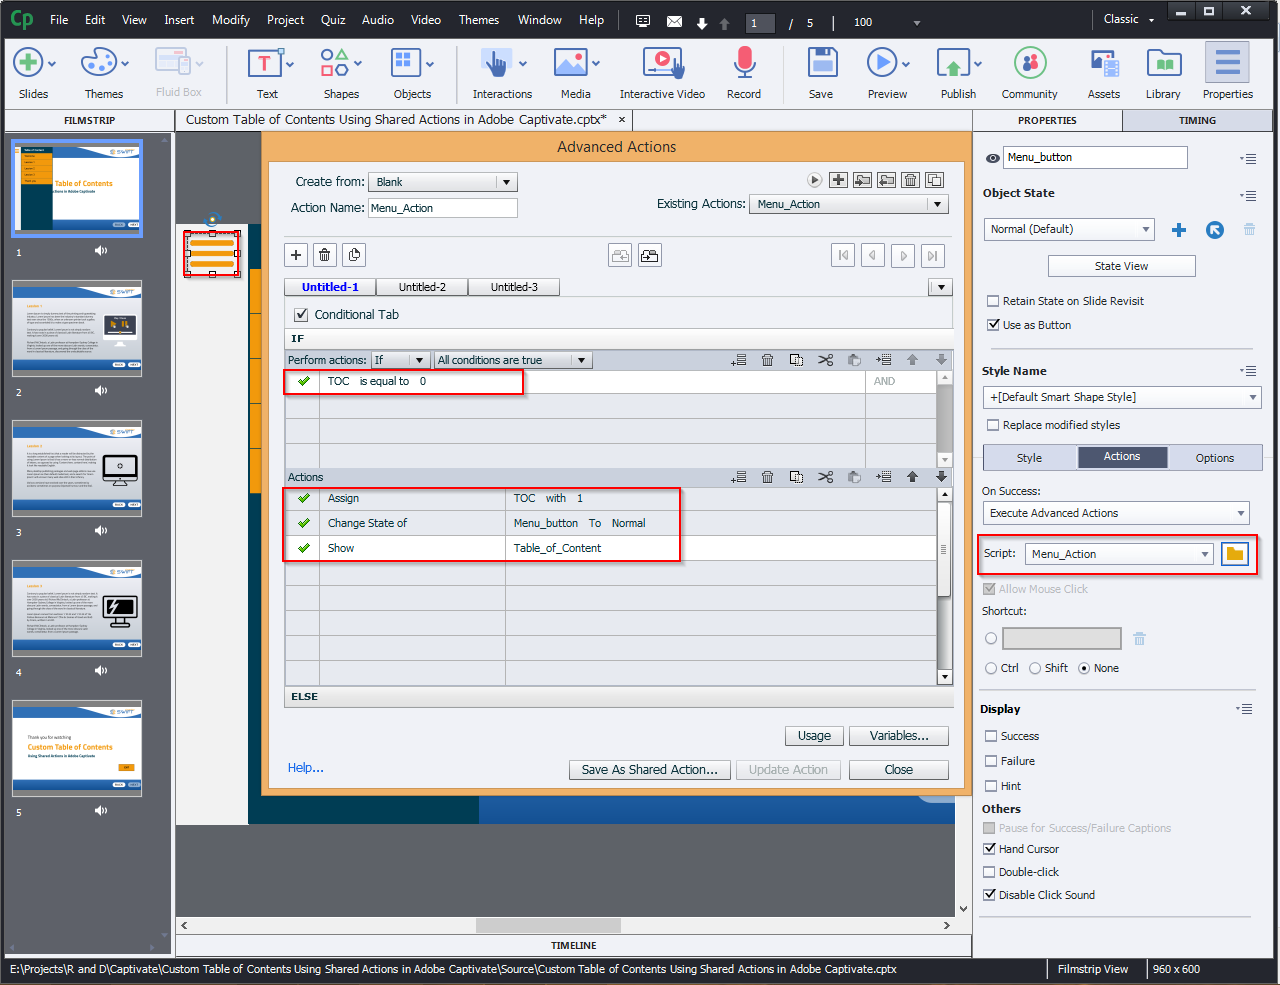
Step 4: Create a menu action:
IF:
TOC is equal to 0
Actions:
Assign TOC with 1
Change State of Menu_buttton To Normal
Show Table_of_content
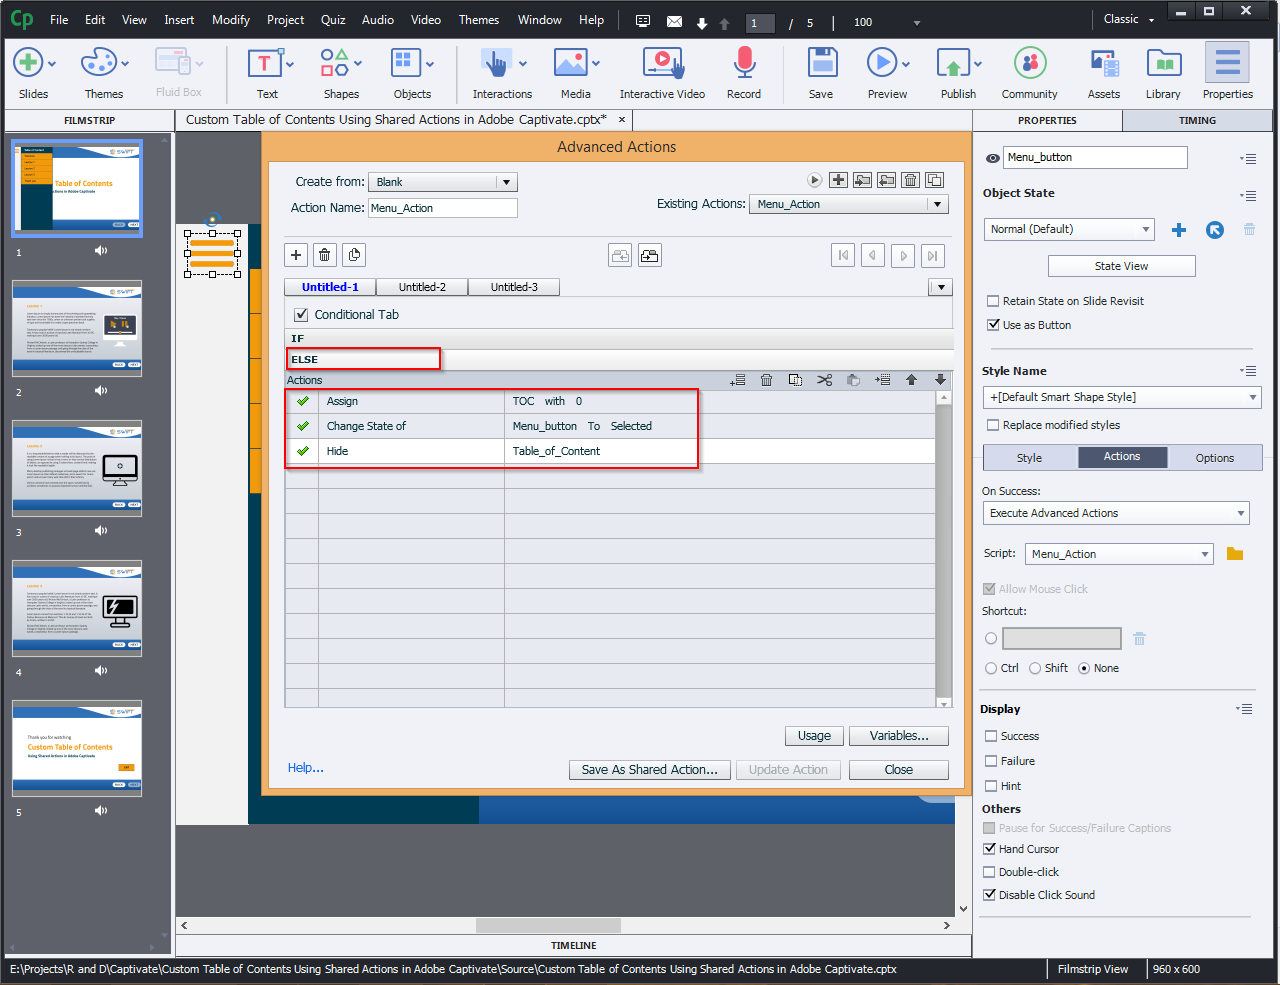
Else:
Assign TOC with 0
Change State of Menu_buttton To Selected
Show Table_of_content
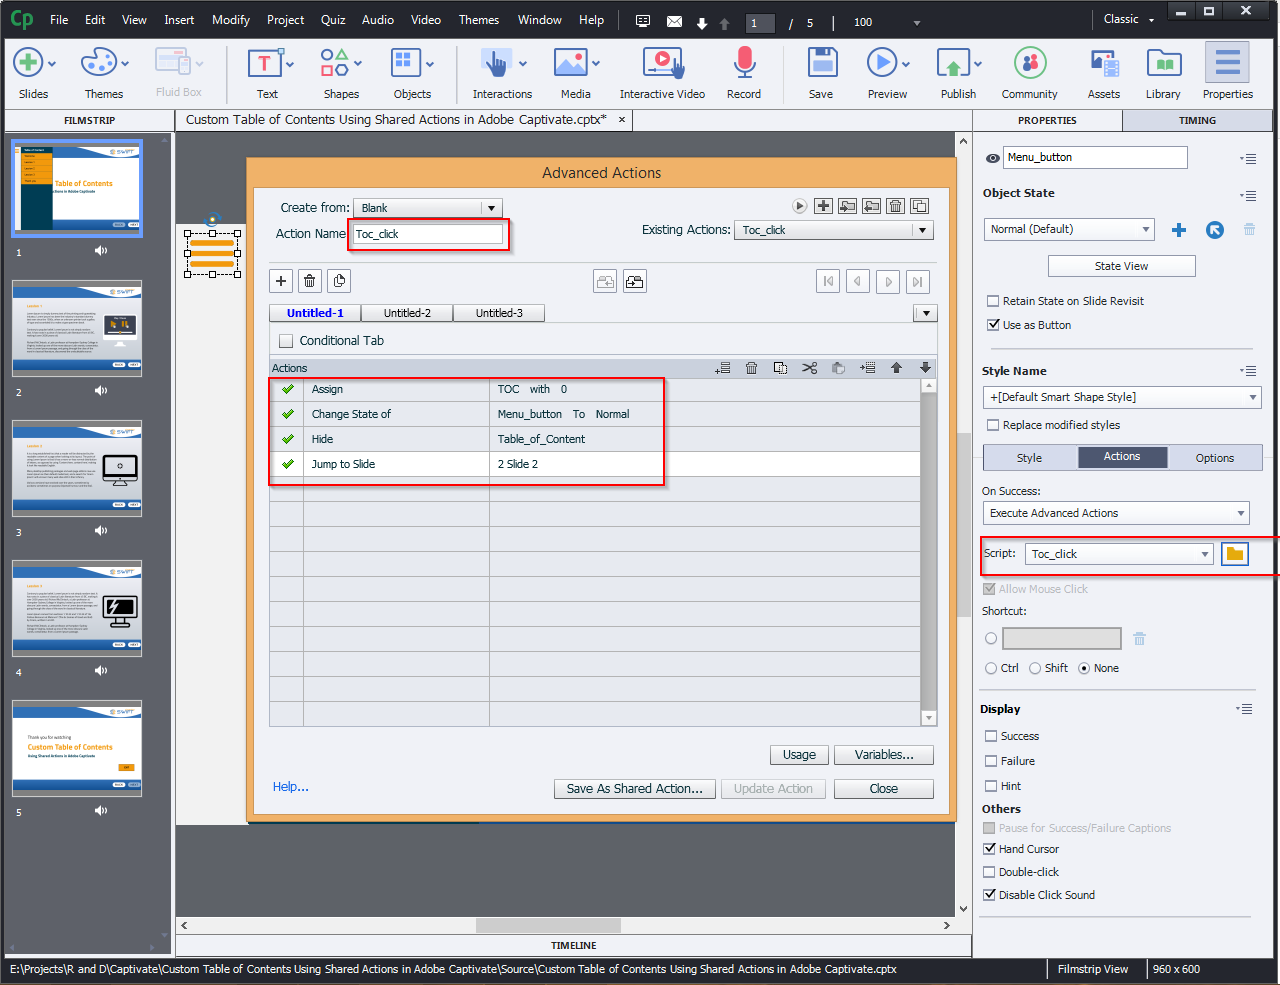
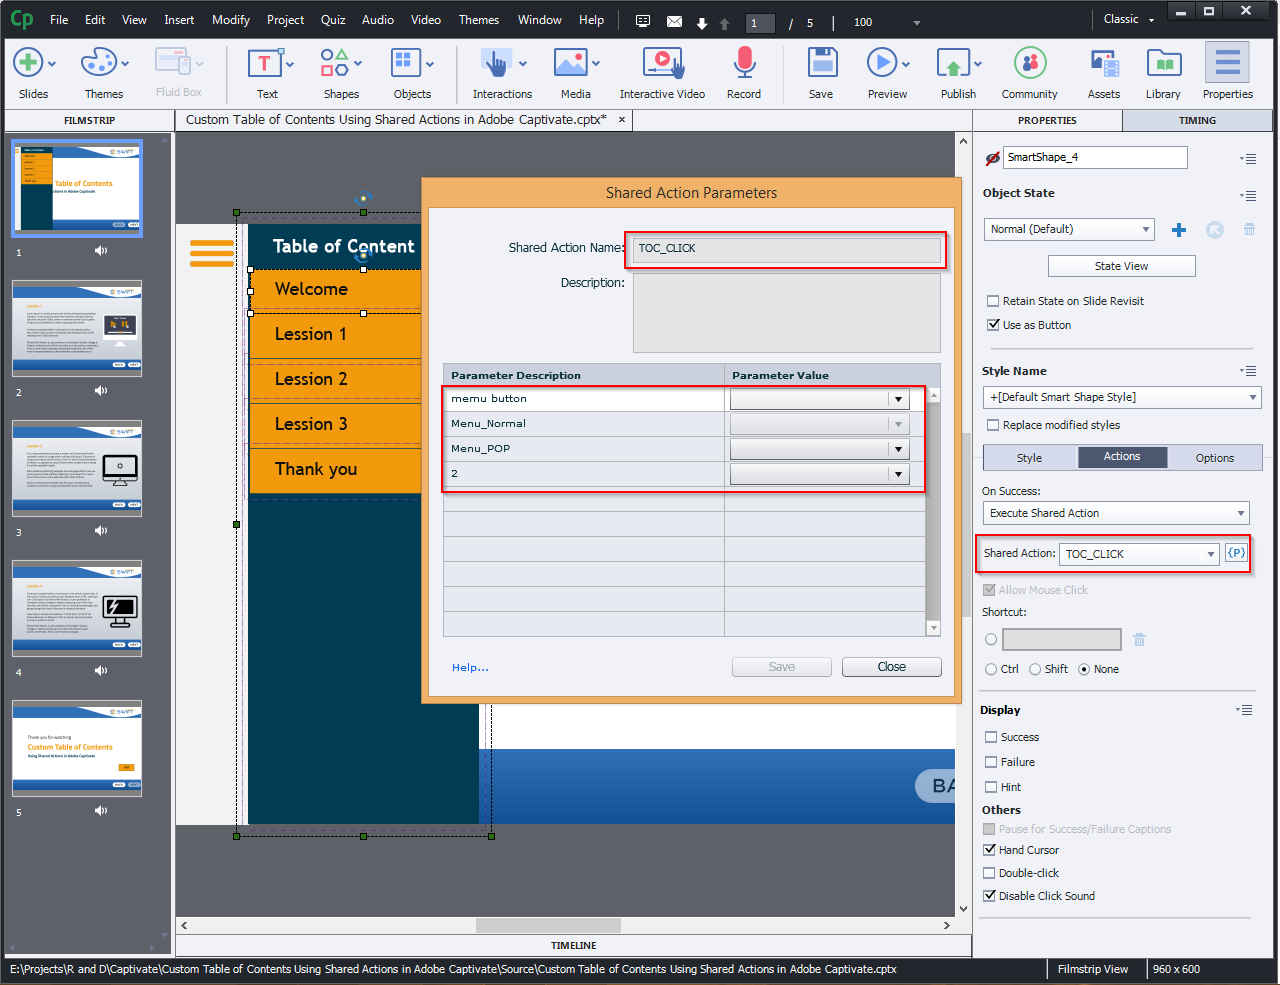
Step 5: Now, follow the steps given below to create a shared action:
Give a specific name for action (Ex: Toc_click).
Assign TOC with 0.
Change State of Menu_button To Normal.
Hide: Table_of_Content
Jump to Slide: (Which slide do you want to visit?)
Step 6: Click Save as Shared Action…
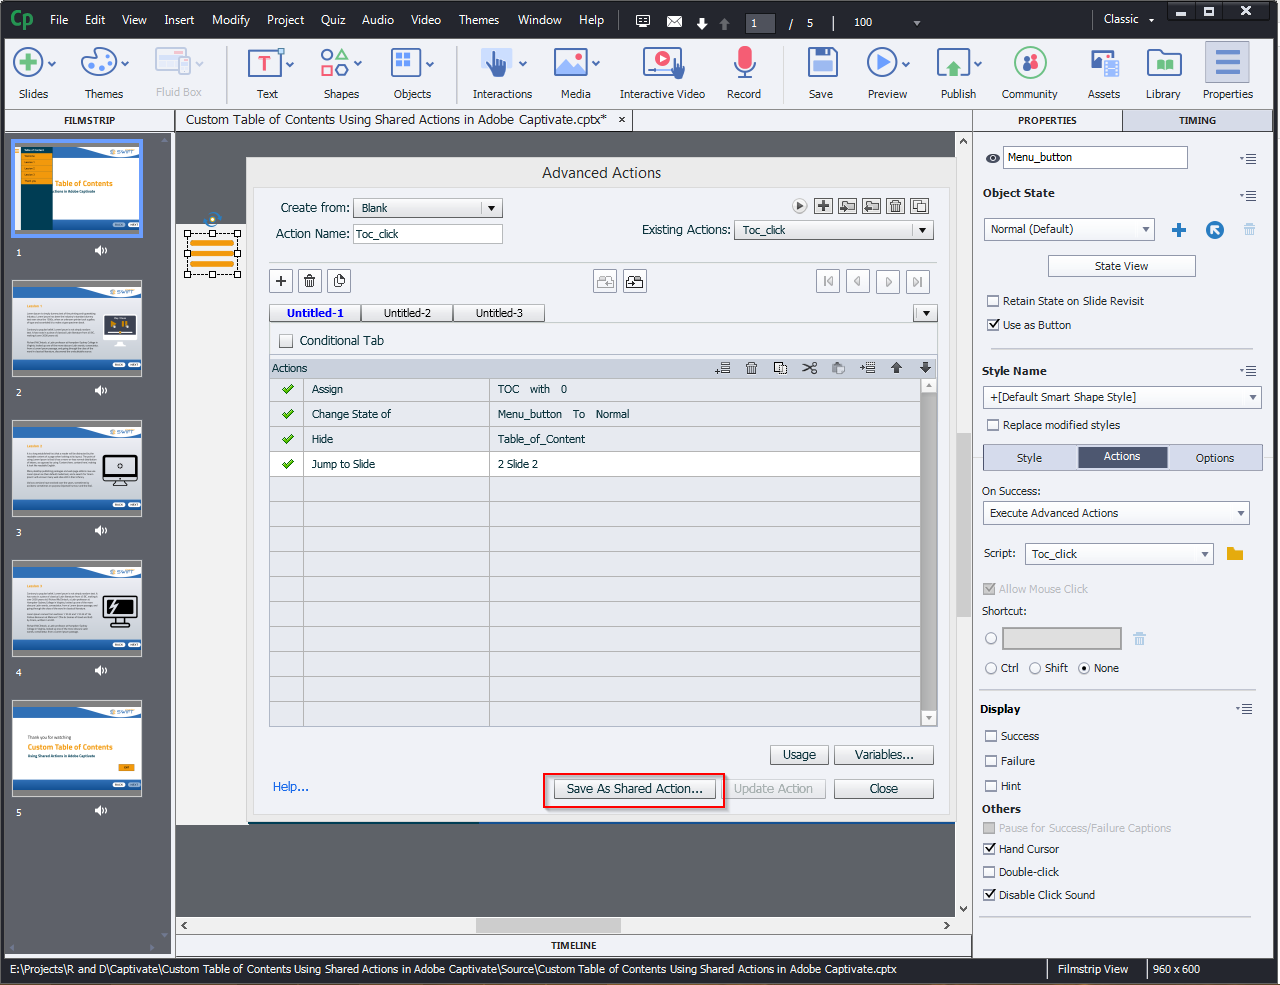
Step 7: When you choose Save As Shared Action…., a window similar to the one below appears.
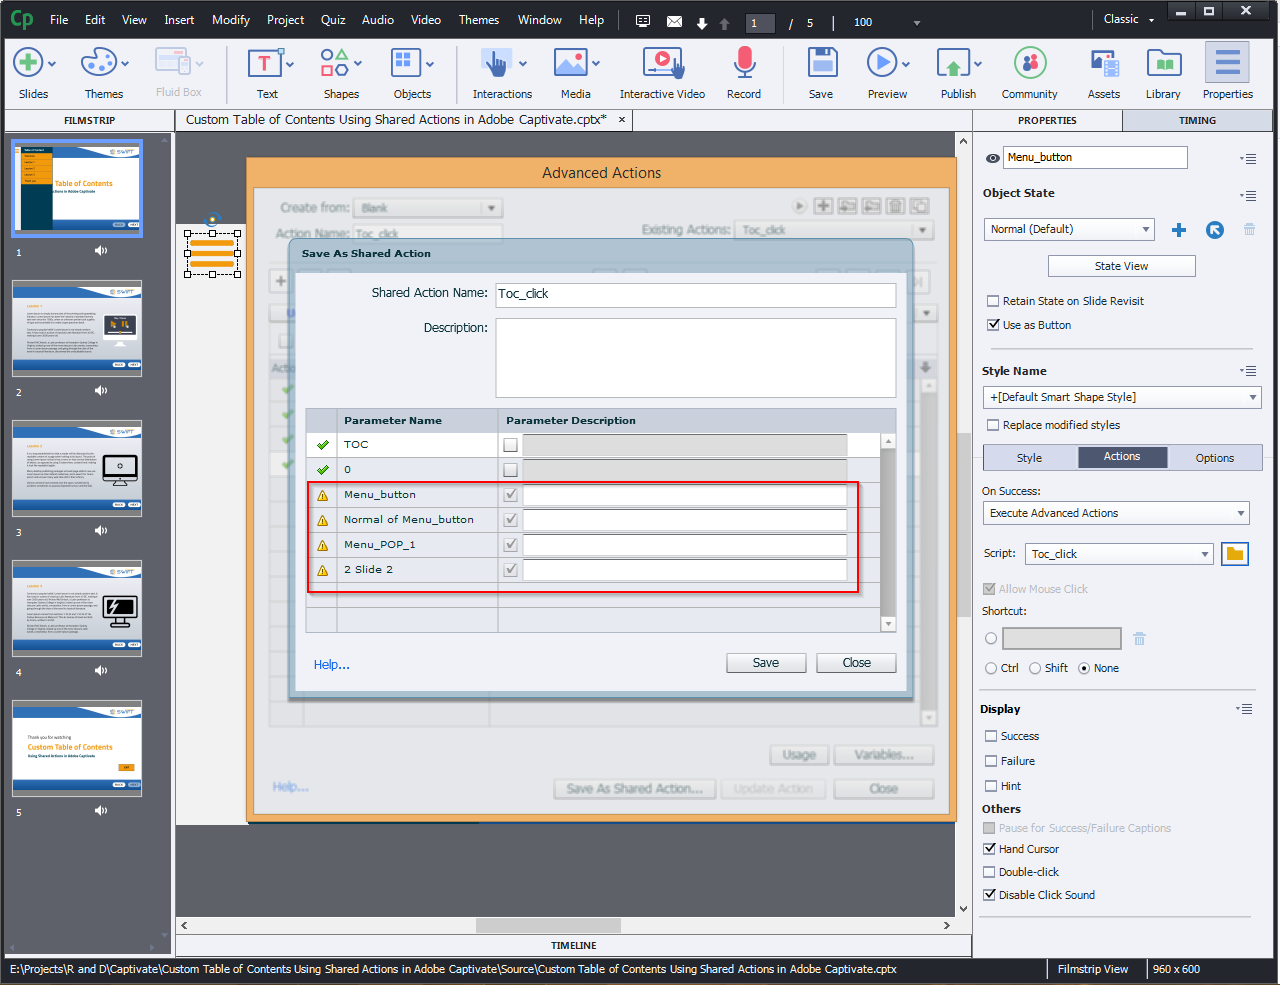
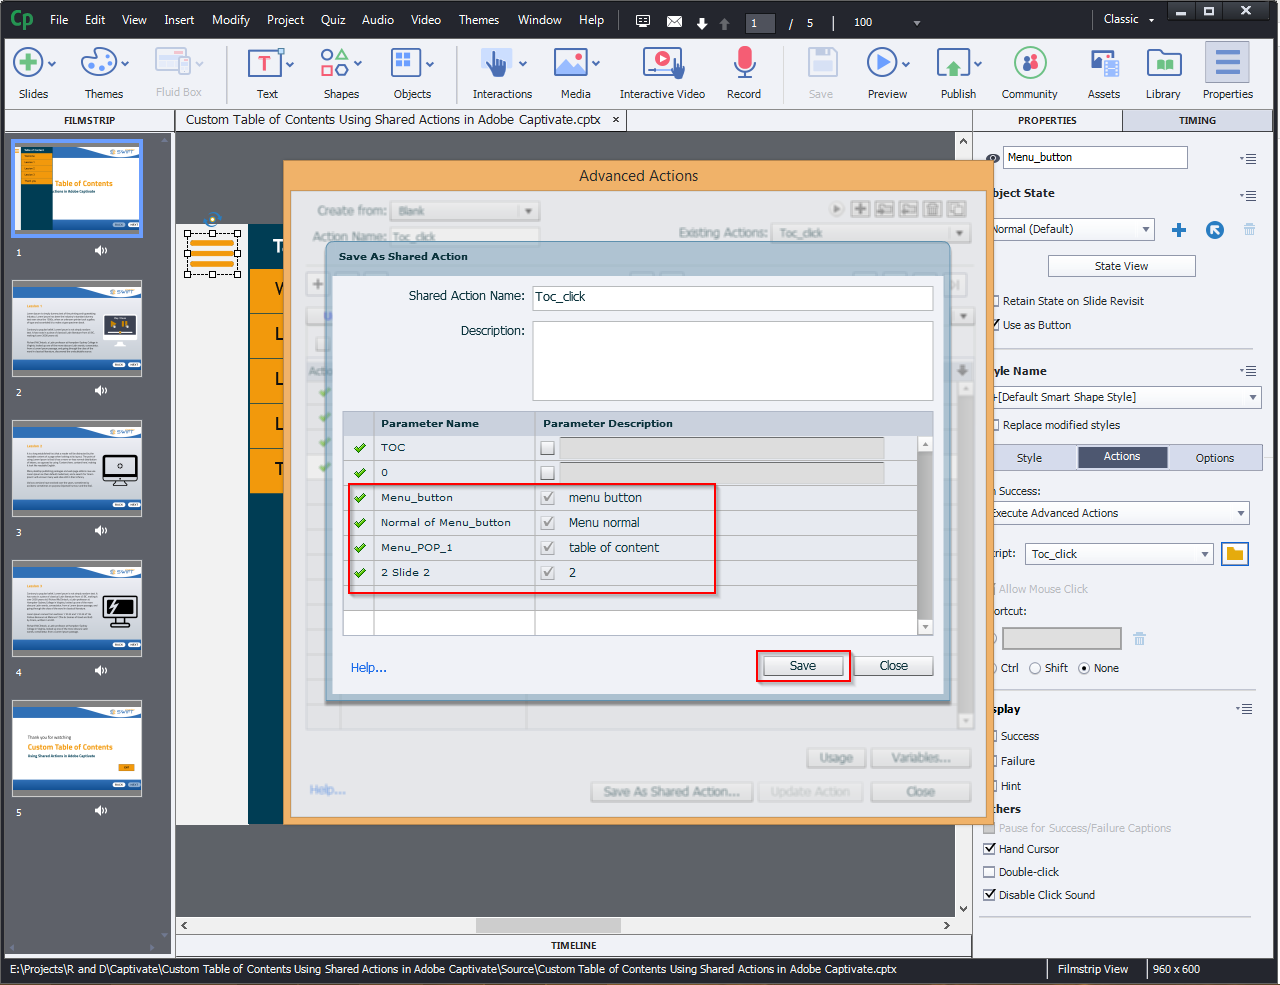
Step 8: As shown in the screenshot below, update the highlighted field.
Step 9: Now select the title from the table of content and go to Executive Shared Action.
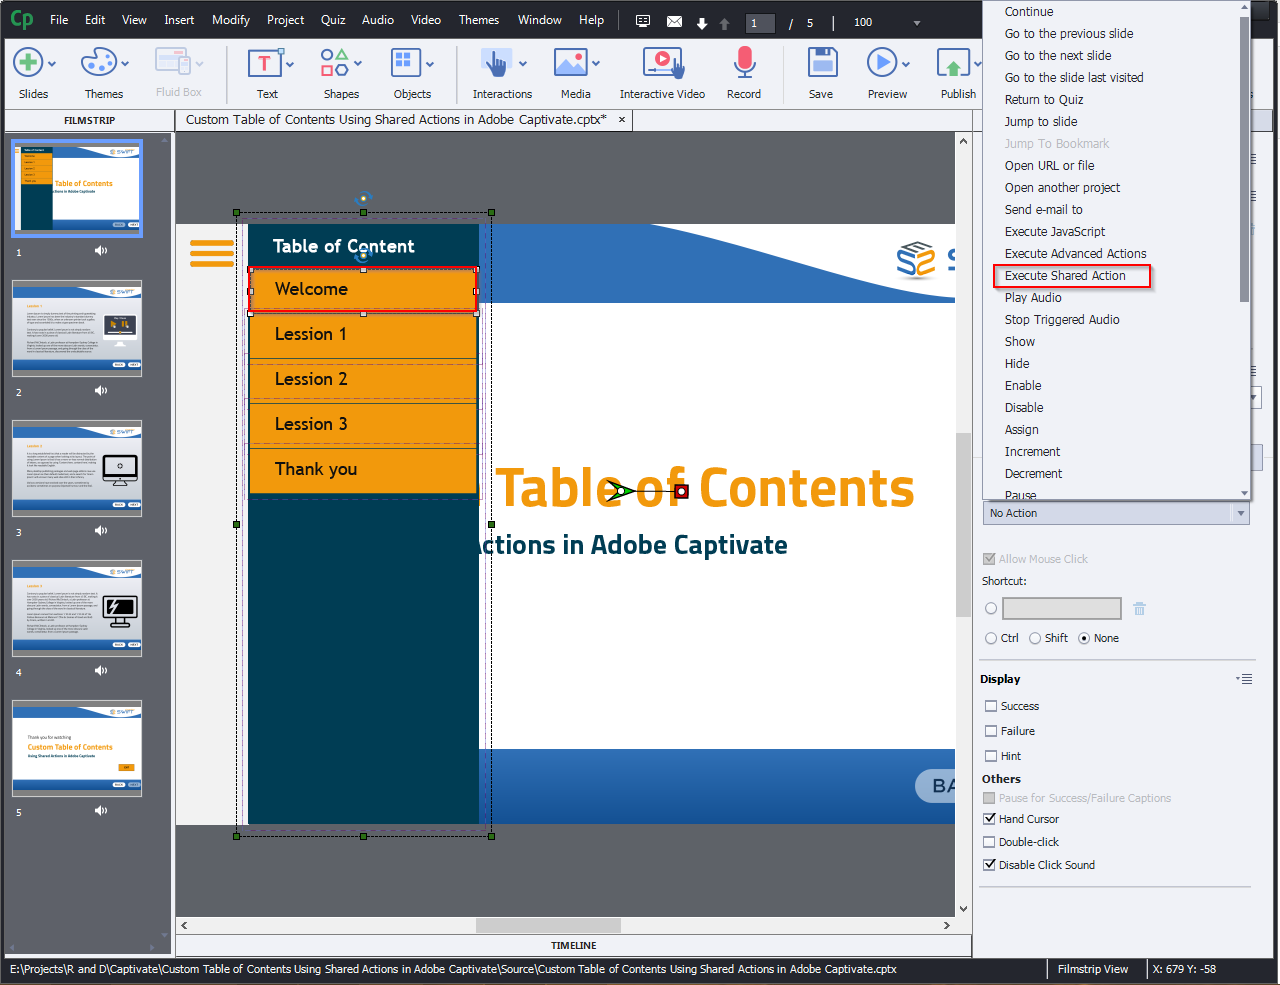
Step 10: In the highlighted field, enter the parameter value.
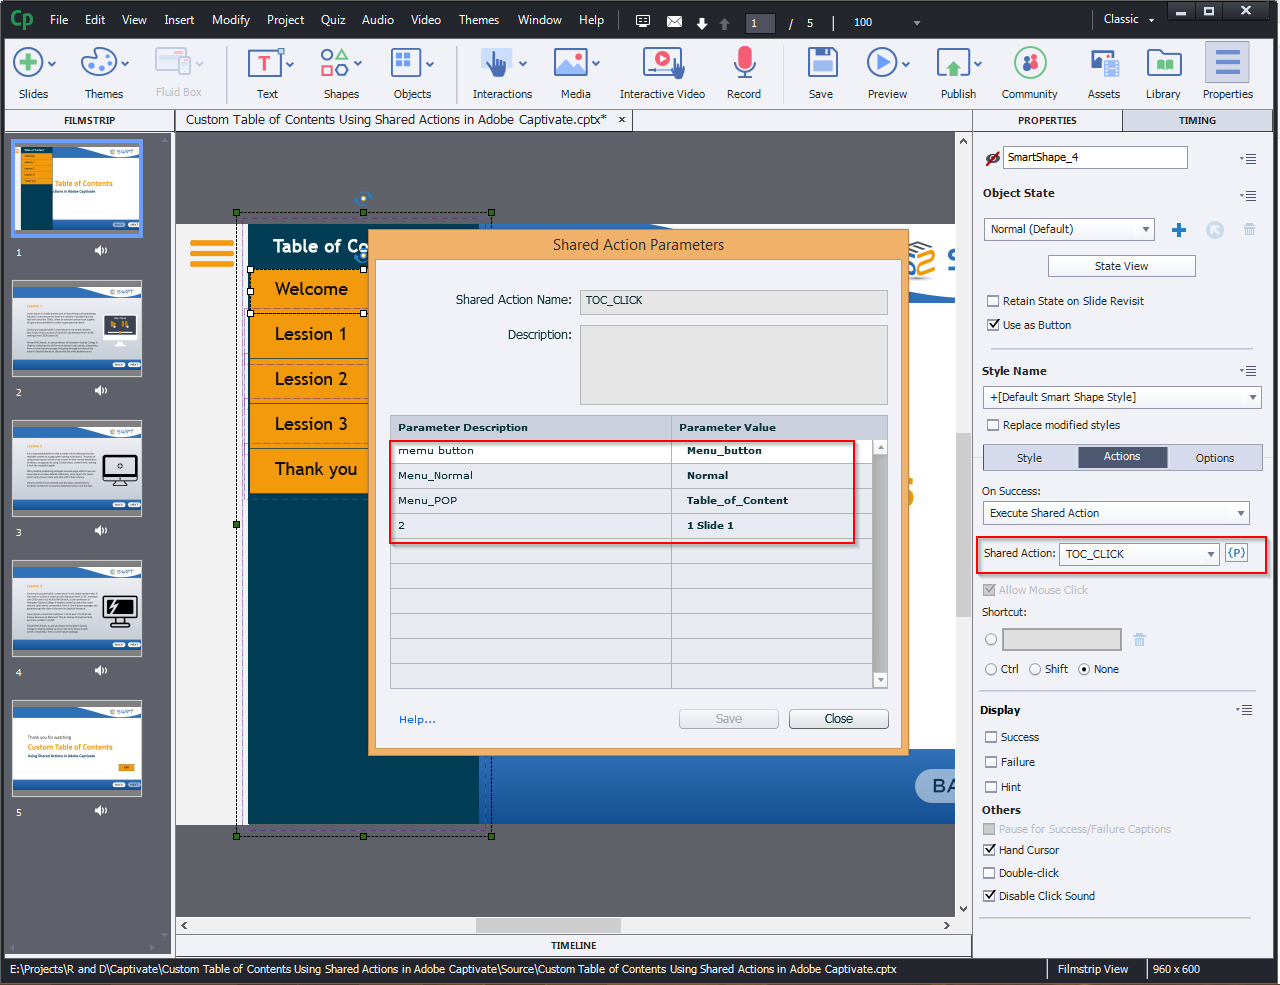
Step 11: The same procedure should be followed for each title in the table of contents and assign the respective slide number in jump to slide.

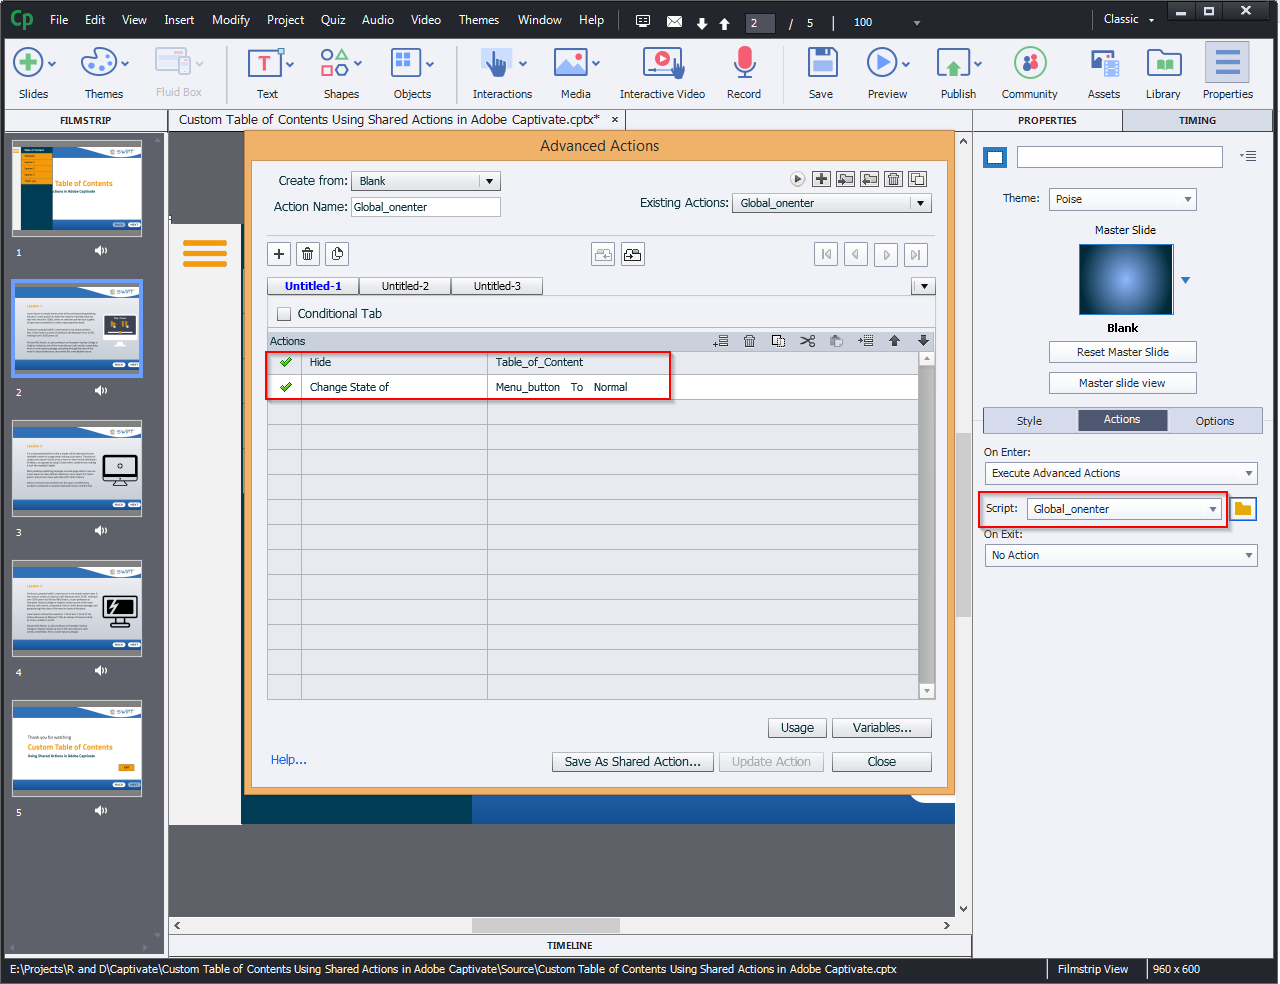
Step 12: On each slide, you must execute the global action “On Enter” as well as the actions mentioned below.
Hide: Table of Content
Change State of Menu_button To Normal.
Here is the sample course with a customized Table of Content:
https://www.swiftelearningservices.com/samples/custom_table_of_contents/index_scorm.html


Leave a Reply
Want to join the discussion?Feel free to contribute!