
Learning how to edit a video used to require a ton of skills. In fact, it wasn’t that long ago that you really needed professional equipment and training to create great videos.
Luckily, that’s no longer the case!
Today it’s possible to create professional-quality videos with no video experience at all.
I’ll show you how!
Whether you’re looking to make videos for education, for platforms like YouTube, or your business, learning how to edit videos helps you connect with your audience better than ever.
Ready to elevate your video projects?
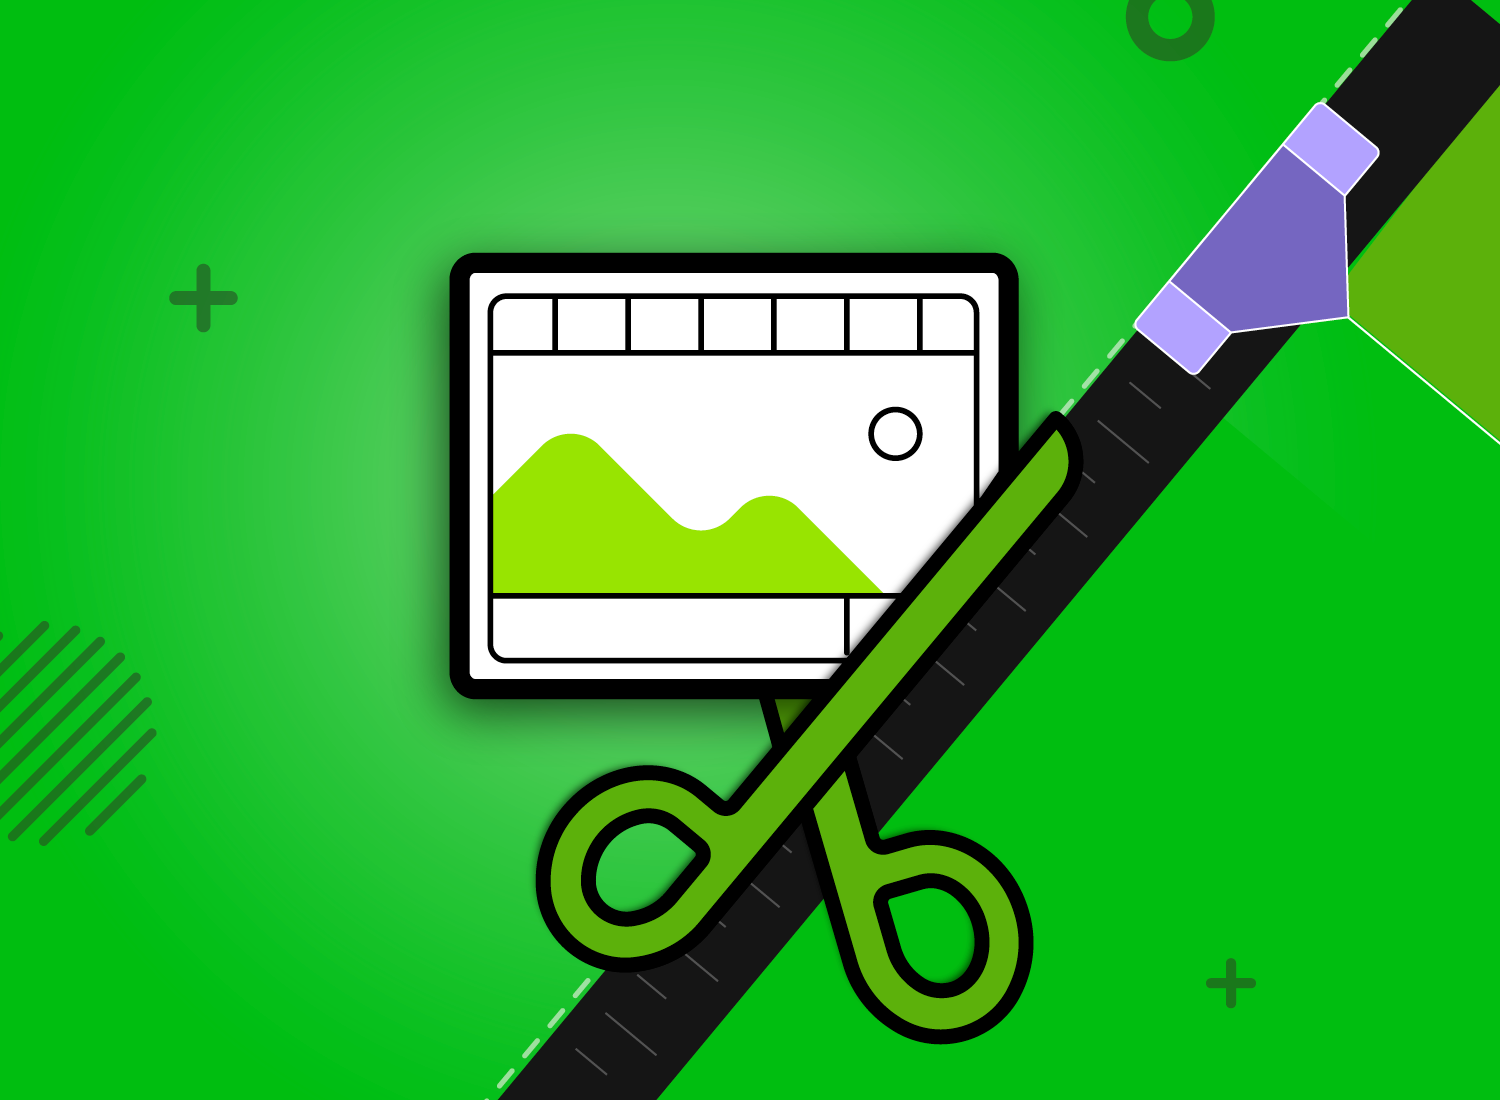
Edit Your Own Videos like a Pro
Camtasia is the best screen recorder and video editor on the market. Create content your viewers actually watch.
Download Camtasia for Free!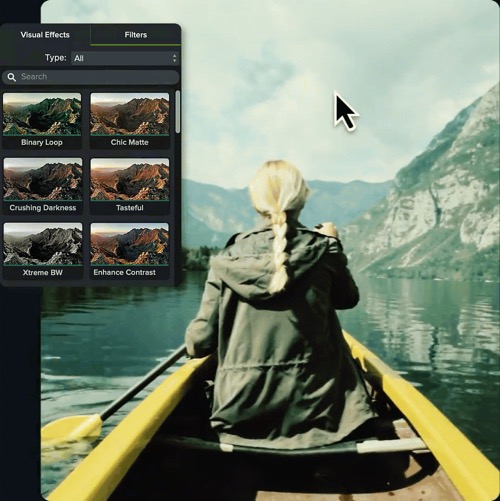
Before you start editing
There’s more to editing video content than meets the eye! As with many creative projects, success comes from effective planning and preparation. Let’s take a look at some of the early steps you need to take before jumping into the editing suite.
Import or record your footage
If you have footage shot on your phone, the first thing you’ll need to do is import it to your computer. For Mac users, we highly recommend airdropping to your device. If you’re on Windows, OneDrive is a great option.
Once your footage is on your computer, it’s best to back up your media in two or three places, including cloud storage and physical hard drives. This might sound over-the-top, but should anything happen to your computer, hard drive, or internet connection, you’ll be glad you were extra careful.
Next, create a new project and save it as a standalone project file. This makes it super-easy to keep your footage and media assets organized because they’re being saved to the same project file.
Start by saving your new project
Then, import your files to your editing software. In Camtasia, adding footage is as easy as dragging and dropping it into the media bin. You can also open the media bin and choose Import to select your files.
Even at this early stage, you should see the benefit of taking the time to organize your footage before editing, with each shot clearly labeled.
But if you need to record footage, look no further than Camtasia Rev. Rev makes it easy to record your webcam, screen, and voice. Plus, it makes editing your video faster with a variety of automatic features like size, layout, background, effects, and filters. Check out our Rev editing workflow video to see it in action!
Pro tip: As you populate your Media Bin, save the file frequently by going to ‘File’ and clicking ‘Save’. Alternatively in Camtasia, you can use the keyboard shortcut by pushing Control (Ctrl) + S on Windows or Command (Cmd) + S on Mac. Learn about shortcuts in Camtasia.
How to edit a video in Camtasia
Most video editors offer a number of the same tools and similar workflows, but not all video editors are created equal. Here’s a quick walkthrough aimed at equipping you with everything you need to know about video editing tools.
Before we get into the walkthrough, let’s discover the key features of video editing software!
Key features of video editors
They might be named differently in your editor, but most video editing software has many of the following features:
Media bin: We think of this as the kitchen, which contains all the ingredients (video clips, music, narration) for the video you’re making right now.
Media library: If the media bin is your kitchen, the media library is your pantry, which contains many basic assets like intros and outros, video clips, and music that you can use in any video.
Assets: Building on our food analogy ー assets are like your personal supermarket. Thousands of B-roll videos, motion backgrounds, soundbytes, music scores, and more are available whenever you need them with Camtasia assets.
Edit video with popular tools
Annotations: Whether it’s adding readable text on screen to underline your message, or using arrow pointers to highlight elements, the annotation tool ensures your viewers never miss the important parts of your video. Annotations are an important part of accessibility! Here’s how to add them in Camtasia.
Visual effects: Visual effects can make your background disappear or apply a cinematic blur to focus on the main subject. How about enhancing colors to make your footage pop? Good news! Professional-grade effects are just a few clicks away, enabling you to craft stunning videos that stand out.
Filters: Enhancing the look of your video is fast and easy with filters. Filters adjust the mood and tone of your footage using color enhancement, sometimes called look up tables (LUTs). Select one of many presets or create a custom one that contributes to your video’s overall impact.
Transitions: Easily transition between scenes with fades and transitions. Smooth fades gently guide your audience from one scene to the next, while dynamic wipes add energy and movement to your transition. The transition tool helps you maintain flow and keep your viewers engaged.
Animations: Animations add motion to your static images, creating an immersive experience that captivates your audience. They can be used to achieve effects like:
- Webcam recordings transitioning or trading places with a screen recording.
- Images that enter the video from the left and pause before moving off the canvas.
- Callouts that animate in various ways on the canvas to draw attention to an area in the video.
Behaviors: With behaviors, you can automate animation sequences on image or text, making them grow, shrink, slide, or pop without needing keyframe adjustments. These tools are designed to add polish to your projects, making your video not just seen, but remembered.
Edit video with useful effects
Cursor effects: With cursor effects, you can highlight or magnify your mouse pointer, making it easy for viewers to follow along with your tutorials or presentations. Edit the cursor.
Audio effects: Audio effects ensure your sound is as clear and impactful as your visuals. From removing background noise to enhancing voice clarity, our audio tools are here to make sure your message is heard loud and clear. Add audio effects.
Regardless of the tools and effects you decide to use, be sure to use them somewhat sparingly. Too many transitions or effects might make your video feel chaotic and look amateurish. When using transitions, it’s best to only use them at the beginning and end of a video, or when there’s a significant change in the video’s content.
Edit Your Own Videos like a Pro
Camtasia is the best screen recorder and video editor on the market. Create content your viewers actually watch.
Download Camtasia for Free!
Practical editing techniques
Once you’ve explored the key features of your video editor, it’s time to strap in and start editing your clips. But what should you do to effectively edit your video? Let’s explore some ideas..
Techniques for cutting and stitching video sections
When you add your footage to the timeline, a good practice is to make any large cuts to the footage. If you know that the first two minutes of a clip needs to be cut, do it now!
Learn how to quickly trim videos.
Effective editing often involves removing parts of your video to keep the content concise and engaging. If you’d like to experiment with more advanced editing techniques, you could even try adding some L-cuts and J-cuts to your video. Stepping outside of your comfort zone and playing around with different creative processes can be a great way to hone your skills.
If you simply delete a video section and move the clips together, you might find gaps in your timeline. The cutting tool seamlessly joins clips together, reminding you where the cut was made and smoothly joining the clips. Camtasia’s cutting tools allow you to easily remove unwanted sections. Simply hit CTRL+X on Windows or Command+X on Mac.
Expert tip: Boost your editing efficiency in Camtasia by using Shift + Click to precisely drag sections from the playhead. Then, hit the spacebar for quick playback of selected sections
Using Zoom-n-Pan and custom animations for dynamic content.
Master the timeline
Mastering the timeline is crucial for efficient video editing. A handy feature in Camtasia is the use of red and green tabs on the media playhead. These allow you to effortlessly adjust the start and end points of your clips.
This means you can quickly move elements back and forth on the timeline, ensuring precise timing and seamless transitions between segments. Check out this step in action:
No matter what software you’re using, play around with the timeline until you feel comfortable. You’ll be using the timeline a lot, so it’s a good idea to familiarize yourself with it!
Shrink and grow footage
Animation can dramatically increase the engagement and understanding of your content. With Camtasia, adding animations like ‘Grow’ and ‘Shrink’ is straightforward, enabling you to highlight specific parts of your video or make transitions more dynamic.
This technique is perfect for creating Picture-in-Picture (PiP) effects, enhancing tutorials, or presentations with a more interactive feel.
How to apply transitions
Drag and drop transitions are a great way to give your video a polished look, and they’re easy to use in Camtasia! You may want to apply a simple fade to your scenes or use a more complex transition like ripple or dissolve, if that’s fitting for your video.
But did you know that transitions aren’t only useful between scenes? You can also use transitions with annotations or other images shown on-screen to provide a more focused and polished look. Here’s how easy it is to add transitions with Camtasia!
How to add animations
Animating your videos is a powerful way to captivate your audience, and Camtasia makes it intuitive, whether you’re on Windows or Mac. Like transitions, it’s important to use animations intentionally. You don’t want to distract your viewers!
Windows users have a fantastic tool at their disposal—the ‘Scale to Fit’ feature, which works hand-in-hand with Zoom and Pan. This feature allows you to focus on specific content or create a dynamic flow throughout your video. To use it, simply select the clip you want to animate, navigate to the ‘Animations’ tab, and choose ‘Zoom-n-Pan.’ From there, you can adjust the scale of your clip to fit the screen as needed, providing a smooth, animated transition that keeps your viewers engaged.
Mac users aren’t left behind when it comes to animation. The ‘Restore’ feature in Camtasia for Mac leverages custom animation, allowing for a high degree of personalization and creativity. To animate a clip, head to the ‘Animations’ tab and select ‘Custom Animation.’ Drag the animation to your timeline, and then tweak the scale, position, and rotation as desired. This method gives you the flexibility to create unique animations that can emphasize points, guide your audience’s attention, or simply add a touch of flair to your videos.
Enhance the cursor in your video
Camtasia’s suite of tools makes it easy to manage cursor movements, ensuring your viewers can follow along without missing a beat. Plus, adding cursor effects can help emphasize key points or give your audience a moment to absorb the information. Whether it’s highlighting clicks or smoothing cursor paths, these tips will polish your screen recordings to perfection.
Brand your video with custom assets
Your brand tells your story, and consistency is key to making that story resonate. With Camtasia, incorporating branded elements into your videos is a breeze. Use customizable animated titles to introduce your content with flair and align with your brand’s colors and fonts. This cohesive approach not only strengthens your brand identity but also elevates the professionalism of your videos.
Add music to your video
According to our research on Video Viewer Habits, Trends, And Statistics you Need to Know, nearly half of the videos we identified as “great” featured background music. This underscores the importance of adding music to your videos, as it can truly elevate the viewing experience.
Whether you’re aiming to set the tone, build excitement, or underscore key moments, the right soundtrack can transform your content. Here’s how to seamlessly integrate music into your video projects with Camtasia:
Audio effects and balancing
The right balance between music and narration is essential for engaging videos. Whether you’re looking to emphasize your narration or create the perfect ambient mood, effects like emphasize or fade-in and fade-out allow you to fine-tune your audio for an immersive listening experience.
Camtasia’s audio effects offer you the control to ensure your background music complements, rather than competes with, your voice.
Get started creating videos!
This may seem like a lot, but remember you can always start small and add more techniques and skills as you go. In fact, one of the greatest things about Camtasia is that it’s easy enough for beginners, but powerful enough to be your video editor for life.
If you want even more content on making your first video, our full five-part course is available for free on the TechSmith Academy.
It features multiple video experts, including Owen Video (Thevideospot.net), Buddy Scalera (Content Strategist), Jason Valade, Master Trainer (TechSmith), and Amanda Robinson (Social Savvy Society).
Embark on your video editing journey, and discover the endless possibilities that await. With Camtasia, every video project is an opportunity to captivate, educate, and inspire. Ready to elevate your video projects to unprecedented heights?
Download Camtasia today and unlock your creative potential. Let’s make something amazing together.
Edit Your Own Videos like a Pro
Camtasia is the best screen recorder and video editor on the market. Create content your viewers actually watch.
Download Camtasia for Free!
How to edit videos on iPhone?
To edit videos on iPhone, you can use the built-in iMovie app. Simply import your footage, select the clips you want to use, and then use the editing tools to trim, adjust, and add effects to your video. Once you’re happy with your video, you can export it in a variety of formats and share it with others.
How to edit TikTok videos?
To edit TikTok videos, you can use the built-in editing tools in the TikTok app or Camtasia video editing software. Simply select the clip you want to edit, and then use the editing tools to trim, adjust, and add effects, text, music, or filters. Once you’re happy with your video, you can post it to your TikTok account for others to see.
How to edit Youtube videos?
To edit YouTube videos, you can use the Camtasia video editing software. All you need to do is import your footage, select the clips you want to use, and then use the editing tools to trim, adjust, and add effects, transitions, text, or music to your video. Once you’re happy with your edits, you can export your video directly to YouTube, or export it locally before manually uploading it.
How to edit videos on Windows?
On Windows, you can use video editing software such as Camtasia, which offers a simple interface with powerful editing tools. First, import your footage, select the clips you want to use, and then use the editing tools to trim, adjust, and add effects, transitions, text, or music to your video. Once you’re happy with your edits, export your video in a variety of formats and share it with your colleagues, friends, and family.
How to edit video on mac?
The Camtasia editing suite offers a range of powerful and intuitive features to help you create professional-quality videos on Mac and Windows. To start editing, simply import your footage and use the editing tools to trim, adjust, and add effects, transitions, text, or music to your video. Once you’re satisfied with your edits, you can export your video in a range of formats and quickly share it with your audience.
Share