

Taking a screenshot on your Mac is a simple and useful way to capture and save information. However, sometimes you may want to crop the screenshot to focus on a specific area or remove unnecessary parts.
In this article, we will guide you through the steps on how to screenshot on Mac and crop it to your liking!
Crop your screenshots with Snagit!
It’s super easy to crop your screenshot with Snagit’s intuitive features.
Download Free Trial
Why crop a screenshot on Mac?
Cropping a screenshot on Mac can be useful in many situations. For example, to share a specific part of a webpage or document with someone, you can crop the screenshot only to show that part of the screen. This can also be helpful when creating engaging presentations or tutorials, as you can focus on the important information without any distractions
How to take a screenshot on Mac
Before we learn how to crop a screenshot on Mac, let’s first go through the steps of taking a screenshot and some keyboard shortcuts that can help.
To screenshot, press the “Command + Shift + 3” keys on your keyboard.
To take a screenshot of a specific area, press “Command + Shift + 4” keys. Your cursor will turn into a crosshair, and you can click and drag to select the area you want to capture.
To take a screenshot of a specific window, press “Command + Shift + 4” keys, then press the spacebar. Your cursor will turn into a camera icon, and you can click on the window you want to capture.
Built-in screenshot tools for cropping a capture on Mac
Conveniently, Mac computers already have a cropping tool included. We’ll go through two ways to crop your screenshot.
How to crop a screenshot with Mac’s editor
Open your screenshot by double-clicking it and then access the Markup Toolbar.
Click on the “Crop” button.
Click and drag the corners of the crop box to select the area you want to keep. You can also adjust the size and position of the crop box by clicking and dragging the edges.
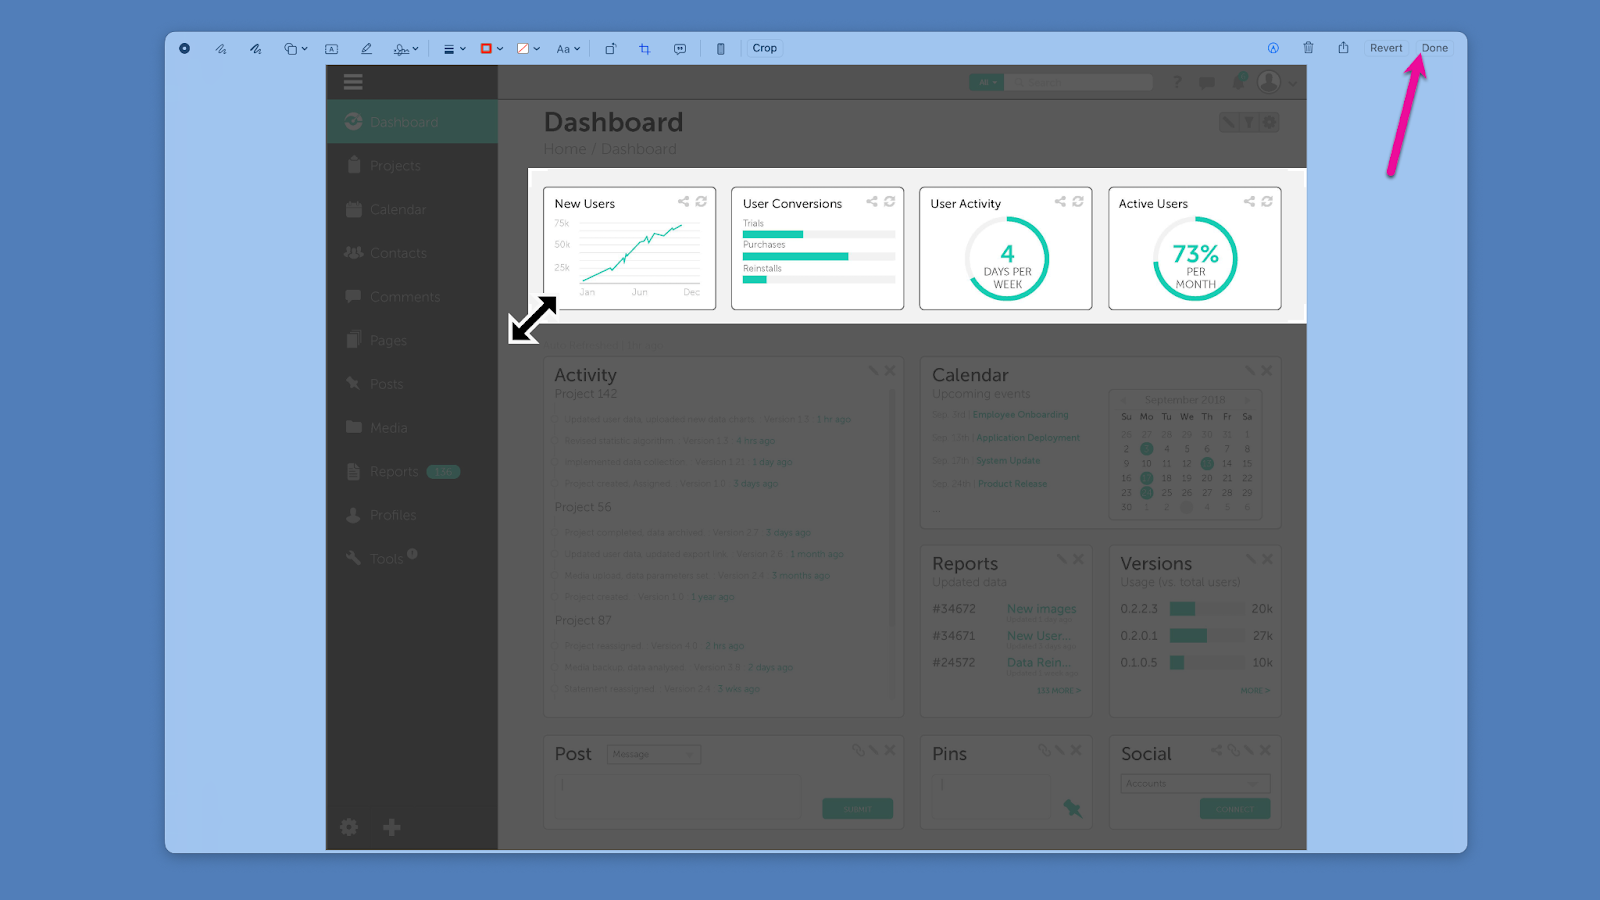
Once you are satisfied with the selection, click on the “Done” button in the bottom right corner of the window.
Your screenshot is now cropped, and you can save it by clicking on “File” in the menu bar and selecting “Save” or by pressing “Command + S” on your keyboard.
How to crop a screenshot on Mac using Preview
Open your screenshot in Preview and access the Markup Toolbar.
Click on the “Selection” tool.
Click and drag to select the area you want to keep. You can also adjust the size and position of the selection by clicking and dragging the edges.

Once you are satisfied with the selection, click on “Tools” in the menu bar and select “Crop” or press “Command + K” on your keyboard.
You can save your cropped screenshot by clicking on “File” in the menu bar and selecting “Save” or by pressing “Command + S” on your keyboard.
Crop your screenshot with Snagit!
It’s super quick to crop your screenshots with Snagit’s easy-to-use features.
Download Free Trial
Crop your screenshot using Snagit
Third-party apps are available and can help you crop your screenshots on Mac like Snagit. This app offers more advanced features and customization options for cropping your screenshots.
How to take a screenshot using Snagit
The most common way to take a screenshot with Snagit is to open the Snagit Capture window and select what type of capture you need. Whether a specific region, scrolling screenshot, full screen, or other, Snagit can take the perfect capture for you!
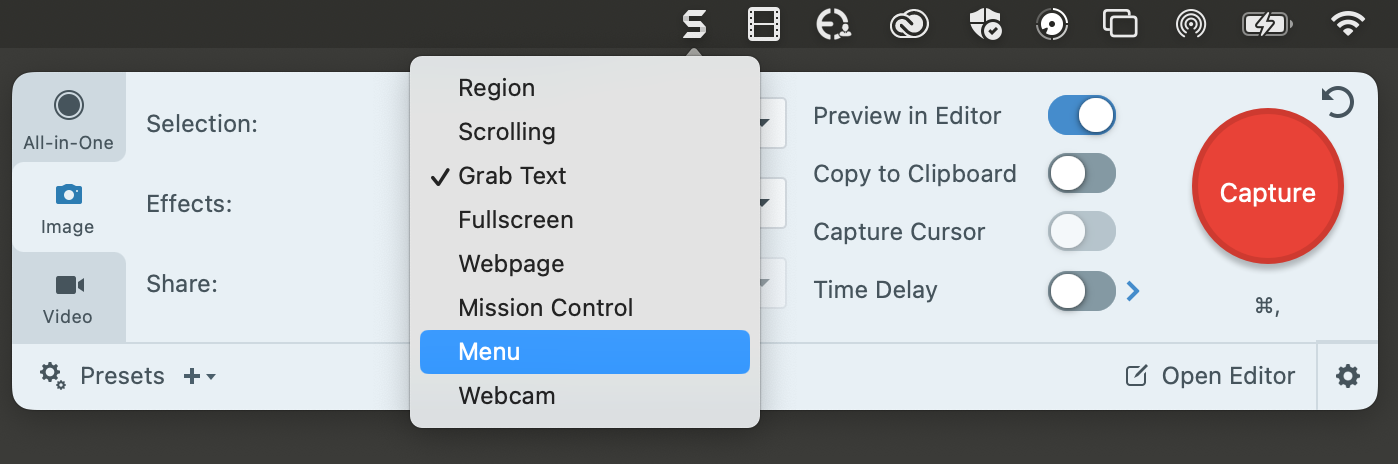
Then, press on the Capture button.
How to crop your screenshot using Snagit
Take a screenshot using Snagit, or upload a screenshot you’ve already taken. It’ll open in the Snagit Editor, which is where you need it, either way.
From there, drag and adjust the anchors alongside the screenshot to your desired fit, and use the arrow keys on your keyboard to move the edges one pixel at a time. This will ensure a highly precise crop.
Then, save your cropped screenshot as an MP4 download or directly share it with anyone using Screencast.
Transform your screenshot with Snagit’s features
If you need to take it a step further, Snagit can help you make quick edits to your screenshots too!
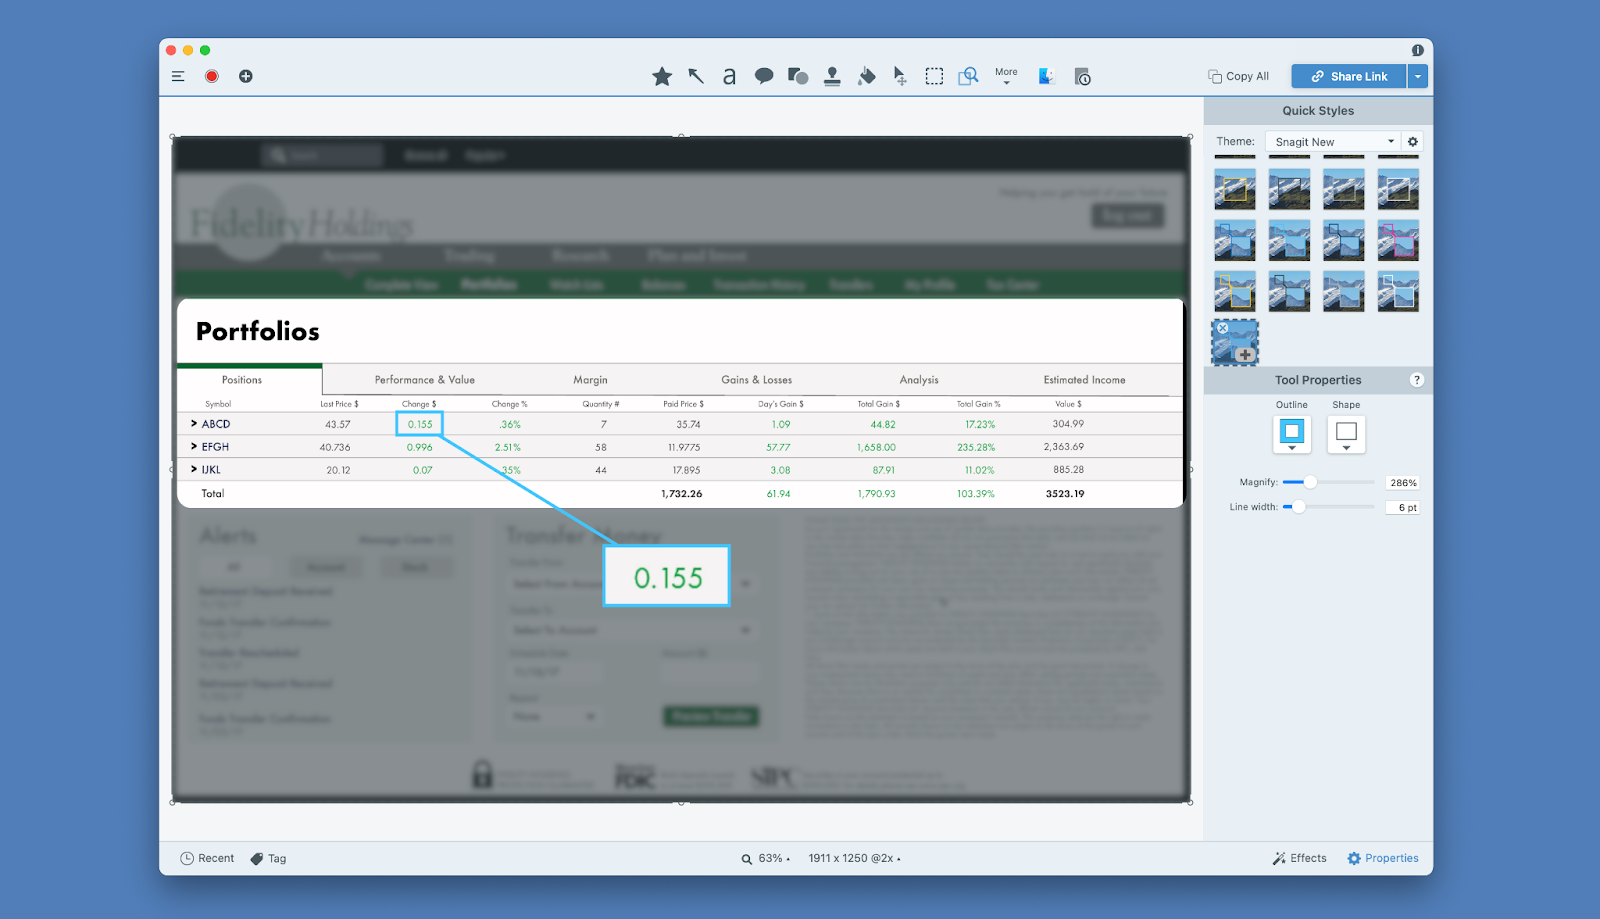
Use the Spotlight feature to highlight the most important part of your screenshot or even magnify it to show off the important details.
Snagit also has a Selection Tool that removes selected areas from your screenshot. For example, if you wanted to share a news article, you could remove the distracting ads so your viewers are focused on the important information. Plus, you can either leave the space transparent, or Snagit can autofill the area to best match the rest of the screenshot!
We recommend using Snagit due to the ease of use and additional features that will make your screenshot stand out. Crop your screenshot, then save it for yourself or share it with anyone – it’s up to you!
Share