Microsoft has now made sensitivity labels available throughout Microsoft 365 (the programs formerly known as Office 365!). This feature allows you to visually mark and electronically protect your Microsoft 365 files to make sure that they don’t fall into the wrong screens! Here we’ll take a look at how you can use these labels in PowerPoint and how they might affect your design choices throughout your decks.
What are sensitivity labels?
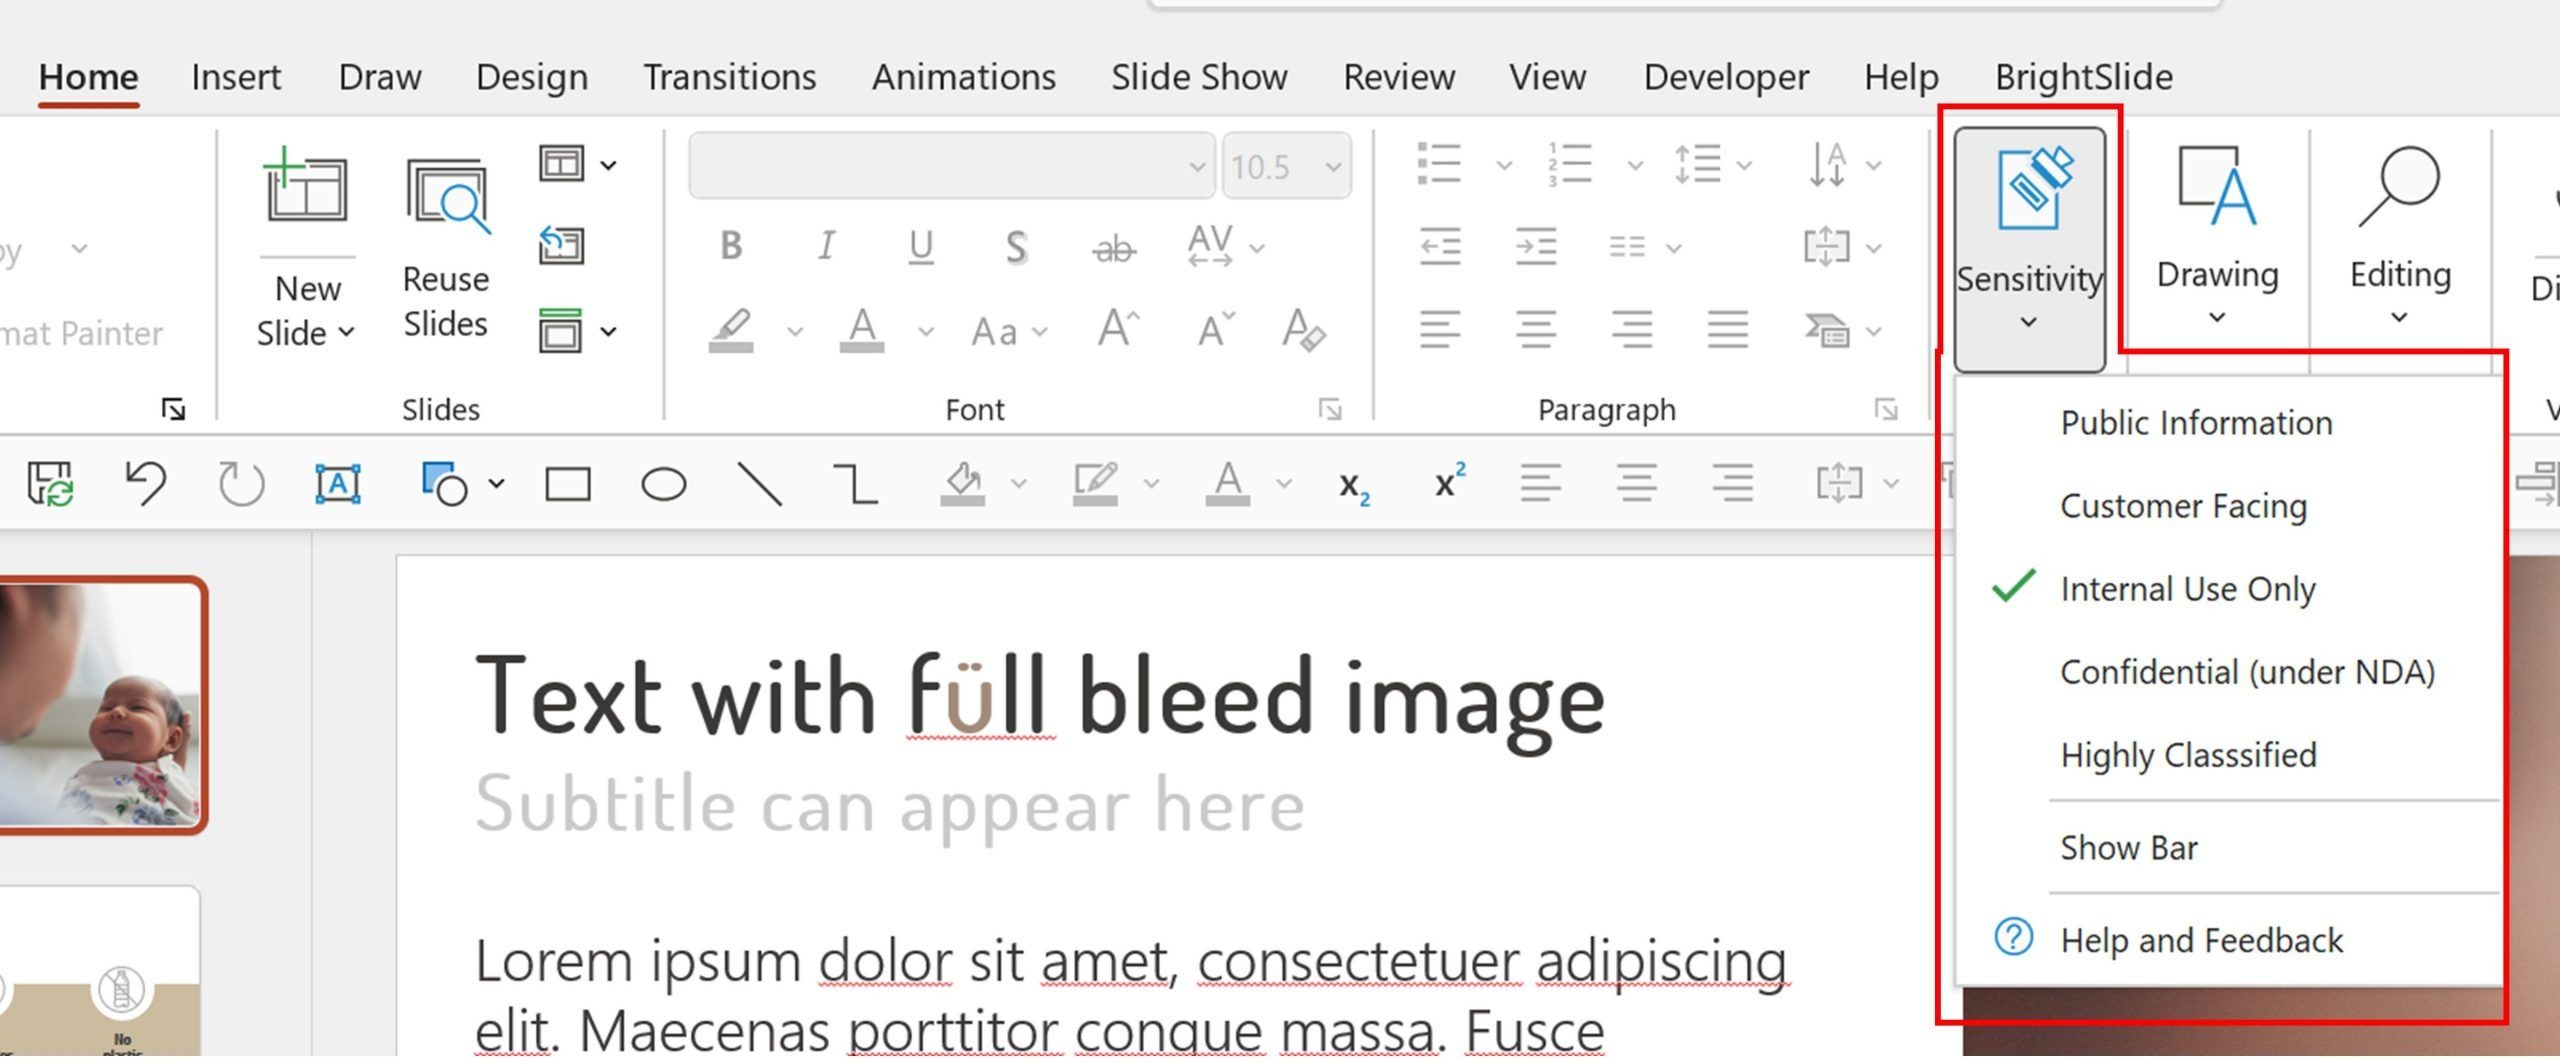
Microsoft sensitivity labels:
Are set up by a Microsoft 365 Administrator (most likely someone in your IT department).
Can be applied across a group of users or an entire organisation.
Provide a way to add pre-defined text labels to presentations, documents and spreadsheets.
Offer optional IRM (Information Rights Management) capabilities, providing access to the file for specific groups of users and locking everyone else out.
How can we use Microsoft sensitivity labels?
Sensitivity labels are useful for those of us who are frequently handling decks that contain, you guessed it, sensitive information. With this tool you’re able to blanket apply text like ‘Confidential – For internal use only’ on all of your slides, without having to go through and copy and paste this message onto every slide. It also allows you to only give access to these confidential decks to select people or just those within your organisation, which helps to support your security.
Although these features are useful, there isn’t a whole lot of freedom when it comes to the design and position of sensitivity labels added to a PowerPoint file, so they can impact the overall design of your slides. In this post we’ll outline what you have control of and how to modify your design choices around sensitivity labels.
An administrator can
Define multiple text phrases to be placed in the Sensitivity menu in the Home tab of the ribbon (see above).
Define the font size, font colour and horizontal justification as left, centre or right.
An administrator cannot
Define the position of the text box that’s created or any other design properties such as the font type or shape fill colour.
Define any other placement location except the slide master.
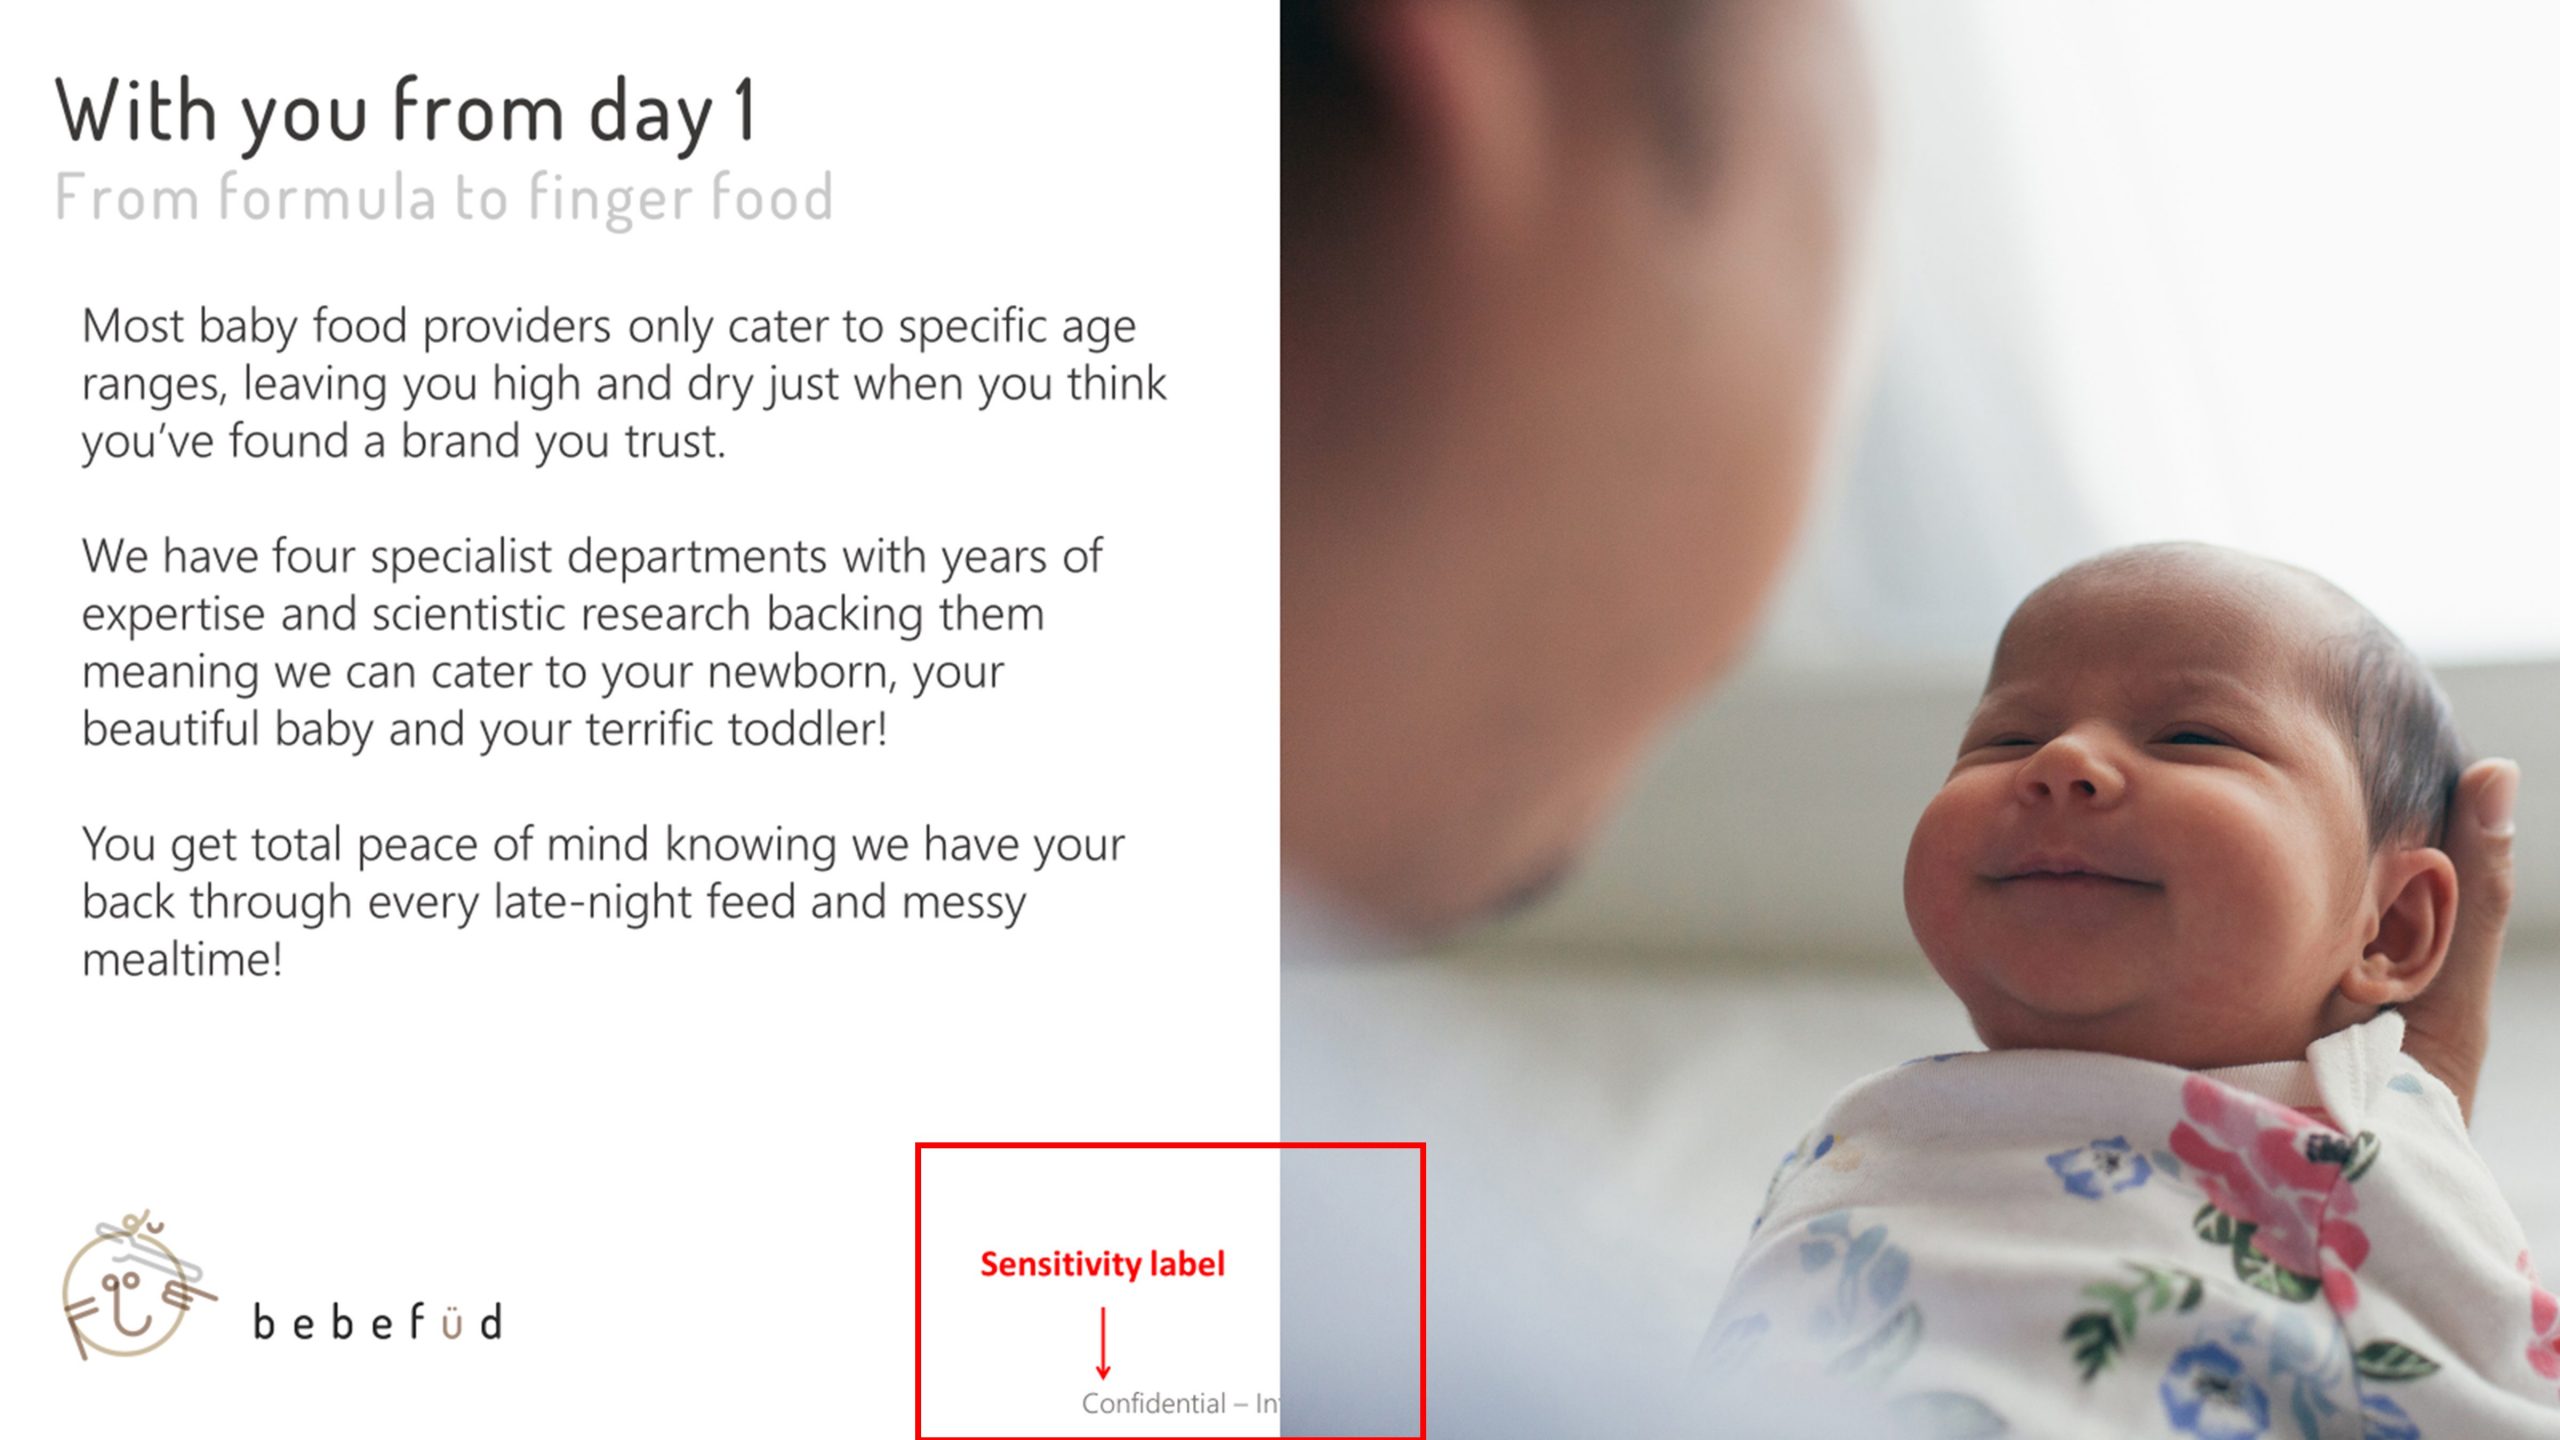
By default, the sensitivity label is a plain text box. It’s placed in the bottom centre of the slide as shown here:
Obviously, the longer the phrase you write, the more space it’ll take up on screen. This means that there’s full width no go zone at the bottom of every slide which you need to take into account when you’re designing your slides, or you may end up with a confusing overlap between the label and your content.
It’s also important to establish the height of this zone, again to avoid any content clash. To figure this out, you need to know what font size the IT admin who set up the sensitivity labels selected. This particular restriction has a big impact on template and slide design, especially when it comes to full bleed images as you can see here:
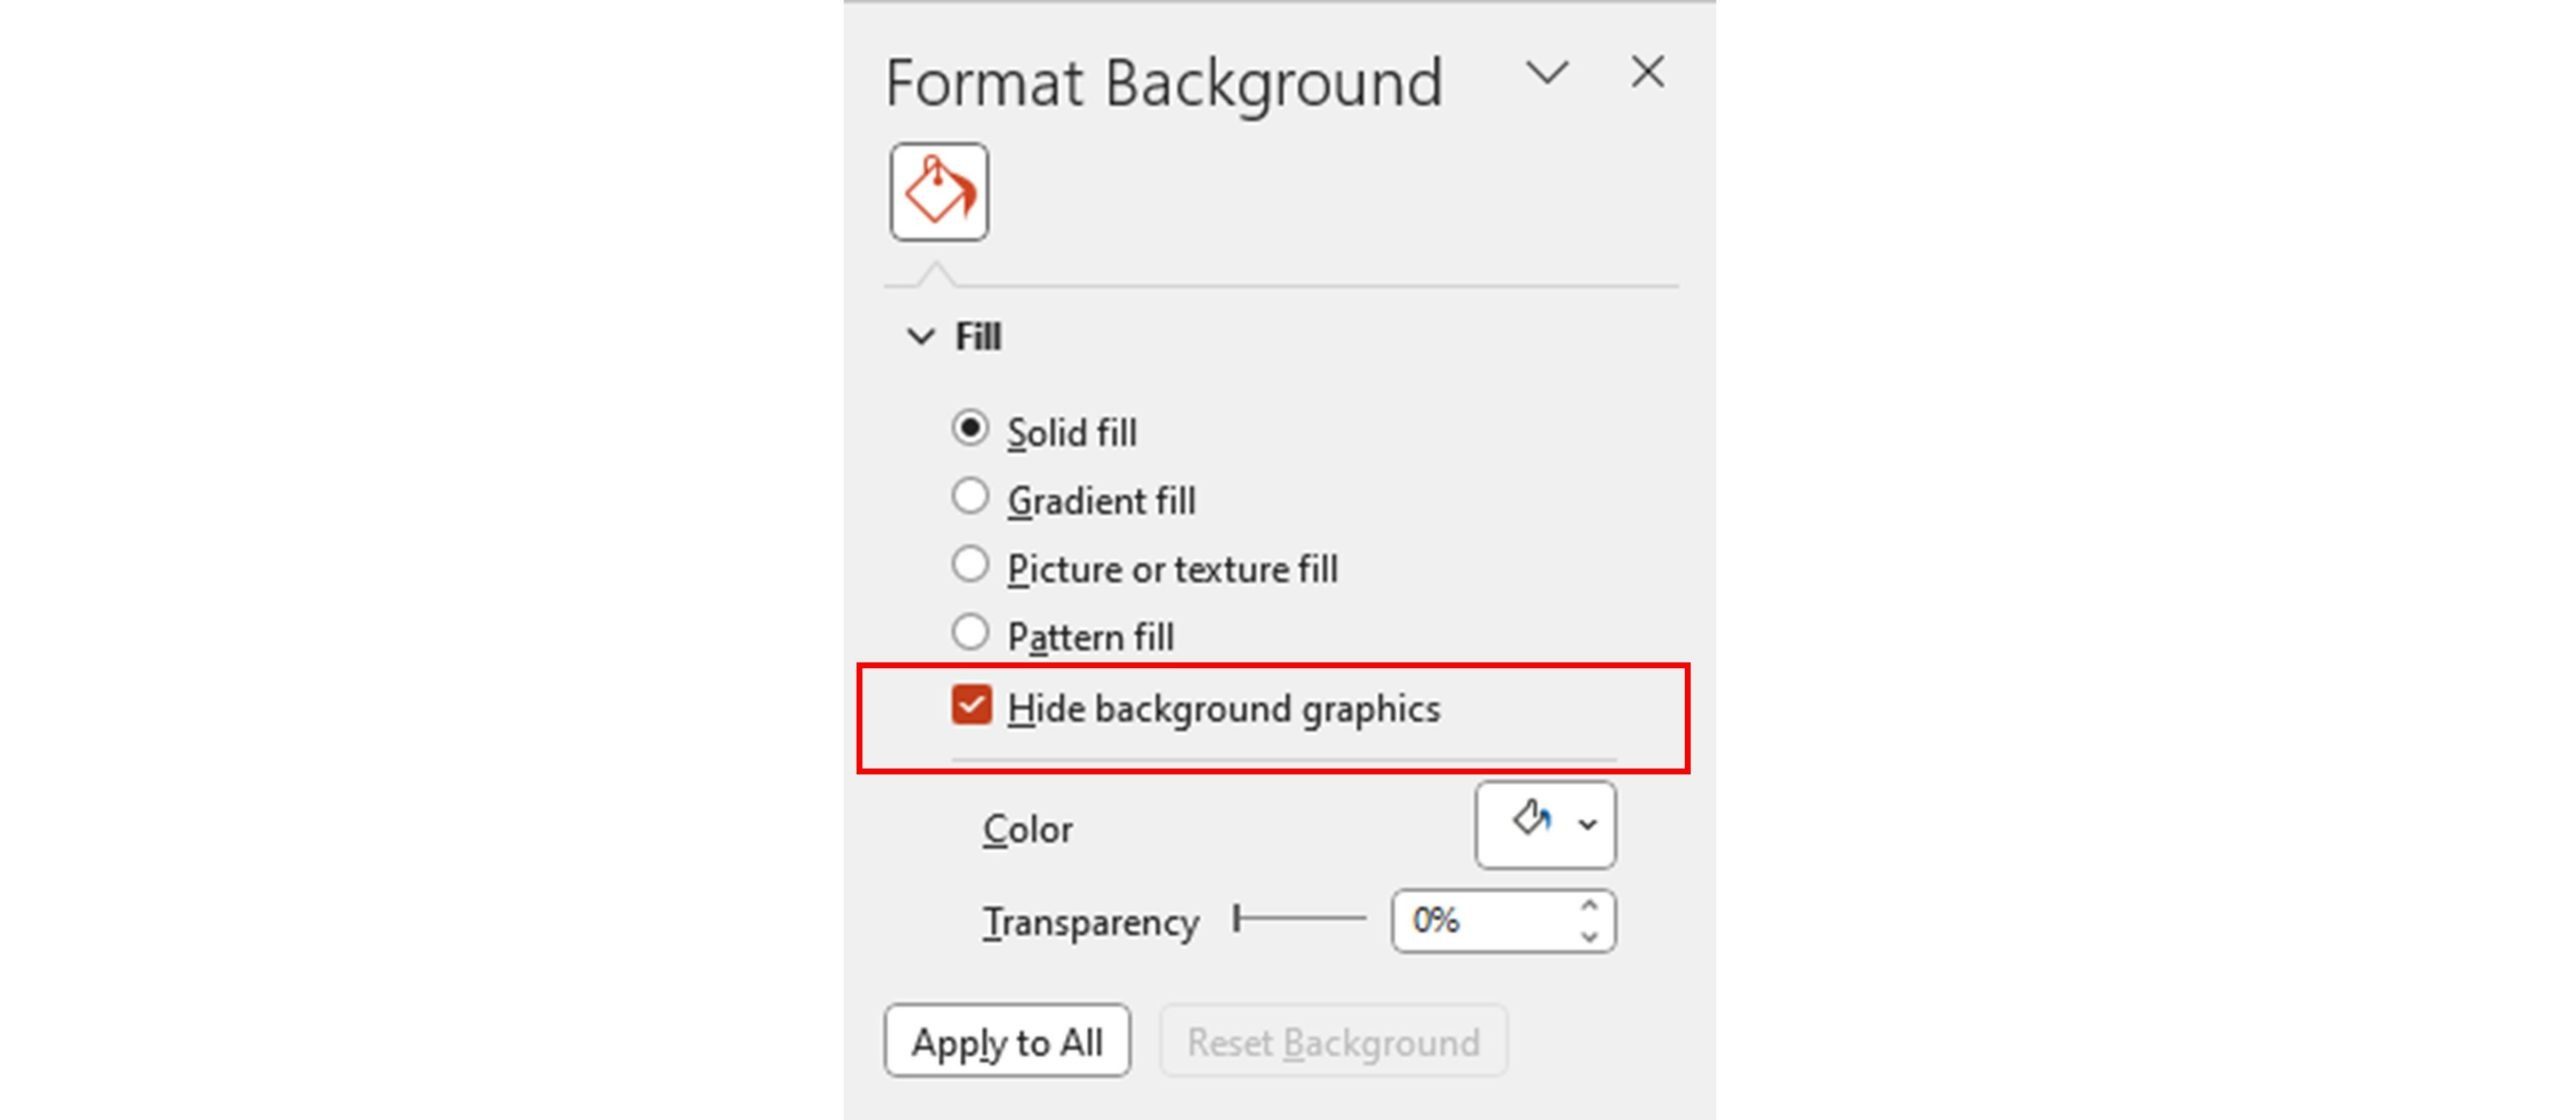
It’s possible to hide the sensitivity label on specific slides by selecting the Hide background graphics check box within the Format Background tab but be aware that this will also hide other objects such as logos and any other non-placeholder objects on the slide master. Also, if your slide does actually contain sensitive information, you probably shouldn’t remove the label and it’s therefore better to tweak your design to accommodate this label and not the other way round.
Your design options
So what can you do to avoid the problems in the example above? Think about how you can adapt your design choices to work around the label. This might include changes to the slide master, different layout options or completely new slide ideas altogether. Here are some examples that show how you can incorporate the reserved full width area at the bottom of the slide:
Other changes might include adjusting the position of your logo if it’s currently on the bottom of your slide decks, but bear in mind that it’s best practice to keep your logo consistent throughout all your decks, even those without sensitivity labels.
Another thing to keep in mind is how your animations may interact with the sensitivity label. If you have anything animating up from the bottom of the screen, the label may ruin the fluidity of the effect, so it may be best to consider a different option for animating.
How to check for sensitivity labels
If you’re not sure whether or not a deck you’re using already has sensitivity labels set up, there’s a way to check.
Check example content for text in a plain text box in the bottom centre of the slide master.
If you see it, check to see if it has a non-standard PowerPoint name in the Selection Pane (Alt+F10). An example of a standard PowerPoint name is something like TextBox 13 or Rectangle 12.
If this is the case, then check the Home tab of your PowerPoint interface. If you see the Sensitivity option, that means your deck has sensitivity labels already embedded.
If you’re working collaboratively with a client or someone outside of your own organisation on a deck, you’ll have to ask them to share their screen during a call to check the Home tab as the Sensitivity option will only appear for those inside the organisation.
Any questions about Microsoft sensitivity labels? Leave them below and we’ll get back to you! If you want more info on securing your precious presentation decks, check out this blog post: Protecting your prized PowerPoint content.
Conference presentations are really hard to get right compared to day-to-day presentations. How do you tackle bigger stages, bigger rooms, bigger audiences and higher stakes?
A PowerPoint template is the foundation on which polished and professional presentations are built. We interview BrightCarbon’s new Templates Lead, Gemma Leamy, and pick her brains on the ideal process for creating robust PowerPoint templates.
We have worked with BrightCarbon for over 5 years, across a number of healthcare divisions, where they have been a very important part of our bid programme, supporting numerous awards of new contracts.