Welcome to 2024! Hopefully you’ve already made a bunch of inspiring resolutions like climbing a mountain or learning the French horn, but have you made the most important resolutions of all? Your presentation resolutions! No? You surprise me!
Here are 5 things you should commit to doing this year in your presentation practice. Don’t worry our free PowerPoint design and productivity add-in BrightSlide will make keeping these new year’s resolutions a breeze!
Oh and before we start, you should really download BrightSlide if you haven’t already!
Present with animations
When people hear ‘PowerPoint animations’ I get the suspicion that they imagine something like this:
Dated animations that add nothing to the story and are tricky to present. But times have changed! And it’s time to start using animations to help you present your story. Animations put you in control of the flow of information, they mean your audience isn’t reading ahead and ignoring you, and they give you the opportunity to tell your story visually.
It’s classy, it’s professional and it’s not terrifying to present! A great place to start is with BrightSlide’s My Animations. You’ll find a selection of simple animation combinations already available to add to your slide with just a couple of clicks and you can even add to the library yourself as you gain confidence. We’ve got lots of resources if you want to learn how to animate slides. Start here: How to be a PowerPoint animation ninja.
Use guides!
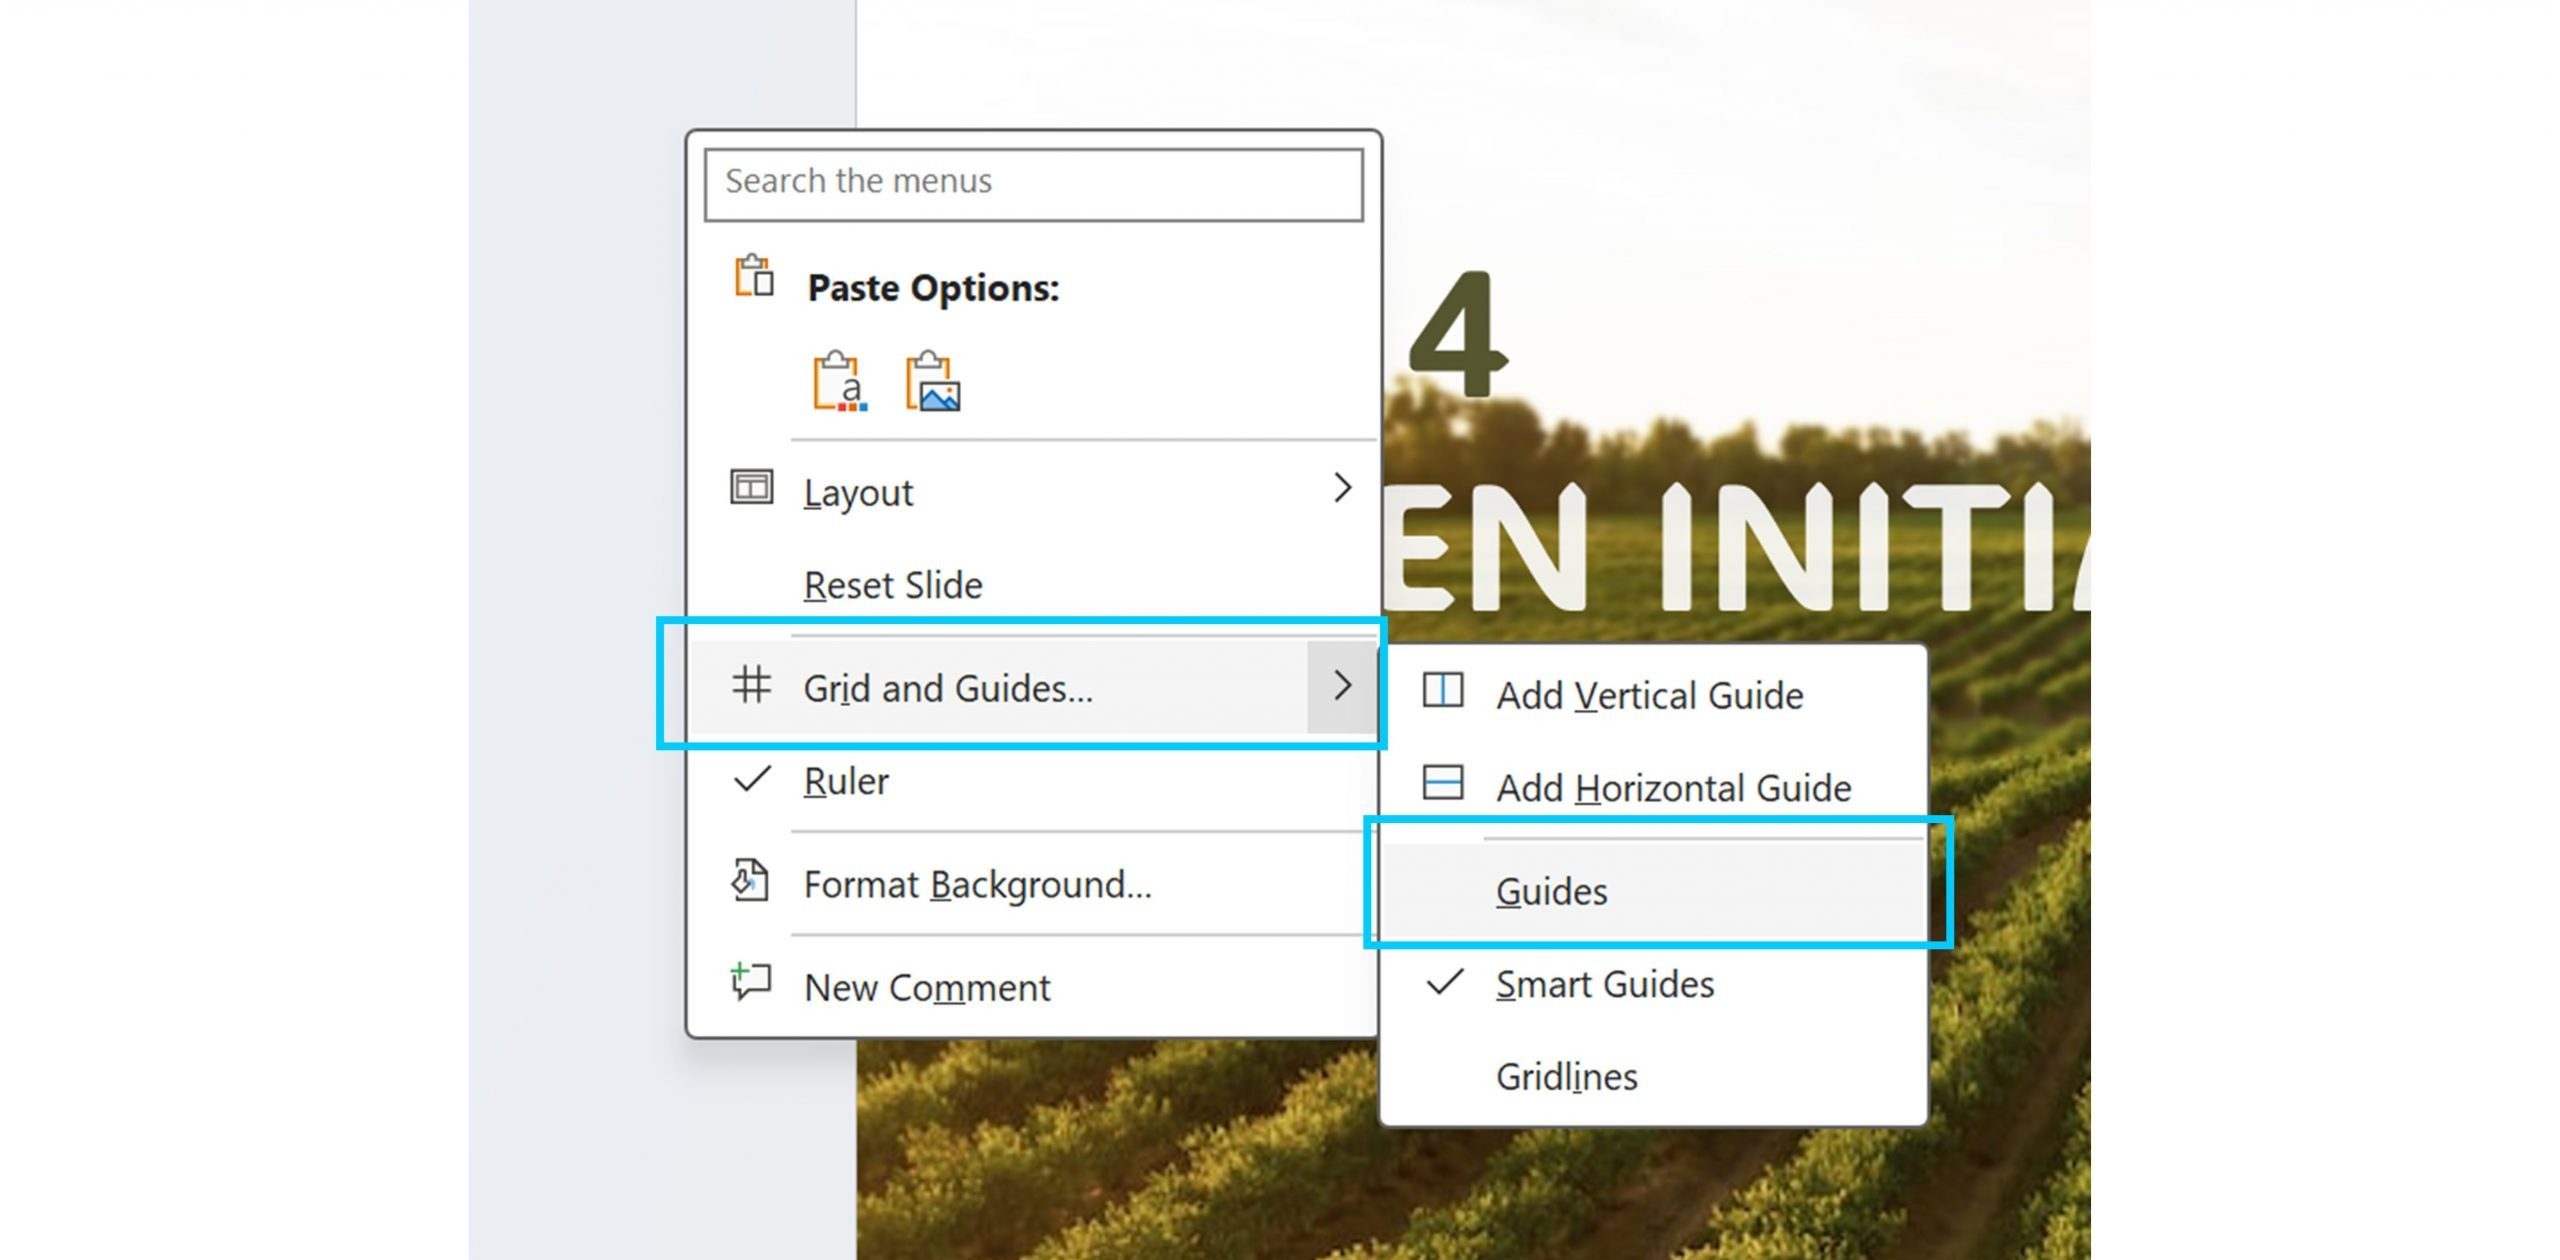
We’ve written elsewhere – and at length! – about why guides are a key component of making any design look good. And for a non-designer like me, they’re essential to help me create a balanced design. To turn them on in PowerPoint right click on a slide, open the Grids and Guides drop down menu and select Guides.
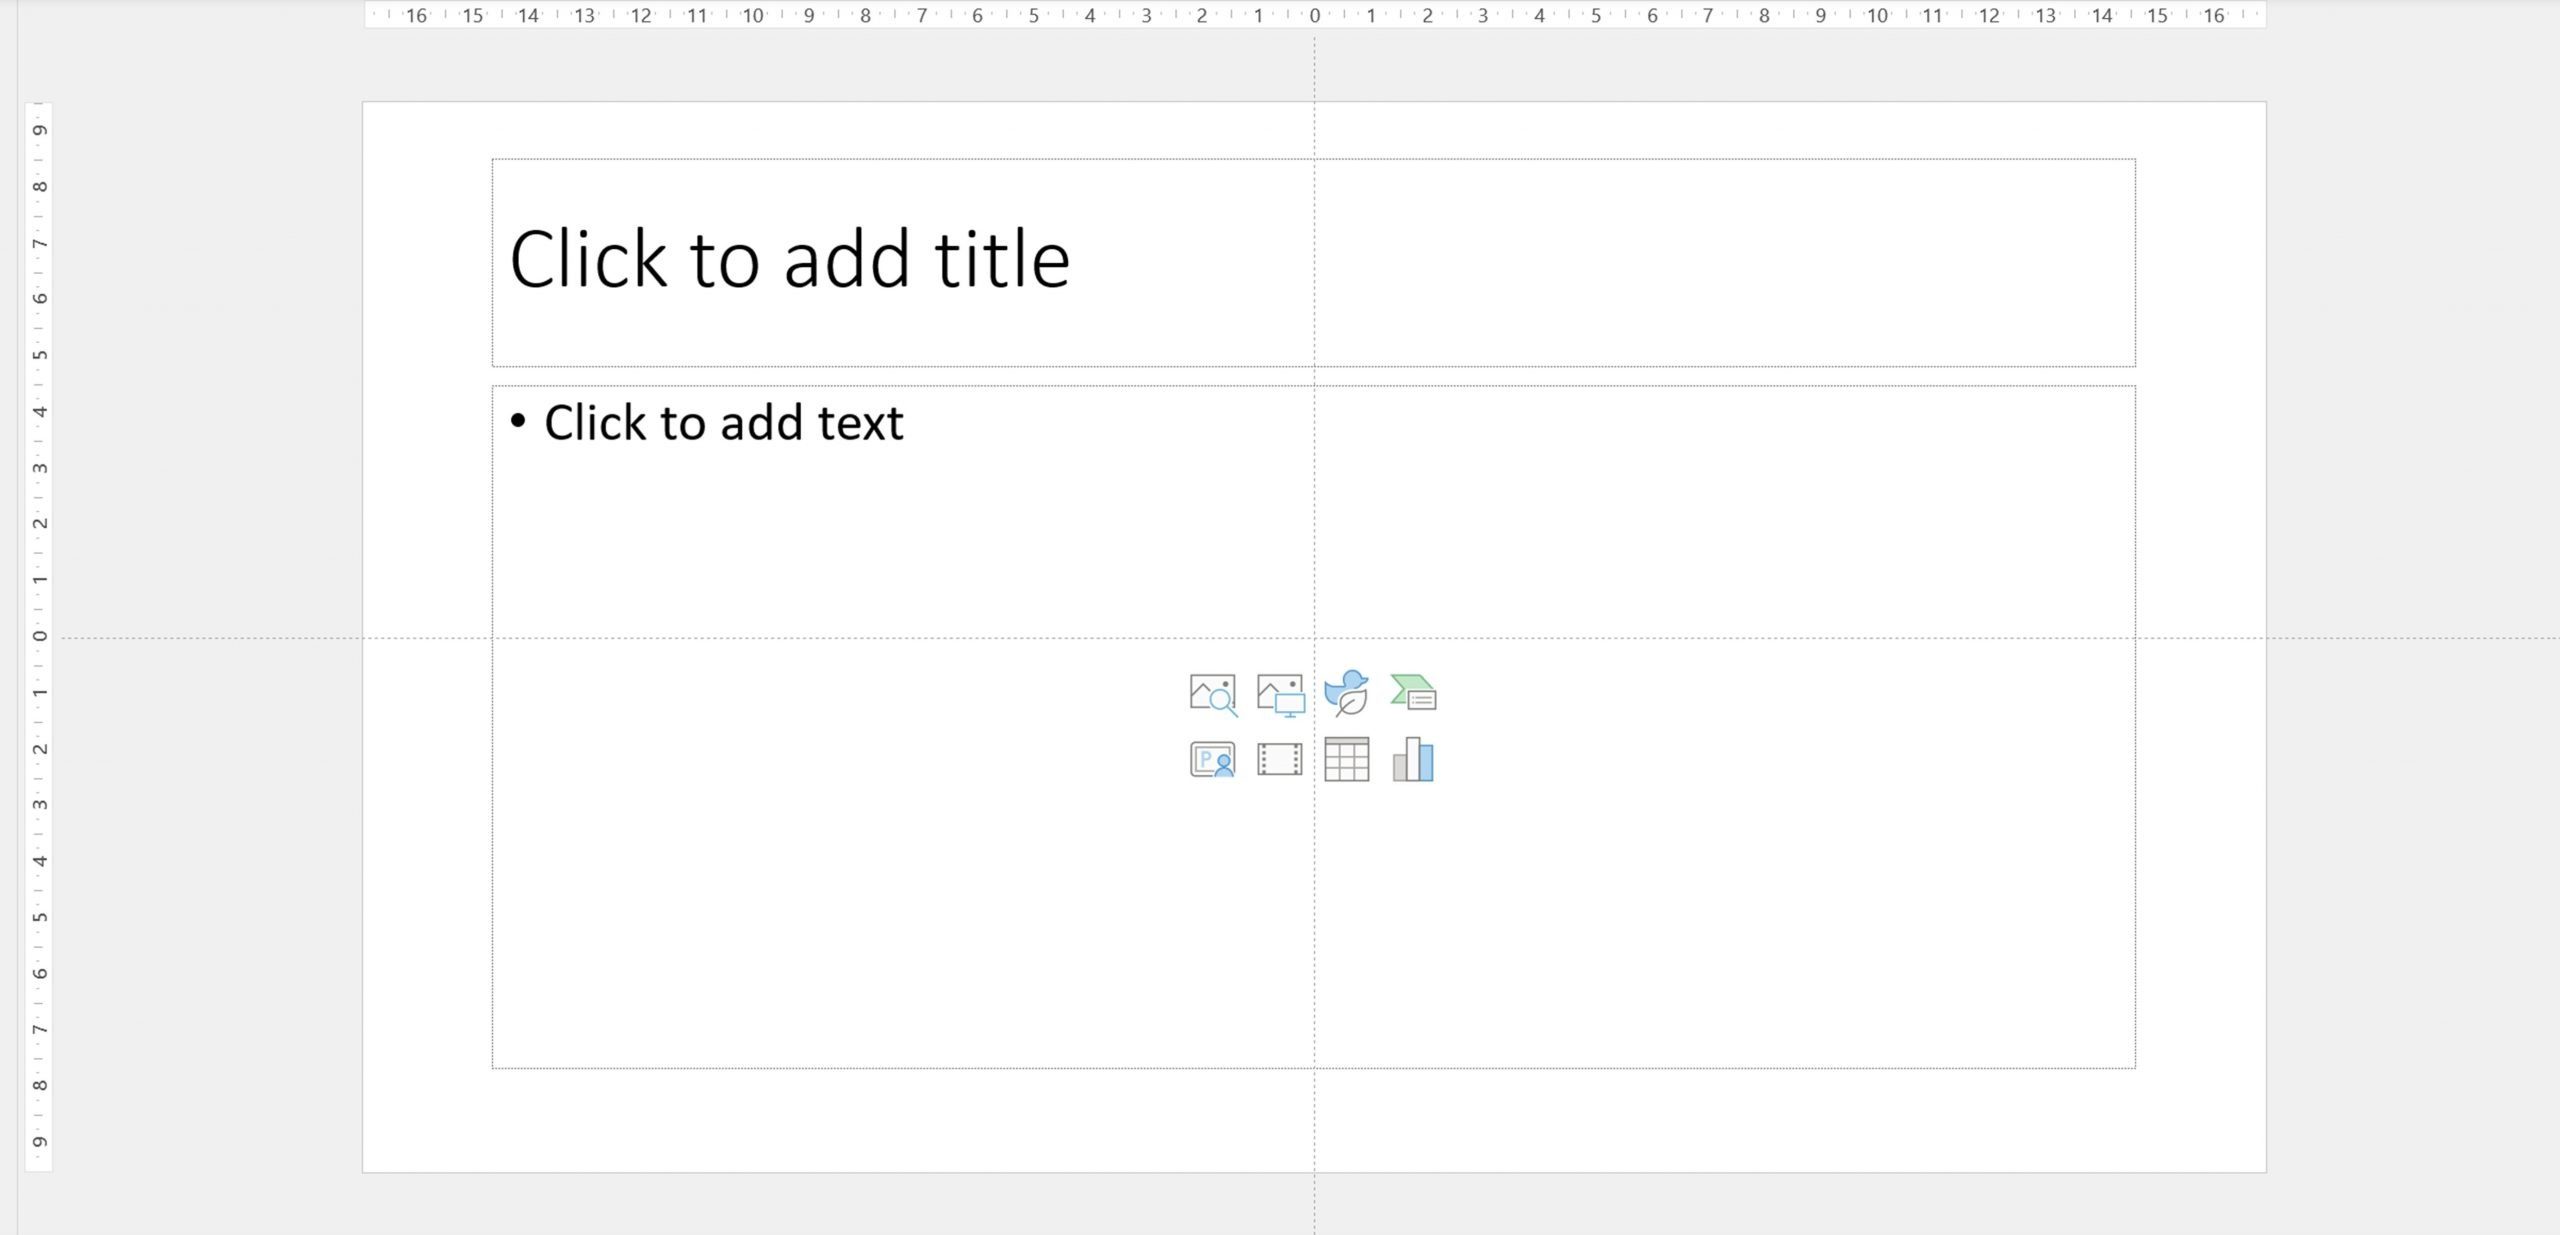
The default guides look like this:
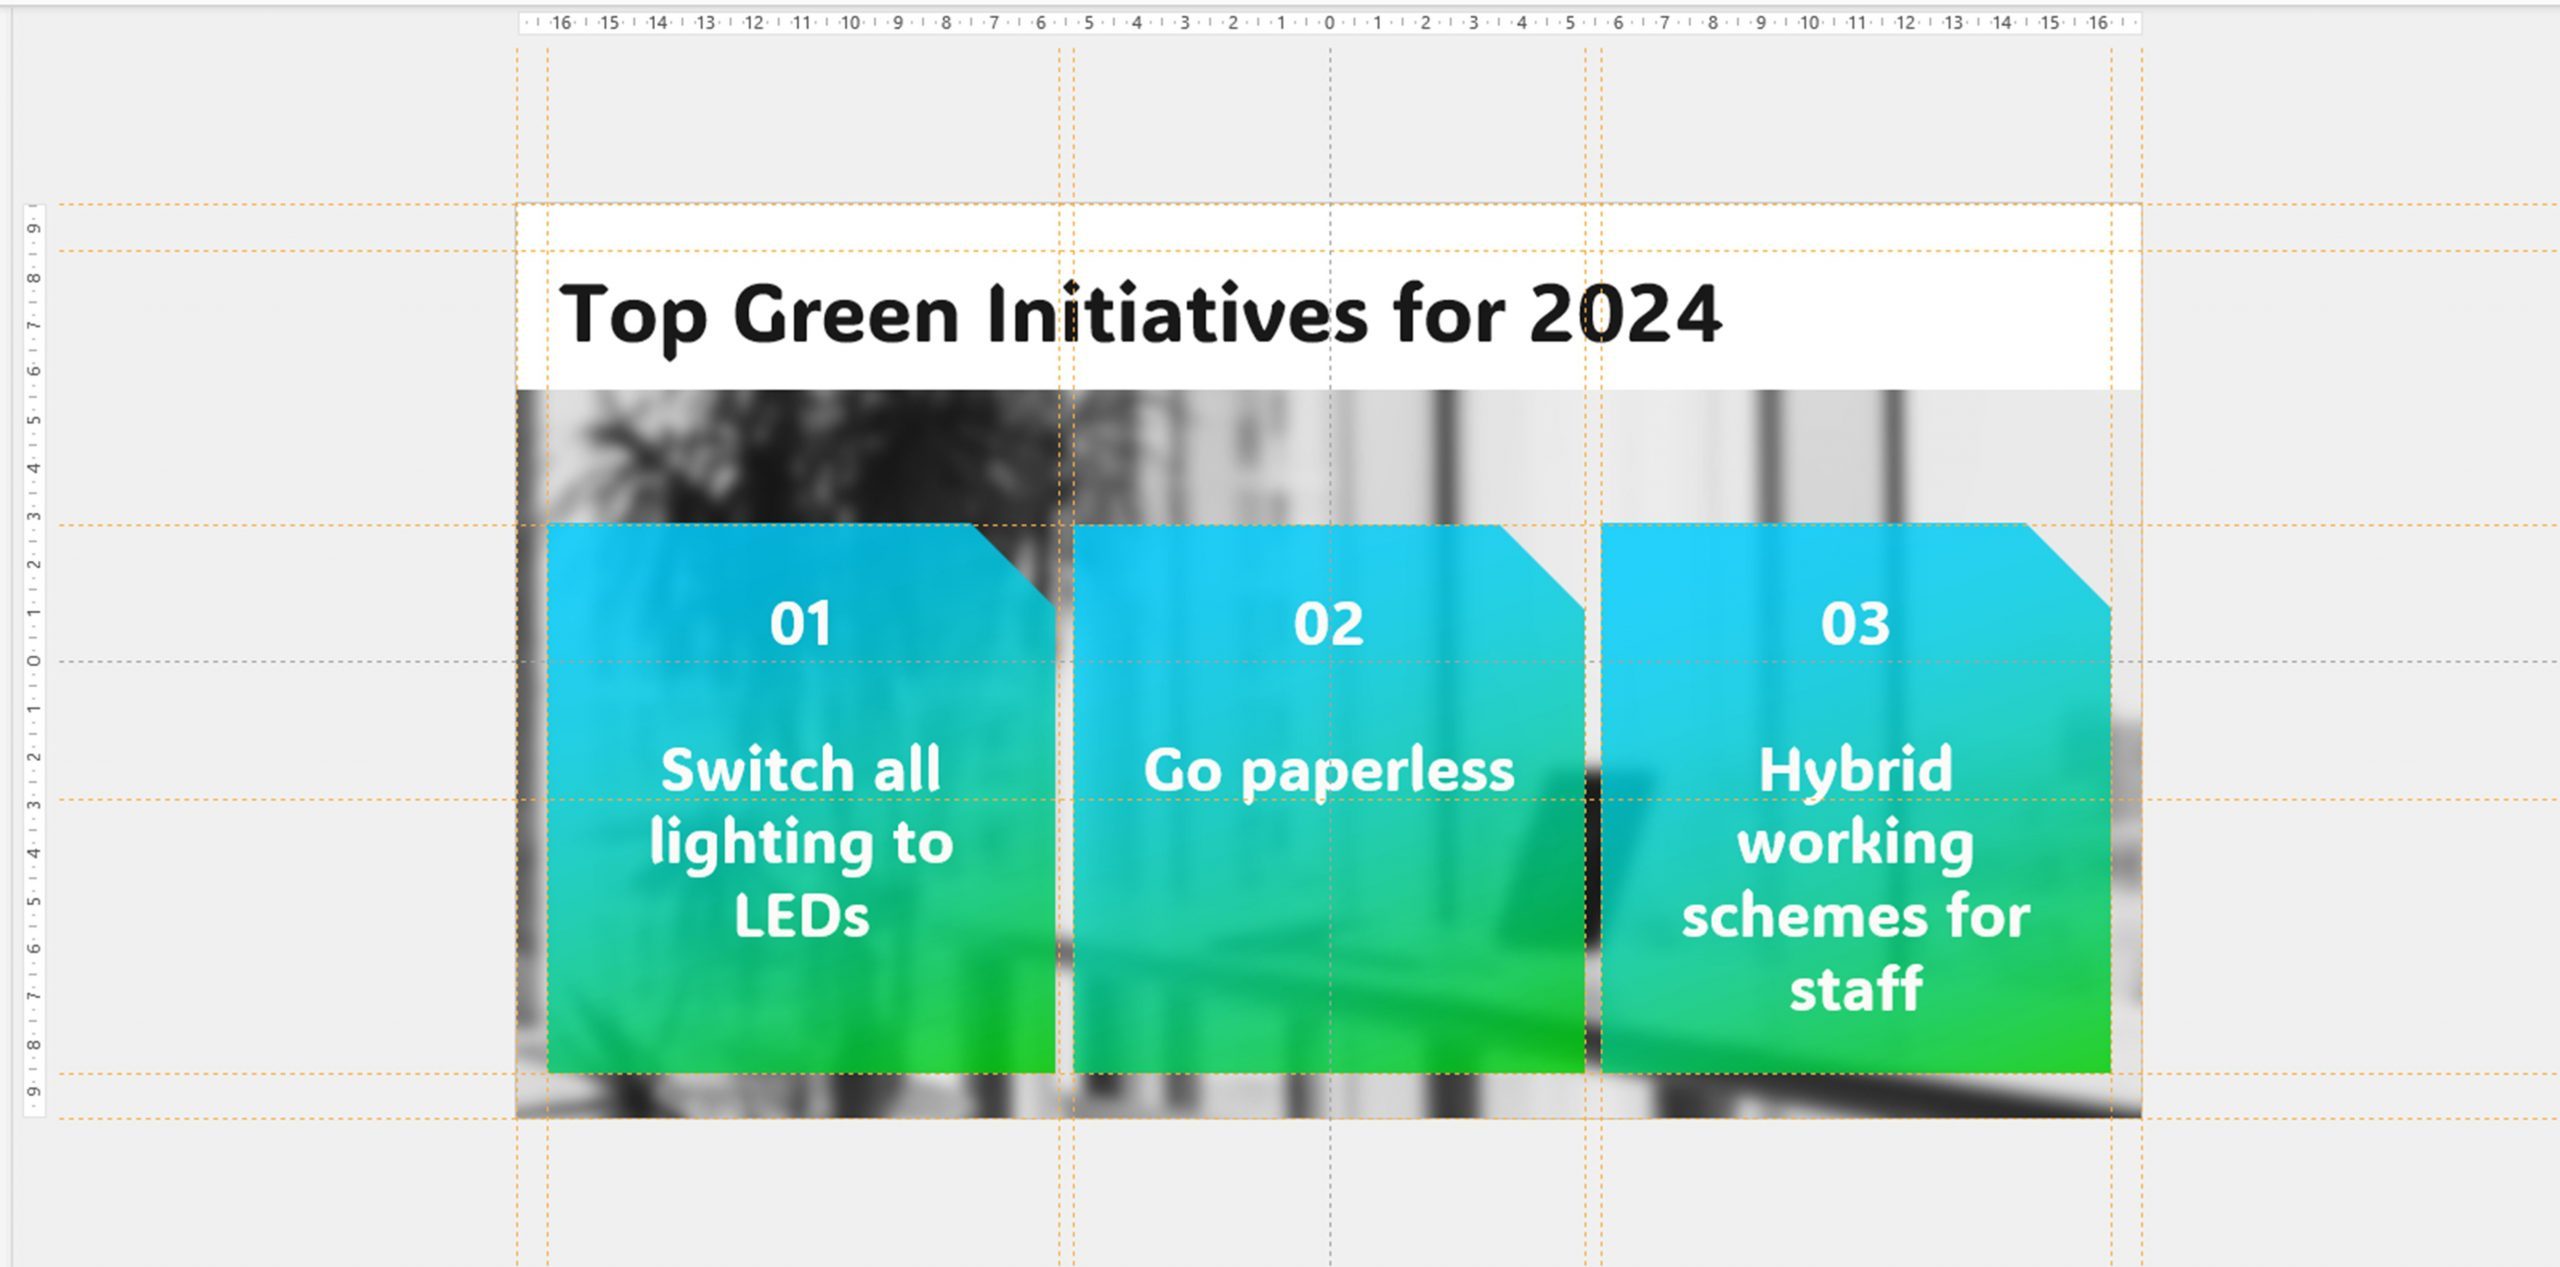
…And won’t help you much. Setting custom guides in PowerPoint used to be a pain in the proverbial but thanks to BrightSlide it’s now pretty simple. Go to the BrightSlide tab, select Guides, then CreateGuides. Choose whether you want to add the guides to the Master, Layout or Slide view – I’d recommend Master or Layout as with slide view you can easily accidentally move the guides when you’re editing slides and mess them up. Then use the BrightSlide guides pop up to create your guides, check you’re happy with the live preview, and select OK. If you’re not sure what to go with, a three by three grid is pretty standard and will help you whip up balanced slides in seconds.
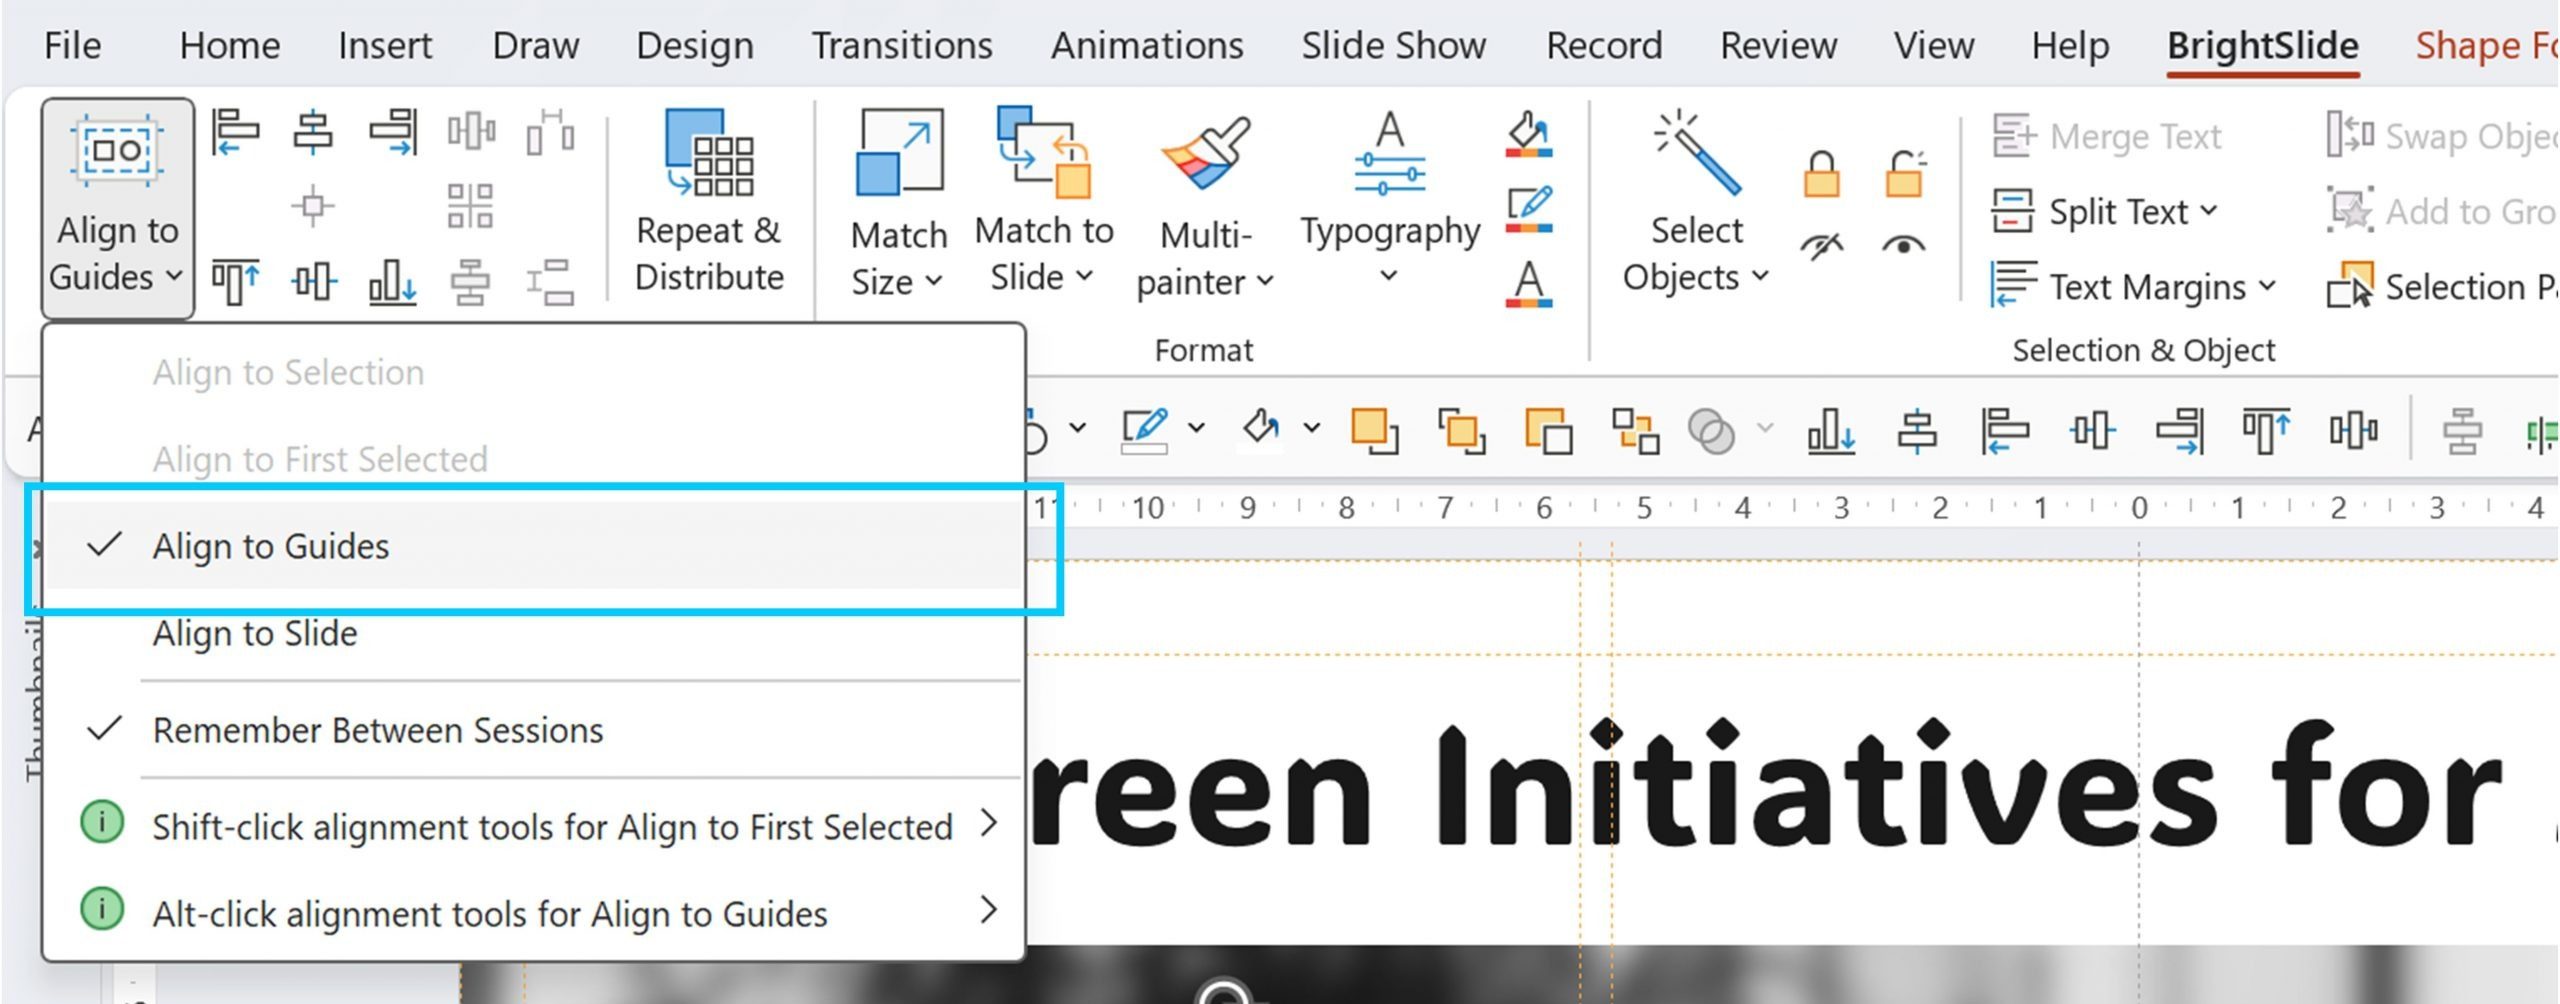
When you’ve got your guides set up, you can use BrightSlide’s Align to Guides alignment mode to snap objects to your guides. You can also Alt-click the alignment tools anywhere in PowerPoint for Align to Guides. Then repeatedly click the selected align option to shuffle through the guides. Add Shift to shuffle through the guides in the opposite direction. Sorted!
Stop using poor colour contrast
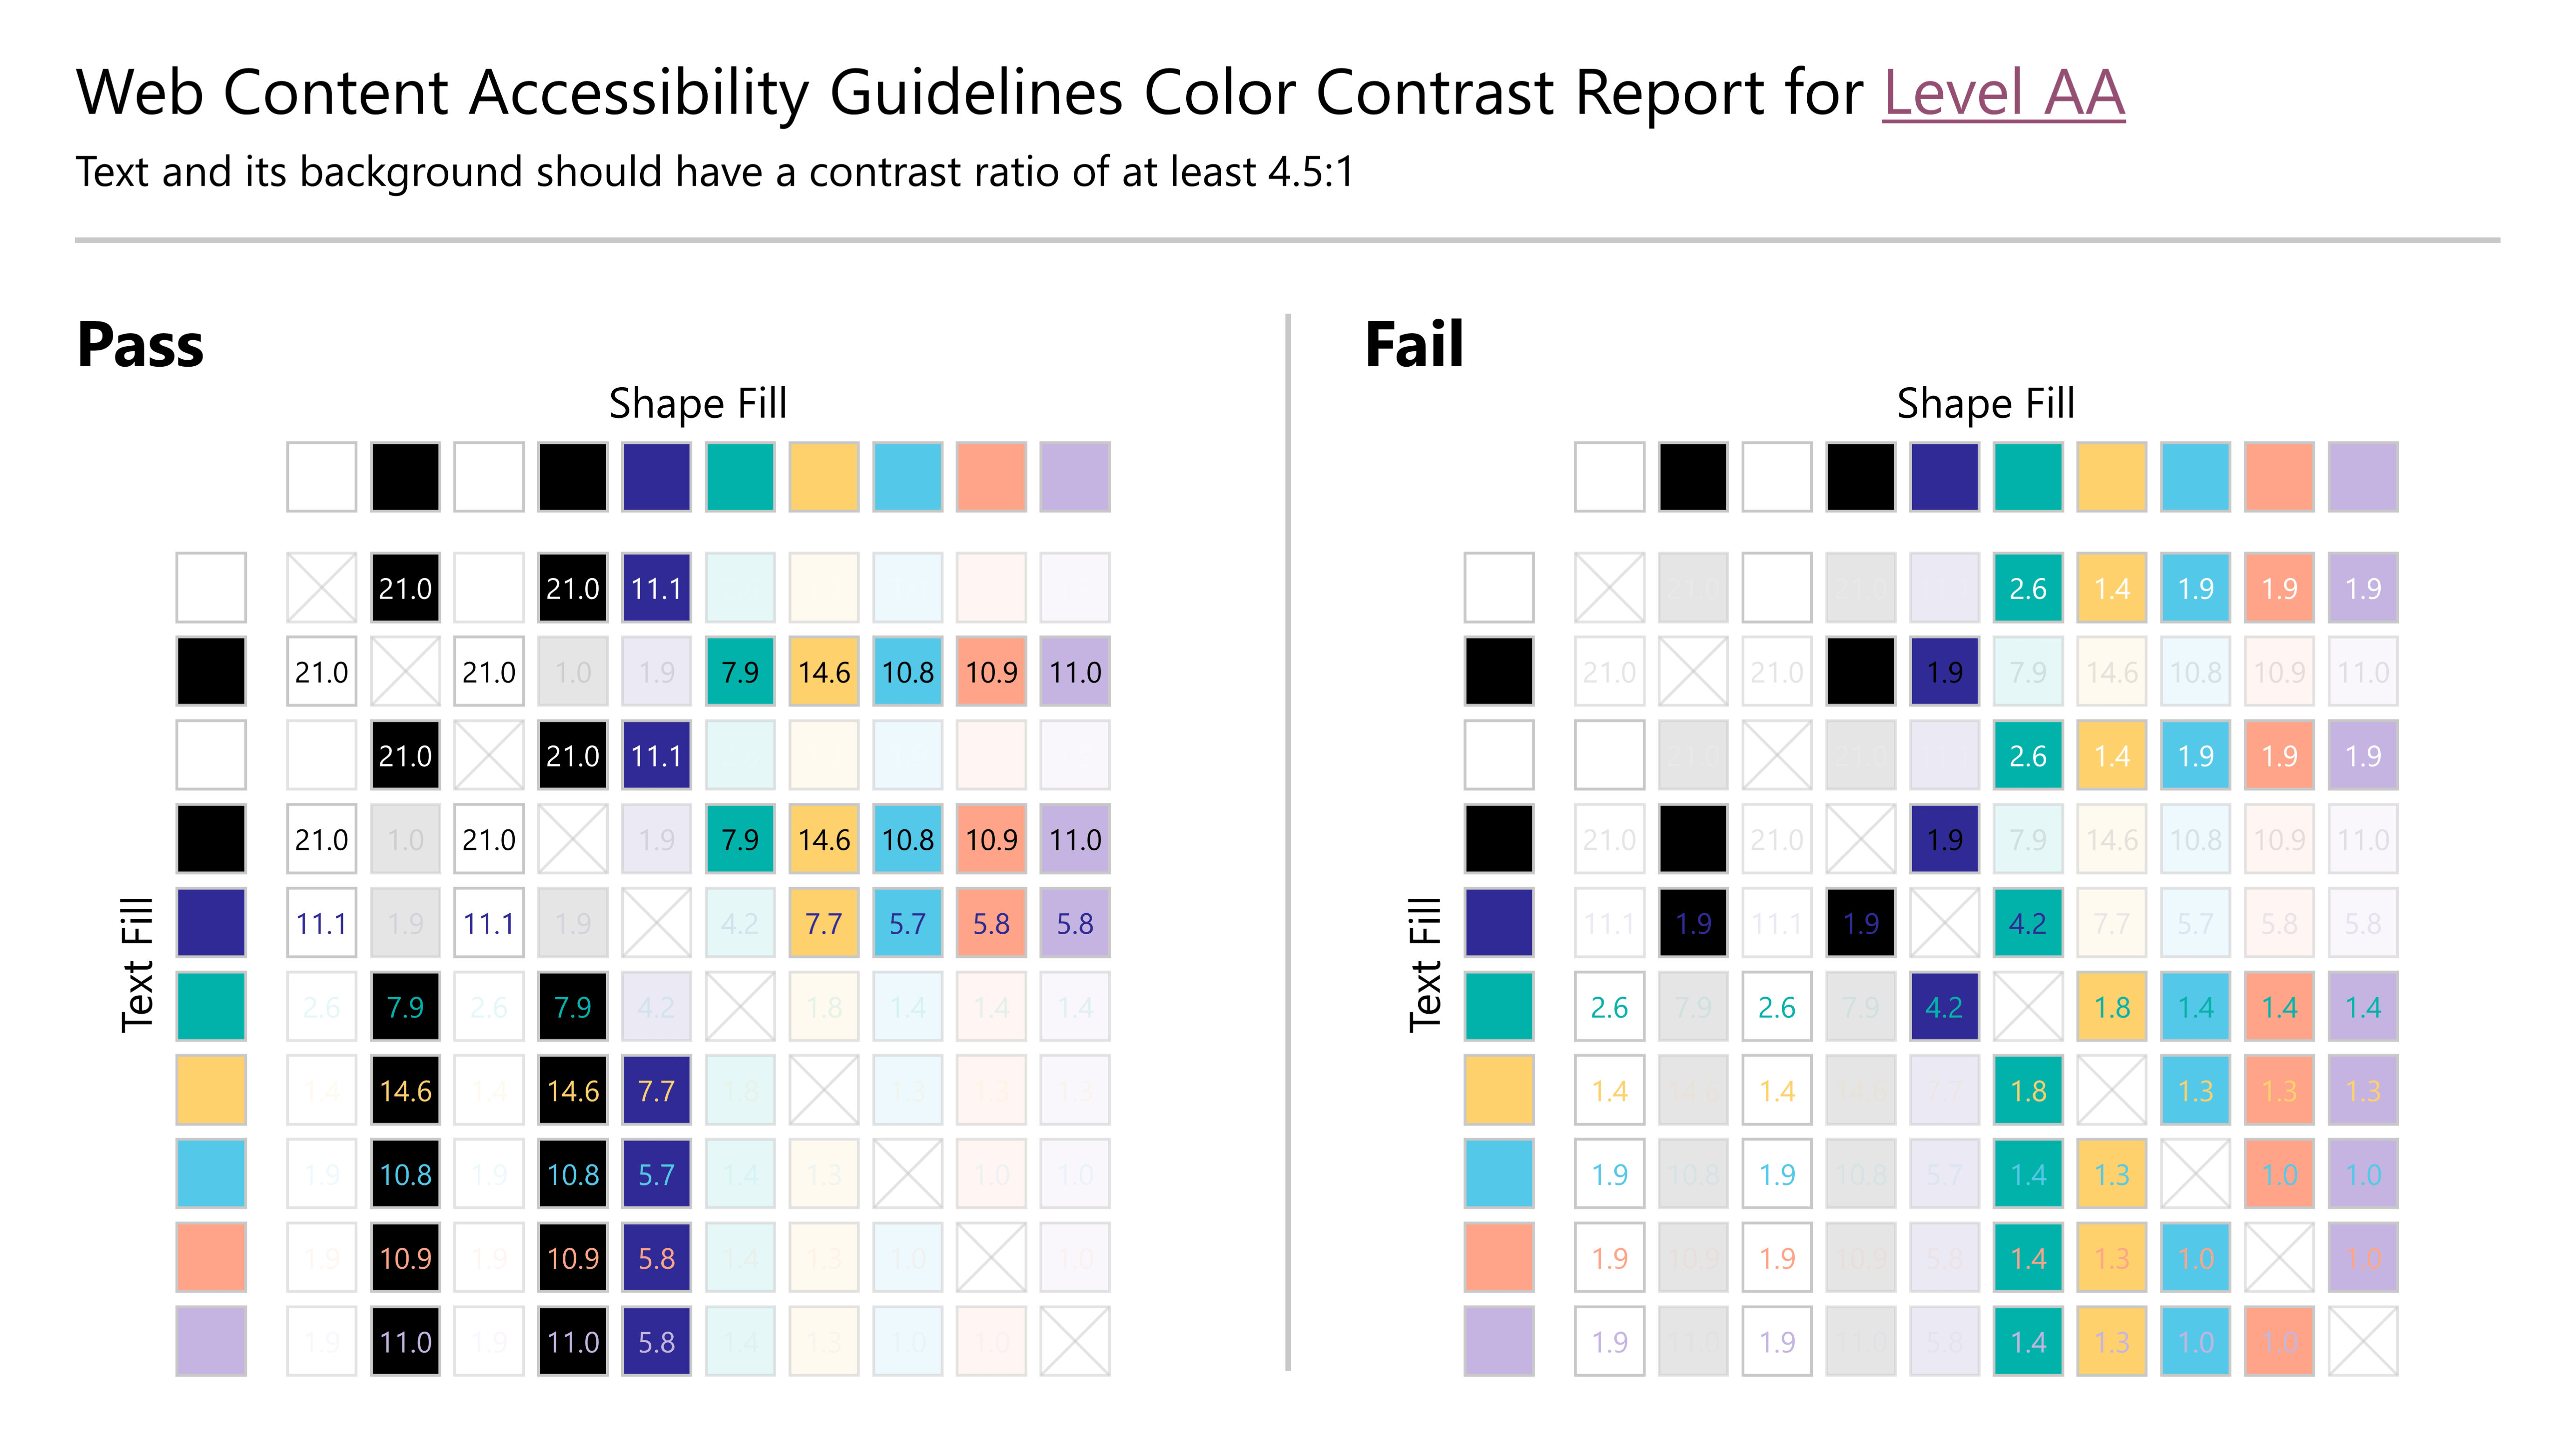
The bottom line is that poor colour contrast makes your slides less accessible. Though colour contrast is one of the easiest things to fix in terms of improving accessibility, it’s often overlooked. You can learn more about common colour contrast issues here, but BrightSlide has two built-in tools to help you tackle them. The first is the Colour Contrast Report. Go to the BrightSlide tab and under File & Master select Colour Contrast Report. BrightSlide will generate something like this:
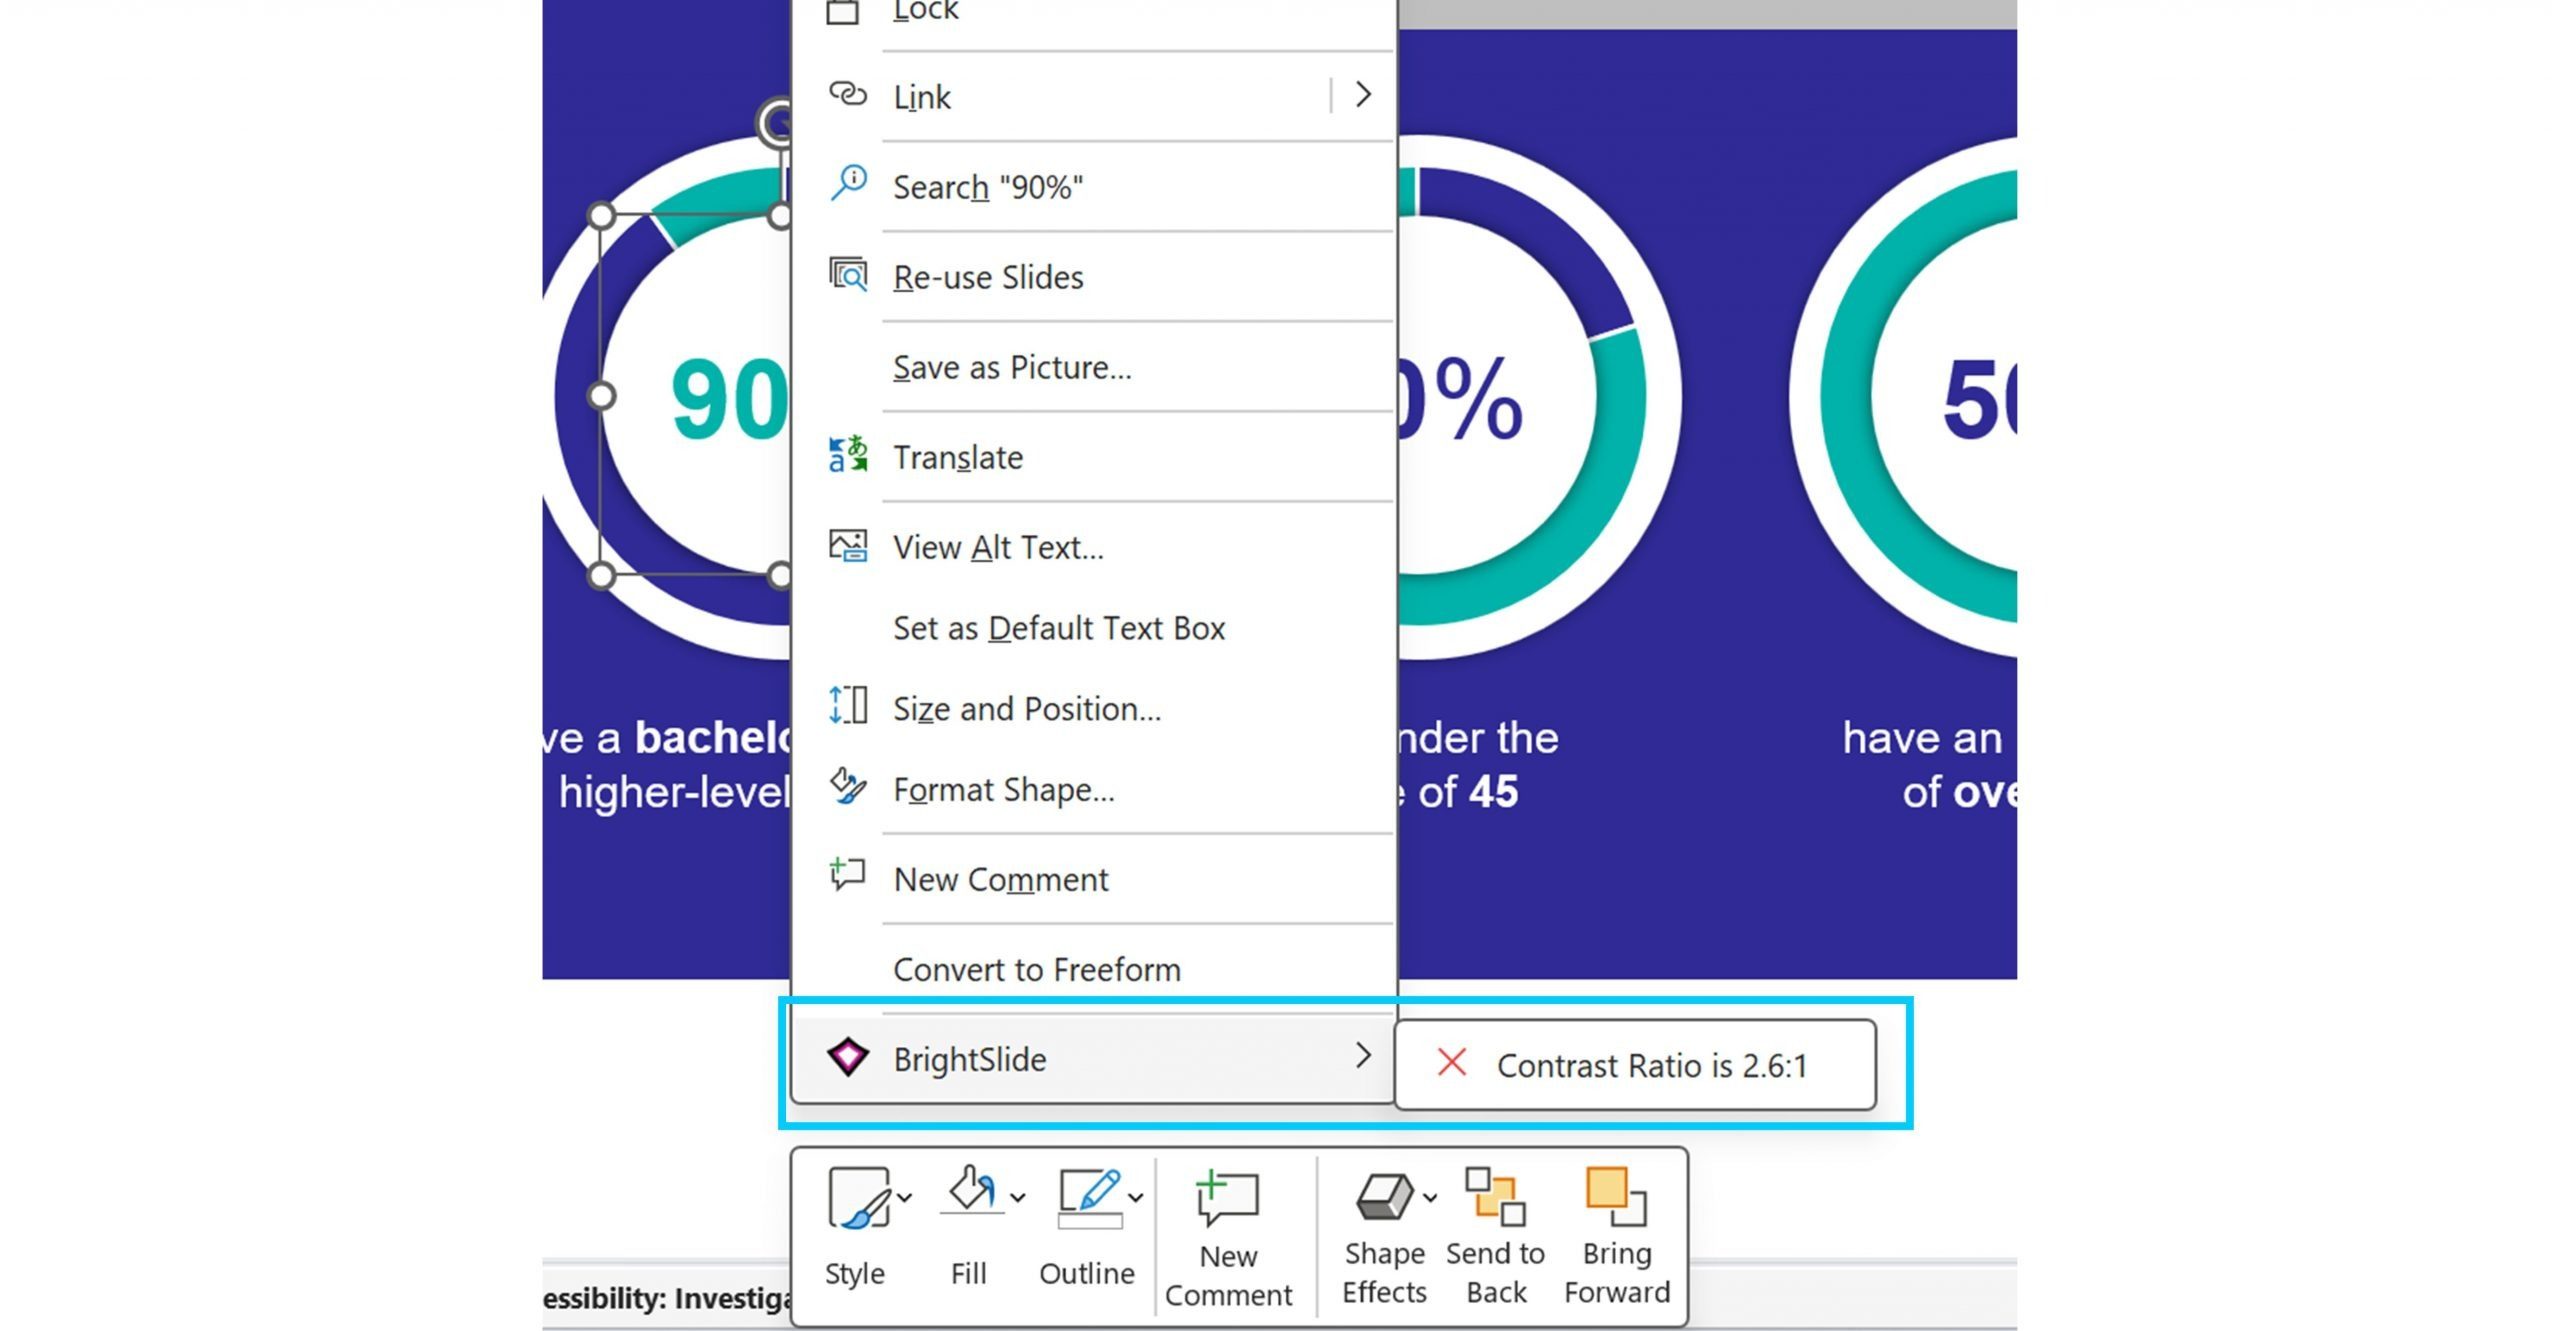
A clear list of all the colour combos you could use in your presentation, and those you shouldn’t! You can also use BrightSlide to help with colour contrast when you’re deep into slide creation. Select two shapes or a filled shape that contains text and right click. In the drop down, hover over BrightSlide and you’ll get the colour contrast ratio and a handy tick or cross to tell you if the colour combo passes the Web Content Accessibility guidelines.
If this has whetted your appetite and improving accessibility in your presentations is on your new year’s resolution list this year then this article is a great place to start: 5 tips for more accessible presentations.
Deflate file bloat
Large presentation files are difficult to share and more prone to being slow and laggy or even crashing. But how do you find out which slides are causing the issue and how do you fix them?
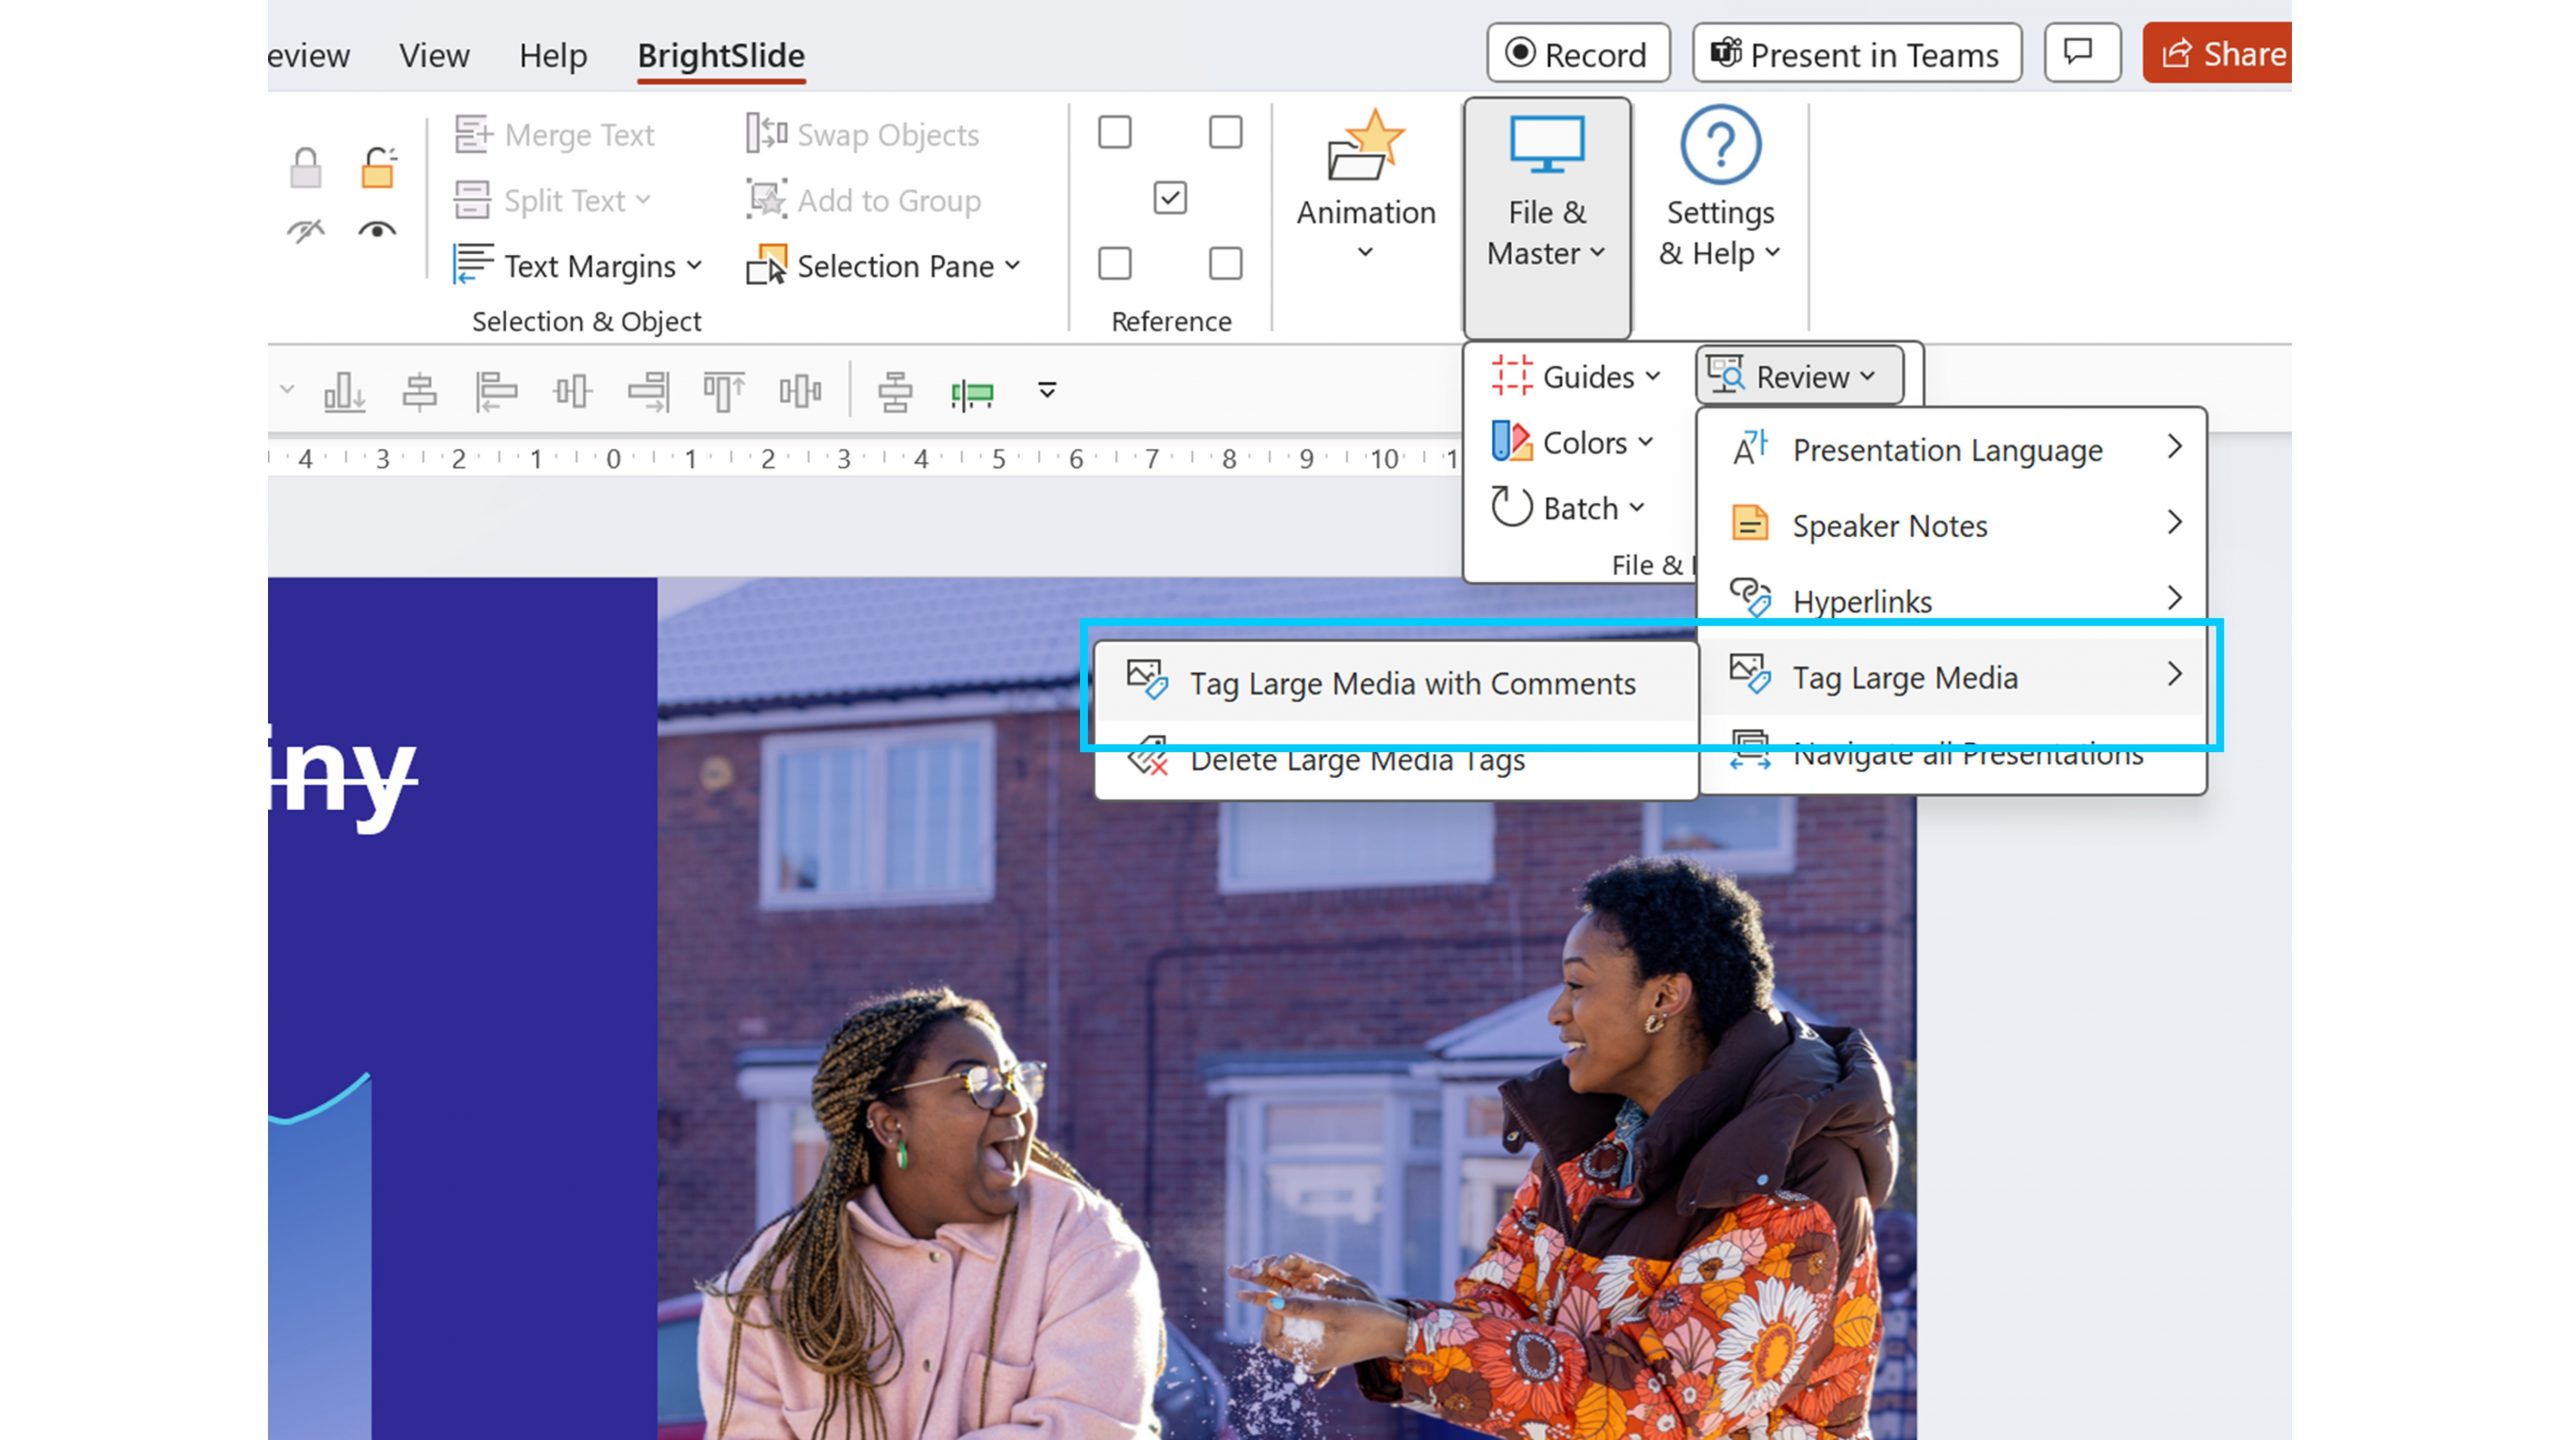
Step 1 – Use BrightSlide to tag all the large media in your deck. This tool is a bit of a hidden gem for BrightSlide users. Head to the BrightSlide tab, and in the File & Masters section under Review, select Tag Large Media. BrightSlide will add comments to each large media item in your deck. Any image that is larger than 2000×2000 pixels, or any video that is more than 10 seconds in length will get tagged.
Step 3 – Check your templates! Having a really big template or multiple templates in your deck can make the file bloated and laggy even if your slide content is light and compressed. It’s easy to fix. To check what’s going on beneath the hood, go to View, Slide Master and see what templates are included in the file. You can also right click on a slide in the slide sorter and look at the layout options. Make sure all your slides are on the right template and delete those you don’t need. You can assign layouts en masse using BrightSlide’s Assign Layouts tool (in the File & Master section). To learn more about templates and masters check out this blog post: How to create PowerPoint templates that work.
Learn how to use the Multi-Painter tool
I’ll be the first to admit that BrightSlide’s multi-painter tool can feel a bit… intimidating. There’s a big old drop down menu with a bunch of options on it and even I wasn’t sure what all of them did! This tool is actually very powerful and will save you so much time and effort. Once you get to grips with it you won’t look back. Thankfully BrightCarbon’s BrightSlide geniuses have put together a tutorial video to walk you through the tool’s functionality. Start at about 1.10! It’s 2 minutes of time that could just change your (presentation-related) life.
The multi-painter can paint size, format, position, adjustments and animation in one click. It’s sticky by default which means you can copy properties across slides and across different presentations. So, you can make all your footnotes the same size, position, and formatting in every deck with just one click per slide – a dream! (And this from a woman who once spent days adjusting footnotes across hundreds of slides – days!).
If you don’t already have BrightSlide downloaded then run, don’t walk: Download BrightSlide.
Check out a BrightCarbon masterclass!
Bonus resolution! Did you know that some of my incredibly talented colleagues run free masterclasses every week? It’s 30 minutes of expert knowledge delivered live with Q&As from you, the audience. They cover topics from graphs and charts, to creating accessible eLearning, to how to run sales kick offs, to how to get the most out of BrightSlide. You can sign up for free on our Events page.
That’s all folks! Happy new year from all of us at BrightCarbon!
BrightCarbon is buzzing with excitement, because we’ve just released BrightSlide - our incredible PowerPoint add-in. BrightSlide was created by our team of PowerPoint experts with input from our professional presentation designers. Its purpose is to supercharge your workflow with a bunch of incredible PowerPoint productivity and design tools, functions and shortcuts way beyond PowerPoint’s normal functionality. And best of all? It’s totally free!
PowerPoint’s Morph transition is a game-changing feature in the world of presentations, but it’s not without it's faults. Here’s a handy tip for using PowerPoint Morph with multiple objects.
How do you make sure that your graphs and charts have consistent branding across Excel, PowerPoint and Word? Learn how to create and use custom templates that support your brand identity across Microsoft Office.
We were notified on Friday that we’ve been successful in our renewal bid. They were particularly complementary about our presentation and claimed it was one of the best they’ve had.