 Is your favorite WordPress plugin lacking some features? Maybe you’ve wished for a custom widget, a specialized contact form, or perhaps an innovative way to display your portfolio. If so, you’re not alone. Many website owners share the same aspirations, and when they don’t find the solution they are looking for, they take matters into their own hands by creating a custom solution, meaning they create a WordPress plugin from scratch. Think of WordPress plugins as the versatile “apps” for your website. Much like how you download apps on your smartphone to perform specific tasks or add new features, plugins serve the same purpose for your website. They can be as simple as adding a weather forecast to your homepage or as complex as integrating a full-fledged e-commerce system. The sky’s the limit when it comes to what plugins can do. Whether you’re a seasoned developer with years of coding experience or a complete beginner just dipping your toes into the world of web development, the process of creating a WordPress plugin is both rewarding and enlightening.
  This guide aims to be your navigator on this exciting journey. We’ll start from the very basics, laying down the foundational knowledge you’ll need, and then guide you step-by-step through the entire process. By the end of this tutorial, creating a WordPress plugin from scratch will be as easy as riding a bike downhill. So, are you ready to transform your WordPress website and elevate your coding skills? Let’s dive in!
What You Need to Know Before Starting
List of Languages and Skills Needed
Before diving into plugin development, you should have a foundational understanding of the following languages:
- PHP: The backbone of WordPress and the language in which plugins are primarily written.
- HTML: Used for structuring your plugin’s settings pages or any output it generates.
- CSS: To style any HTML elements your plugin may add.
- JavaScript: For any client-side functionality, like interactive settings or features.
If you’re a beginner and these languages sound intimidating, don’t worry. You don’t need to be an expert to create a WordPress plugin. A basic understanding will suffice, and this tutorial will guide you through the rest. The WordPress community is incredibly supportive, and there are numerous resources available to help you along the way. Remember, every expert was once a beginner.
Setting Up Your Development Environment
Importance of a Safe Testing Environment
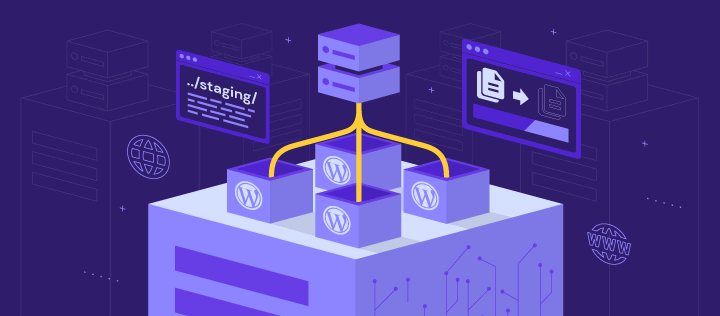
Before you write a single line of code, it’s crucial to set up a safe environment for development and testing. Coding directly on your live website is risky; a single error in your code could bring down your entire site. Therefore, it’s advisable to set up a local development environment on your computer or a staging site for testing your plugin.
Options for Setting Up a Local or Staging Environment
There are several ways to set up a development environment:
- Local Environment: Software like XAMPP, WAMP, or MAMP can turn your computer into a local server, allowing you to develop and test your plugin locally.
- Staging Environment: Some hosting services offer the option to create a clone of your live website in a staging environment. This is particularly useful for testing how your plugin interacts with other plugins and themes.
Tools You’ll Need
To get started, you’ll need a few essential tools:
- Text Editor: Any text editor will do, but code editors like Visual Studio Code or Sublime Text offer features that make coding easier.
- Local or Staging WordPress Environment: Whether you choose to set up a local server using software like XAMPP or use a staging site provided by your host, you’ll need a WordPress installation to test your plugin.
Step 1: Creating Your WordPress Plugin Folder
The first step in creating a WordPress plugin is to make a new folder where all your plugin files will reside. Navigate to the wp-content/plugins directory in your WordPress installation. Right-click and choose to create a new folder. Name this folder something descriptive and relevant to what your plugin will do. For example, if your plugin will add social media buttons to posts, you might name it social-media-buttons. Stick to lowercase letters and hyphens to separate words for better readability and compatibility.
Step 2: Add Plugin Header
The plugin header is a block of comments at the top of your main PHP file that tells WordPress essential details about your plugin. This information includes the plugin’s name, version, author, and more. Here’s a sample plugin header:
Step 3: Plan Your Plugin Features
Before diving into the code, it’s crucial to plan what features your plugin will offer. A well-thought-out plan can save you time and effort later on. List down the features you want to include. Prioritize them based on their importance and feasibility. For example, if you’re creating a social media plugin, features might include adding sharing buttons, displaying follower counts, or integrating social feeds.
Step 4: Write Your Plugin Code
Now that you have a plan, it’s time to start coding. Open your main PHP file (the one with the header) in a text editor. Let’s say you want to add a message at the end of each blog post encouraging readers to share the post. You could write a function like this:
Step 5: Code Organization and Best Practices
Organization is key to maintainable code. Use comments to explain what blocks of code do, and consider splitting different functionalities into separate PHP files within your plugin folder. WordPress has specific coding standards that you should follow. These include naming conventions, code formatting, and more. Adhering to these standards makes your code easier to read and maintain.
Step 6: Install and Test Your Plugin
Once your code is ready and organized, compress your plugin folder into a zip file. This makes it easier to upload to WordPress. Steps to Install and Activate the Plugin via WordPress Admin Navigate to your WordPress admin dashboard, go to Plugins > Add New, and click on the “Upload Plugin” button. Choose your zip file and click “Install Now.” After the installation is complete, click “Activate” to enable your plugin. Finally, it’s time to test your plugin. Navigate to a blog post to see if the share message appears at the end. Make sure to test it in different browsers and with different themes to ensure compatibility.
Step 7: Debugging and Troubleshooting
During the development process, you’re likely to encounter issues. Some common problems include syntax errors, deprecated functions, or conflicts with other plugins. To resolve these, carefully read the error messages, check your code for mistakes, and consult the WordPress Codex or forums for solutions. WordPress has a built-in debugging feature that can be invaluable for developers. To enable it, add the following line to your wp-config.php file:
This will display PHP errors, notices, and warnings, helping you identify issues in your code.
Step 8: User Interface and Admin Settings
If your plugin has configurable settings, it’s a good idea to create an admin settings page. You can use the WordPress Settings API to add sections, fields, and settings specifically for your plugin. A well-designed user interface enhances the user experience. Make sure your settings page is intuitive and easy to navigate. Use tooltips or help text to guide users through the options.
Step 9: Localization and Translation
If you want your plugin to reach a global audience, it’s crucial to make it translation-ready. WordPress uses GNU gettext localization to translate plugins. Text domains allow translators to know which text to translate. Add a unique text domain in your plugin header and use it in the __() and _e() functions for strings that need translation.
Step 10: Submitting Your Plugin to WordPress.org
Once your plugin is ready and thoroughly tested, you can submit it to the WordPress.org repository. Create a readme.txt file that follows the WordPress readme file standard, and include it in your plugin folder. Then, submit your plugin for review via the WordPress.org plugin submission page. The readme.txt file is crucial because it provides users and reviewers with information about what your plugin does, how to install it, and how to use it. It’s also used to generate the plugin page on WordPress.org. After submission, your plugin will be reviewed by the WordPress team for security, code quality, and adherence to guidelines. Once approved, it will be publicly available for download.
Step 11: WordPress Plugin Maintenance and Updates
Keeping your plugin updated is essential for security and compatibility. Monitor your plugin regularly for issues and update it to work with the latest versions of WordPress. Regular maintenance ensures that your plugin remains secure, functional, and compatible with the latest WordPress updates. It also provides an opportunity to add new features or improve existing ones. 
Step 12: Getting User Feedback and Reviews for Your WordPress Plugin
User reviews are invaluable for improving your plugin and gaining credibility. You can encourage users to leave reviews by adding a polite prompt within your plugin’s admin settings or by sending a follow-up email after a certain period of usage. User feedback provides insights into what users like or dislike about your plugin, allowing you to make informed decisions for future updates. It’s also a great way to identify bugs or conflicts that you may not have discovered during testing.  Want to learn about WooCommerce Plugin Development? Read How To Develop a Woocommerce Plugin from Scratch Want to build a WooCommerce custom payment gateway plugin? Read this.
Congratulations on reaching the end of this beginner’s guide to creating your first WordPress plugin!
From understanding the basics and setting up your development environment to writing code and submitting your plugin to WordPress.org, you’ve covered a lot of ground. Remember, you don’t need to be an expert in coding to start; a basic understanding of PHP, HTML, CSS, and JavaScript will suffice. The WordPress community is rich with resources and support to help you along the way. We’ve also discussed the importance of a well-planned feature set, good coding practices, and user-friendly design. These elements not only make your plugin functional but also accessible and easy to maintain. As you move forward, keep in mind the value of regular updates and user feedback. These are crucial for the long-term success and improvement of your plugin. So, that’s it, I hope this article was helpful. We hope you’re now equipped with the knowledge and confidence to create your own WordPress plugins. If you feel stuck at any step or need more clarity on anything get in touch with our Experts.
Resources for Further Learning:
For WooCommerce Developer Documentation, go here.
For the WordPress Plugin Handbook, click here.
Join the WooCommerce Community here.

